Planning a Walkway or Garden Path: Route, Width, Curves and Slope
Whether it is the front walk from the driveway, a gravel path to the vegetable garden or stepping stones across the lawn, a path is the hardscape you use every day - and the one most often built too narrow and in the wrong place. Get the route and width right and it feels like it was always there. Get them wrong and you will be walking on the grass beside it for years.
General guidance for American yards. A front walk that ties into a public sidewalk, work in the street right-of-way, and changes to drainage may need a permit, and many HOAs require approval for hardscape - check with your town and HOA if in doubt, and call 811 before you dig. Part of the PlantMapper Garden Paths section.
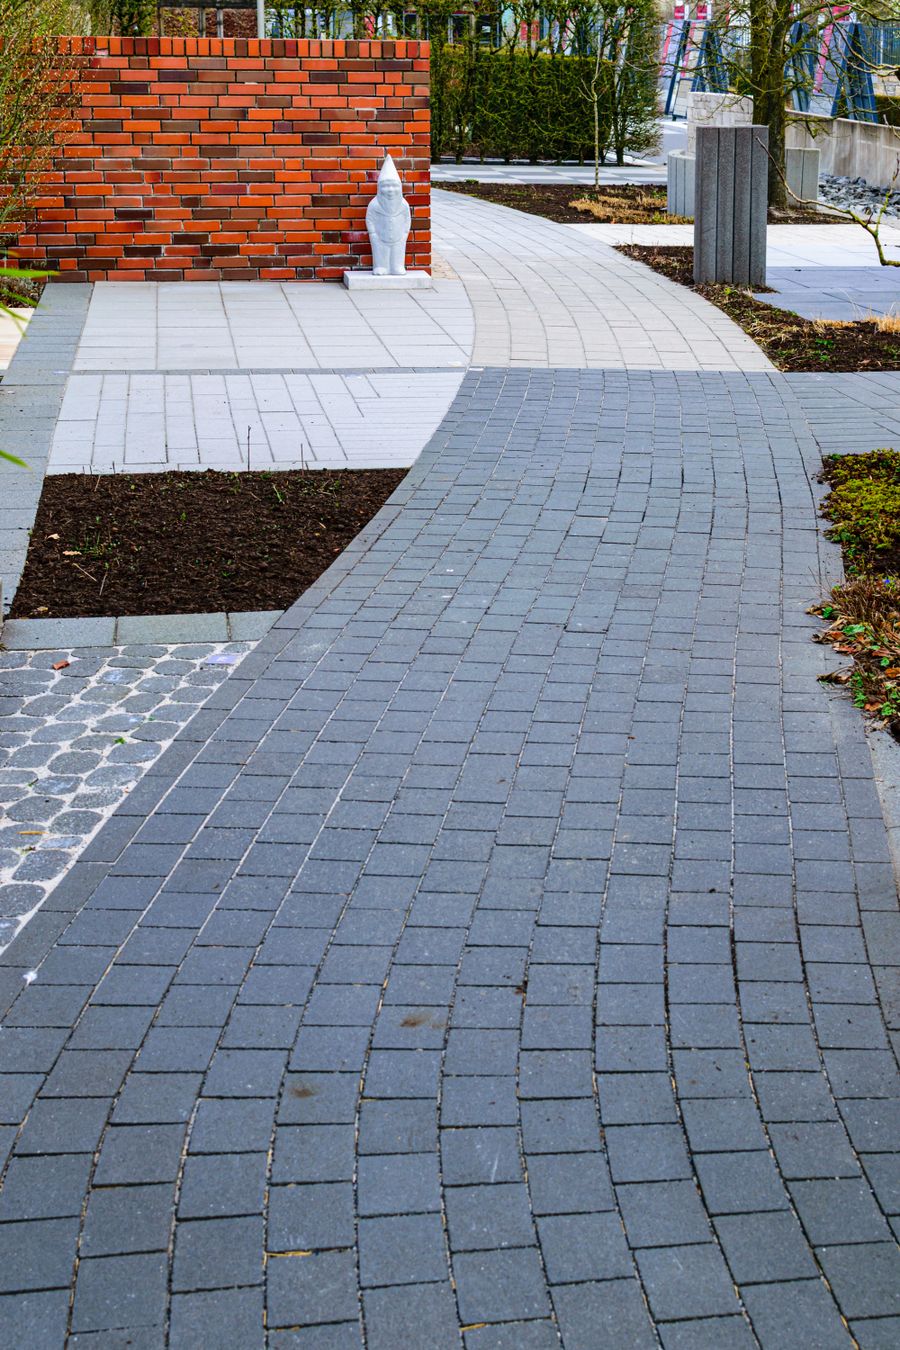
The route matters more than the material · photograph via Pexels
Start here
What your path is really for
Every path does one of three jobs, and it helps to know which before you draw anything. A working path gets you from the back door to the shed, the trash cans, the garage or the compost - in the rain, in the dark, with a wheelbarrow or a bag of groceries. A connecting path links one part of the yard to another, like the front walk from the driveway to the porch. A strolling path exists to be walked for its own sake - it slows you down, leads you past plantings and makes a small yard feel bigger.
Each wants something different. A working path should be direct, wide, level and firm - and in snow country, easy to shovel. A strolling path can be narrow, curved and made of gravel, mulch or stepping stones. Building a working path as a winding decorative one is the most common mistake in American yards, and the proof is always the worn strip of lawn cutting straight across the corner.
This guide covers everything to settle before choosing a material: where the path goes, how wide it is, how it turns, how steep it can be, and roughly what it will cost.
Where it goes
Choosing the route
The route is the decision that matters most and costs nothing to get right. Spend an evening on it before you spend anything on pavers or gravel.
Follow the paths people already make
Look for worn grass, bare dirt, a trampled corner of a flower bed, mud tracked into the house. Those “desire lines” show how the yard is really used, and a path that ignores them will be ignored too.
If you’re not sure, wait a season and watch. A path built where people already walk always works; one built where you wish they walked rarely does.
Go direct where the path does a job
A route to the trash cans, the shed, the garage or the hose bib should be as straight as the yard allows. Nobody hauls a full trash can around a decorative curve.
Save the curves for paths meant to be enjoyed rather than used.
Give every curve a reason
A curve looks forced unless something causes it - a tree, a planting bed, a change in grade, a corner you can’t see around. Curving just to avoid a straight line looks fussy.
The exception is a strolling path, where slowing you down and hiding the destination is the whole point.
Think about what the path passes
People pause on paths. Route them past things worth stopping for - fragrant plants by the door, a good view, the herb bed, a bird feeder - and away from things that aren’t, like the AC unit, the propane tank and the trash cans.
Give a strolling path a destination: a bench, a planter, a specimen tree, a gate. A path that leads nowhere feels unfinished.
Check the ground along the whole route
Walk it after a heavy rain. A route through a low, soggy spot will need drainage or a different line, and moving the line is far cheaper. See Garden Drainage if the ground stays wet.
Call 811 before digging to have buried utilities marked, and note tree roots, sprinkler lines, downspout drains, septic tanks and drain fields, and cleanouts along the route. Never pave over a septic lid or a cleanout you may need to reach.
Look at it from the house
A path is a strong line, and you’ll see it every day through a window, including all winter when the plants are dormant or under snow. Stand at your main window and check that the line improves the view instead of cutting the lawn awkwardly in half.
Lining a path up with a door, a gate, a window or the edge of a patio almost always looks more intentional than setting it at a slight angle.
Lay out the route with a garden hose, a rope or a line of marking paint, then live with it for a week. Walk it in the dark, push the wheelbarrow along it, roll the trash cans down it, carry the groceries along it, and look at it from an upstairs window. It is free, it takes a week, and it prevents almost every regret people have about a path.
The number people get wrong
Choosing a width
Paths end up too narrow more often than anything else in the yard, usually because the width was picked on paper instead of by walking it. These are the figures that work.
Working widths for walkways and garden paths. Measure the clear usable width, after edging and after plants spill over it.
Path type
Width
Notes
Front walk, two people side by side
4-5 ft
The width for a front entry walk or any route used socially
Main path, one person comfortably
3-4 ft
The practical minimum for a route used every day
Wheelbarrow or trash-can route
3 ft minimum
Measure your barrow - the handles are wider than the tub
Wheelchair or stroller
3 ft minimum, 5 ft to pass
With a 5-ft turning space where the path changes direction
Secondary or informal path
2-3 ft
Fine for occasional use; too narrow for two people or a barrow
Access path behind a flower bed
18 in-2 ft
Just enough to work from. Often best in mulch or gravel
Stepping stones across a lawn
18-24 in stones, about 24 in center to center
Space them to a comfortable stride, not to a drawing
Path between raised beds
2-3 ft
3 ft if a barrow has to pass; 2 ft is a squeeze
✓Getting the width right
Add 6-12 inches to whatever you first thought - nearly everyone underestimates.
Allow for plants spilling over the edges: a planted bed on each side can steal 6-8 inches of usable width by midsummer.
Measure the widest thing that will use it - a wheelbarrow, a mower, a trash can, a snowblower, a wheelchair.
Walk the marked-out width side by side with someone before you build.
The front walk can afford to be generous and a side path can be tight. Vary them on purpose.
Where a path meets a door, a gate or the driveway, widen it locally so there is room to stand.
!Signs a path is too narrow
A worn strip of grass or bare dirt running beside it.
You step off it whenever you meet someone coming the other way.
The wheelbarrow or trash can catches on the edging or the plants.
Plants along the edge are always trampled, broken or flopped.
You avoid it after rain because wet foliage brushes your legs.
It feels like a hallway instead of part of the yard.
Making it look right
Curves, junctions and proportions
Once the route and width are settled, a few details separate a path that looks designed from one that looks improvised.
Curves that work
A good curve is generous and has a reason. A bad one is a squiggle.
Use long, sweeping curves. One you can see all of at once looks deliberate; a
series of short bends looks like a mistake.
Curve around something. A tree, a planting bed, a boulder, a change in grade.
The eye accepts a curve when it can see the cause.
Curve out of sight. The most useful curve in a small yard is the one that
hides where the path goes, which makes the space feel larger.
Lay the curve out with a garden hose, then step back and look from the house
before you dig. Curves that look graceful at ground level often look weak from
above.
Remember the material: brick, small pavers, gravel, decomposed granite and poured
concrete curve easily; large flagstones, big concrete pavers and timbers don’t
without a lot of cutting.
Straight paths
Straight isn’t the boring option. A straight walk lined up on the front door, a
gate or a focal point is the most formal - and often the most satisfying - line in a yard.
Line it up with something real: a door, a window, a gate, the center of a patio, a
specimen tree at the far end.
A straight path needs a destination even more than a curved one. Give it a bench,
a large planter, an arbor or a gate to arrive at.
Soften the edges with plants rather than the line with wiggles - the contrast
between a crisp walk and loose planting is what makes it work.
In a long, narrow lot, a straight path down the middle exaggerates the shape.
Running it on a diagonal, or breaking it with a change of material, counteracts that.
Junctions, corners and steps
Junctions are where paths look messy and where people cut corners. Design them
instead of letting them happen.
Widen at a junction - a small landing, circle or wider apron lets people pass
and stops the inside corner getting worn into the lawn.
Round off inside corners. Nobody walks a right angle; an angled or curved
inside corner is what actually gets used.
Make steps obvious. Where a path changes level, make the steps generous and
easy to see, and light them. A single step is a trip hazard because it is easy to
miss.
Where two materials meet - say the front walk and the driveway - keep the joint
crisp and deliberate. A change of material reads as a transition; a ragged join reads as
a patch.
Keep steps out of the wheelbarrow and trash-can route if you can.
Scale and proportion
A path has to suit the size of the yard and the size of the pieces it is built
from.
Match the unit to the width. Big 24-inch pavers on a 2-foot path look cramped
and need cutting; brick and small pavers suit narrow paths and curves.
Limit the number of materials. One surface with one edging looks confident.
Three surfaces in 30 feet looks like leftovers.
Echo the house or the patio. A path that picks up the brick, stone or color
of the house or patio ties the whole yard together.
In a small yard, a slightly generous path makes the space feel intentional; a skimpy
one makes it feel cramped.
Lay patterns along the direction of travel to make a path look longer, or across it
to make it look shorter and wider.
A curve works when something in the yard causes itSpace stepping stones to a comfortable stride, not to a drawingSmall units - brick, small pavers, gravel - take a curve; big slabs don’t
Making it usable by everyone
Accessibility, slope and easy walking
A path that works for a wheelchair, a walker or a stroller works better for everyone - including you with a loaded wheelbarrow. Private yards don’t have to meet the Americans with Disabilities Act (ADA), but the ADA standards for public routes are a handy benchmark, and most of it costs nothing extra if it is planned in from the start.
Slopes and dimensions for an accessible walkway, based loosely on ADA guidance for public routes.
Aspect
Target
Notes
Preferred slope
1:20 (5%) or gentler
Comfortable for nearly everyone, and needs no handrail. That is 1 inch of rise for every 20 inches of run
Steepest ramp
1:12 (about 8%)
Hard work in a wheelchair; keep runs short, with handrails and level landings
Cross slope for drainage
About 1:48 (2%)
Roughly ¼ inch per foot - enough to shed water; steeper pulls a wheelchair sideways
Level landing on a ramp
At least every 30 in of rise
At least 5 ft long and the full width
Clear width, wheelchair
3 ft minimum
5 ft where two people need to pass
Turning space
5 × 5 ft
At the end of a run and at any change of direction
Surface
Firm, stable and slip-resistant
Pavers, concrete or stabilized decomposed granite rather than loose gravel; gaps under ½ inch
Changes in level
Avoid single steps
A single step is easy to miss. Use a gentle ramp, or a clearly marked flight of at least three
Edges
A visible, contrasting edge
Helps anyone with low vision, and stops wheels dropping off
✓Designing an accessible path
Firm surfaces - pavers, poured concrete, stabilized decomposed granite - rather than loose material.
Joints and gaps kept under about ½ inch so wheels, canes and heels don’t catch.
Generous, gentle curves instead of tight turns.
Good lighting on any route used after dark, especially at steps and junctions - low-voltage or solar path lights are easy to add.
A clearly visible edge, ideally in a contrasting color.
A smooth, nearly level transition where the path meets the porch or door.
!What makes a path hard to use
Loose pea gravel more than about 1 inch deep - wheels sink and canes slide.
Stepping stones with grass between them: uneven, and impossible with wheels.
A steep cross slope that pulls a chair toward the flower bed.
Wide joints, river rock and very rough flagstone.
A single unlit step - the most common trip hazard in any yard.
A path that pinches at a gate or between two shrubs so a chair or walker can’t pass.
In snow country, surfaces you can’t shovel or salt safely.
If accessibility matters now or might later, the two decisions that count are width and surface, and both are far cheaper to get right at the start. A 4-foot paver or concrete walk costs a little more than a 3-foot loose-gravel one, and it stays usable - and shovelable - for the life of the house.
Fitting it into the yard
Grades, edges and what happens on either side
A path is never just the path. How it meets the lawn, the beds and the house decides whether it is easy to live with.
Where a path meets the lawn
The mowing question
Set the finished path either flush with the turf or clearly above it. Anything in between - about ½ to 1½ inches proud - is a constant annoyance, because the mower can’t ride over it and the string trimmer has to come out every week.
Flush, or very slightly below, lets the mower wheel run straight along it - the easiest by far.
Clearly raised, 2 inches or more, looks deliberate and crisp.
A mowing strip of pavers or brick along a bed saves more time than anything else you can build.
Rough US prices per square foot of finished path, as a 2026 starting point. Materials vary by region (flagstone is cheap near a quarry and expensive far from one), and professional labor often doubles or triples the materials cost.
Walkway costs and base depths. A 30 ft × 3 ft path is 90 sq ft. Base depths are typical for foot traffic; go deeper on clay soils and where frost heave is common.
Surface
Materials / sq ft
Base needed
Installed / sq ft
Wood chips or shredded bark mulch
$0.50-$1.50
Little or none, landscape fabric only
$2-$5
Pea gravel or crushed stone
$1-$3
3-4 in compacted gravel
$3-$8
Decomposed granite (stabilized)
$1.50-$4
3-4 in compacted
$5-$12
Stepping stones in lawn or gravel
$3-$10
Sand bed under each stone
$8-$20
Concrete pavers
$3-$8
4-6 in, plus 1 in sand
$12-$30
Clay brick pavers
$4-$10
4-6 in, plus 1 in sand
$15-$35
Poured concrete (broom finish)
$3-$6
4 in gravel
$8-$18
Stamped or colored concrete
$4-$8
4 in gravel
$12-$25
Flagstone (bluestone, sandstone, slate)
$4-$15
4-6 in, sand or mortar bed
$15-$40
Permeable pavers
$5-$12
6-12 in open-graded stone
$18-$40
Wood or composite boardwalk
$5-$15
Footings or blocks and framing
$20-$45
✓Working out quantities
Area: length × width in feet. A 40 ft path at 3 ft wide is 120 sq ft.
Base volume: square feet × depth in feet ÷ 27 = cubic yards. 120 sq ft at 4 in deep (0.33 ft) is about 1.5 cubic yards.
Base weight: crushed gravel base (crusher run, road base) weighs roughly 1.4-1.5 tons per cubic yard. Order 15-25% extra to allow for compaction.
Gravel topping: a 2-inch layer over 120 sq ft is about 0.75 cubic yard, roughly 1 ton.
Bedding sand: about 1 inch of coarse concrete sand under pavers.
Pavers and stone: add 5-10% for cuts and breakage, and about 10-15% on a curved path.
!Costs people forget
Edging - often 15-25% of the total on a narrow path, and not optional for pavers or gravel.
Digging out and hauling soil: a 120 sq ft path dug 6 inches deep produces over 2 cubic yards of dirt.
Landscape fabric, polymeric sand, and renting a plate compactor.
Delivery fees on bulk gravel, which can be steep on small orders.
A wet saw or cut-off saw rental, blades, and waste on curves and angles.
Path lighting and sleeves for future wiring or irrigation, which are far cheaper before the path goes in.
Work out how much gravel you need
Enter the length, width and depth of your path and the calculator gives you the volume in cubic yards and roughly how many tons to order.
All six are locked in before the first shovel goes in, and all six are expensive to change afterward.
1. Building it too narrow
The most common path mistake by a mile. A 2-foot path looks fine on paper but won’t take two people, a barrow or a mower, and once plants spill over it there are about 16 inches left.
The fixAim for 3-4 feet on any path used daily, and 4-5 feet for a front walk where two people walk together. Mark it out and walk it side by side before building.
2. Ignoring the desire lines
A path routed for looks instead of how the yard is actually used gets bypassed, and the worn strip of lawn beside it tells everyone what happened.
The fixWatch where people already walk. Build the working path on that line, and save the curves for a route meant to be enjoyed.
3. Curving for the sake of it
A curve with no cause looks forced, and a string of short wiggles looks like a mistake - especially from an upstairs window.
The fixGive every curve a reason: a tree, a bed, a grade change, a corner to hide. Use long, sweeping curves and lay them out with a hose first.
4. Too steep, or a single step
Anything steeper than about 1:12 is hard work with a barrow and very hard in a wheelchair, and a single unlit step is the most common trip hazard in any yard. On icy northern winters, a steep walk becomes a hazard.
The fixAim for 1:20 or gentler, add level landings on longer slopes, and replace single steps with a gentle ramp or a well-marked flight of three or more.
5. Forgetting how it meets the lawn
A path that sits about an inch above the turf can’t be mowed over, so the string trimmer comes out every week of every summer.
The fixFinish flush with the turf, or clearly raised by 2 inches or more. Never in between. A mowing strip alongside is the best time-saver in a yard.
6. Budgeting for the surface only
People price the pavers, then find that edging, digging, hauling, base gravel, fabric, sand and a compactor rental add half again.
The fixPrice the whole job: surface, base, edging, fabric, joint sand, rentals, delivery and hauling. Edging alone is often 15-25 percent of a narrow path.
Print or check off as you go
The planning checklist
Thirteen things to settle before you order anything. Your check marks are saved in this browser only.
Route
Dimensions
Grades and budget
Questions
Planning a walkway or garden path: your questions answered
Straight answers to the questions that come up most.
How wide should a garden path or walkway be?
For a path used every day, aim for 3-4 feet so one person can walk comfortably with a wheelbarrow or trash can. A front walk where two people walk side by side works best at 4-5 feet. For a wheelchair or stroller, 3 feet is the minimum and 5 feet lets two pass. Informal paths can be 2-3 feet, and an access path behind a flower bed 18 inches to 2 feet. Add 6-8 inches if plants will spill over the edges.
Should a garden path be straight or curved?
It depends on the job. A working path - to the trash cans, shed, garage or back door - should be as straight as the yard allows, because people take the shortest route and will wear a shortcut through the lawn otherwise. A strolling path can curve, but every curve should have a reason, such as a tree, a bed or a corner to hide. Use long, sweeping curves rather than short wiggles, and lay them out with a garden hose first.
What is the maximum slope for a walkway?
Aim for 1:20 (5 percent) or gentler, which is comfortable for nearly everyone and needs no handrail. Treat 1:12 (about 8 percent) as the steepest for a ramp, with handrails and level landings. Keep the side-to-side cross slope to about 2 percent - enough to shed water without pulling a wheelchair sideways. Private yards don’t have to meet ADA rules, but these public-route figures are a useful benchmark, and on icy northern winters gentler is safer.
How do I decide where to put a path?
Start with the desire lines - the worn grass and muddy corners that show where people already walk - and build working paths on them. Check the route after heavy rain, call 811 to have buried utilities marked, and note sprinkler lines, septic systems and tree roots. Lay it out with a hose or rope and live with it for a week: walk it in the dark, push a barrow along it and look at it from an upstairs window before committing.
How much does a walkway cost?
As a rough 2026 guide, installed costs per square foot run about $2-$5 for wood chips or bark mulch, $3-$8 for pea gravel or crushed stone, $5-$12 for stabilized decomposed granite, $8-$18 for broom-finish concrete, $12-$30 for concrete pavers, $15-$35 for brick and $15-$40 for flagstone. A typical 30 by 3 foot path is 90 square feet. Budget separately for edging, base gravel, hauling away soil and tool rentals, and get local quotes.
Do I need a permit for a walkway or garden path?
Usually not for a path within your own backyard. A front walk that connects to a public sidewalk, any work in the street right-of-way, a large paved area that changes drainage, or work near wetlands can need a permit, and some towns limit how much of a lot can be covered by hard surfaces. Many HOAs require approval for any hardscape. Check with your town and HOA, and always call 811 before you dig.
How much gravel do I need for a path?
Multiply the path area in square feet by the depth in feet and divide by 27 to get cubic yards. A 40 by 3 foot path is 120 square feet; a 4-inch base is about 1.5 cubic yards, and a 2-inch gravel topping is about 0.75 cubic yard. Crushed gravel weighs roughly 1.4-1.5 tons per cubic yard, and you should order 15-25 percent extra for the base to allow for compaction.
How far apart should stepping stones be?
Set them to a comfortable stride rather than a drawing - typically about 24 inches center to center for an adult, a little closer for a short or uneven slope. Lay the stones out on the lawn, walk them several times at a normal pace and adjust before setting any. Use stones at least 18 inches across, set flush with the soil or turf so the mower passes over them.
What is the best surface for a wheelchair or stroller?
A firm, smooth, stable surface: concrete, tightly laid pavers with joints under about half an inch, or stabilized decomposed granite. Avoid loose pea gravel deeper than about an inch, stepping stones in grass, river rock and rough flagstone. Keep the path at least 3 feet wide (5 feet to pass), slopes at 1:20 or gentler, and add a visible edge and good lighting.