
Quick answers
- How long does compost take?
- About 2-3 months for a hot pile you build at once and turn often; 6 months to 2 years for a cold pile you add to as you go. Warm climates are faster, cold winters pause it.
- What can go in a compost bin?
- Fruit and vegetable scraps, coffee grounds and filters, eggshells, grass clippings, fall leaves, plain cardboard and shredded paper. Keep out meat, dairy, greasy food, pet waste and diseased plants.
- How hot should a compost pile get?
- An active hot pile runs at about 130-160°F in the center. Several days above roughly 130°F kills most weed seeds and plant diseases.
- Why does my compost smell bad?
- Too many wet greens and not enough air. Stir in shredded cardboard or dry leaves and turn the pile.
What is composting?
Composting is controlled rotting. Bacteria and fungi do most of the work, with earthworms, sow bugs, millipedes and other small creatures shredding material as they go. Give them a mix of nitrogen-rich and carbon-rich ingredients, enough water and enough air, and a pile of scraps and leaves turns into humus-rich compost - the same stuff that builds up on a forest floor, made in months instead of years. It is the cheapest soil amendment there is, because the raw materials are things you would otherwise bag up for the curb.
The forest-floor process
Leaves dropping in a hardwood forest slowly become rich, dark soil. A compost bin runs the same process faster, in one tidy spot.
Microbes do the work
Billions of bacteria and fungi break the material down. You supply food, water and oxygen in the right proportions and stay out of their way.
Greens & browns
Nitrogen-rich “greens” feed the microbes; carbon-rich “browns” give them energy and keep the pile open and airy. The ratio is the whole skill.
Free soil amendment
Finished compost does the job of bagged compost, manure and soil conditioner - made from waste that would otherwise go to the curb.
Composting in the Grow Your Own collection
Composting
Where healthy soil starts - free organic matter for every bed, container and crop.
You are hereRaised Beds
Where most of your compost will end up - filled once, then topped up every year.
Beginner Vegetables
Easy crops that respond fast to compost-rich soil - a good first season.
Tomatoes
America’s favorite homegrown crop, and a heavy feeder that loves compost.
Companion Planting
Good neighbors plus good soil make for a tougher, more productive garden.
Why compost?
A compost bin pays you back in several ways at once: better soil, lower bills and less going to the landfill. Here is what it does.
Better soil anywhere
Compost loosens heavy clay common across the South and Midwest, helps sandy soils hold water, and adds slow-release nutrients and soil life.
Less to buy
Every wheelbarrow of homemade compost is a few bags of compost, manure or soil conditioner you don’t have to haul home from the store.
Less in the trash
Food scraps and yard trimmings are a large part of household waste. Composting them means lighter trash cans and fewer bags of leaves at the curb.
Tougher plants
Plants in compost-rich soil root deeper and cope better with heat waves, dry spells and pest pressure.
Less methane
Food scraps buried in a landfill break down without oxygen and give off methane. Composted in a well-aired pile, they return carbon to your soil instead.
An alternative to peat moss
Sifted homemade compost can replace much of the peat moss many gardeners buy for beds and homemade potting mixes.
What can be composted?
Sort your ingredients into two piles in your head: wet, nitrogen-rich “greens” and dry, carbon-rich “browns”. By volume, aim for about equal parts, or a little more brown than green.
Greens (nitrogen)
Fruit and vegetable scraps, coffee grounds and paper filters, loose tea, grass clippings, fresh garden trimmings, spent annuals and plain eggshells.
Browns (carbon)
Fall leaves, plain corrugated cardboard, shredded newspaper and junk mail without gloss, straw (not hay, which carries seeds), pine needles in moderation, wood chips and small twigs.
About half and half
Too much green goes slimy and smells of ammonia; too much brown sits dry and does nothing. Keep a bag of shredded leaves next to the bin so you can add a scoop with every bucket of scraps.
Chop it small
Tear cardboard, snap stalks and run a mower over leaf piles before adding them. Smaller pieces give microbes more surface and rot much faster.
Moist and airy
Aim for the feel of a wrung-out sponge. Turn the pile or poke holes in it with a garden fork so oxygen reaches the middle.
Mix, don’t dump
A thick layer of grass clippings mats into a smelly slab. Spread clippings thin or stir them in with leaves, and cover every load of kitchen scraps with browns.
What should not be composted?
A few things cause most backyard composting trouble: they bring in animals, spread weeds and disease, or never break down. Keep these out of a home bin.
Meat, fish & bones
These draw rats, raccoons, opossums, skunks and neighborhood dogs, and in bear country they can bring a bear into the yard. An enclosed hot composter or bokashi system can handle small amounts.
Dairy, grease & cooked food
Cheese, butter, cooking oil and leftovers smell strongly as they rot and are the main reason animals dig into bins. Send them to the trash or a city food-scrap cart.
Dog & cat waste
Pet waste can carry parasites and harmful bacteria. Never put it in compost meant for vegetables; bag it for the trash.
Diseased plants
Tomato plants with late blight, cabbage-family roots with clubroot and leaves with heavy powdery mildew can survive a cool pile. Bag them for the trash.
Weeds that fight back
Bindweed, quackgrass, Bermuda grass runners, nutsedge and anything in seed can sprout again from the finished compost. Keep them out unless your pile runs hot.
Ash, plastic & treated waste
Charcoal briquette ash, glossy paper, “compostable” plastics (most need commercial facilities), produce stickers and grass clippings from a lawn just treated with weed killer.
Compost bins and systems
An open pile works if you have room and no animal problems, but most suburban yards are better off with a bin: it holds heat and moisture, looks tidier to neighbors and your HOA, and keeps animals out. Here are the main options.

Enclosed plastic bins
A lidded bin of about 80-100 gallons is the usual starter. Many cities, counties and solid-waste districts sell them at a discount, so check before buying at full price.
Wood or pallet bays
Two or three side-by-side bays, each about 3 feet wide, deep and tall, make turning easy. Recycled pallets and wire work well; use untreated wood.
Open piles & leaf corrals
A simple heap or a ring of wire fencing filled with fall leaves costs almost nothing. Best for big lots with lots of yard waste and no food scraps.
Insulated composters
Double-walled, closed bins stay warm in cold weather and work fast. More expensive, but tidy, quick and hard for animals to get into.
Run two at once
Fill one bin while the other finishes. When the second is full, the first is usually ready to use, so you always have a batch maturing.
Pick the spot
Choose level, well-drained ground close enough to the kitchen that you’ll use it in January, set back from fences and windows. Partial shade in hot regions, sun in cold ones.
Compost tumblers
A tumbler is a closed drum on a stand that you rotate with a handle. It is easy to turn, keeps animals out and suits small yards, patios and decks.
Spin it often
A few turns every two or three days mixes and aerates the load, and a well-balanced batch can finish in one to three months in warm weather.
Off the ground
Raised and sealed, a tumbler keeps rats, raccoons and dogs out. A good pick where food scraps are a must but critters are a problem.
Batch, then wait
Tumblers finish faster when filled and left, rather than topped up daily. Dual-chamber models let you fill one side while the other side cooks.
Watch the water
Closed drums can turn soupy, especially in humid climates. Add shredded cardboard or dry leaves; in dry climates, add a little water when you turn it.
Worm bins (vermicomposting)
A worm bin uses red wigglers to turn kitchen scraps into worm castings, one of the richest amendments you can make. It needs little space, doesn’t smell when run well and can live in a garage, basement, apartment or under the kitchen sink - ideal for renters and bear country.
Red wigglers
Use composting worms (red wigglers, Eisenia fetida), sold online and at bait and garden stores. Earthworms dug from the yard won’t live in a bin.
Stacking trays
In tray systems the worms move up to fresh food, leaving finished castings in the lower trays to harvest. A plastic tote with air holes works too.
Castings & leachate
Castings make a superb top dressing or potting-mix ingredient. Liquid from the bottom of the bin can be diluted until it is the color of weak tea and used on plants.
Keep them comfortable
Worms do best at roughly 55-80°F. Bring the bin indoors in northern winters and into shade or a cool garage in Southern and desert summers. Go easy on citrus and onions.
Hot composting
A hot pile is built all at once, big enough to trap its own heat. Microbes push the center to 130-160°F, which breaks material down in weeks and kills most weed seeds and plant diseases. It takes more work, but the payoff is fast, clean compost.
Size matters
Build it at least 3 feet wide, deep and tall (about 1 cubic yard, 27 cubic feet) in one go, with a good green-brown mix. Smaller piles lose heat too fast.
Watch the thermometer
A long-stem compost thermometer tells you what is happening. Within a few days the core should reach 130-160°F. Much above 160°F, turn it to cool it down.
Turn when it cools
When the temperature drops, turn the pile, moving the outside to the middle and adding water if it is dry. Each turn sets off another round of heat.
Done in about 2-3 months
Once it no longer heats after turning, let it cure for a few weeks. A well-run hot pile can be ready in 8-12 weeks in warm weather.
Cold composting
Cold, or passive, composting is what most people actually do: add scraps and yard waste as they come, and let time handle the rest. Little effort, slower results.
Add as you go
Empty the kitchen pail into the bin whenever it is full and cover it with leaves. No need to collect a big batch first.
Allow 6 months to 2 years
A cold pile finishes from the bottom up. Lift the bin or open the bottom hatch and the oldest layer is usually ready first.
Turning is optional
An occasional stir with a fork speeds things up, but an untouched cold pile will still get there.
Be choosy
A cold pile never gets hot enough to kill weed seeds or disease, so be strict about leaving out seeding weeds and sick plants.
Composting across the US: climate, critters and city programs
The basics are the same everywhere, but a pile in Phoenix behaves nothing like one in Minneapolis. Here is how to adjust for your region and growing zone - find your growing zone if you’re not sure of yours.
Cold North (zones 3-5)
Piles slow down in fall and often freeze solid by midwinter. Keep adding scraps anyway; they break down fast after the spring thaw. Build the pile large, insulate the bin with bagged leaves or straw bales, and stockpile fall leaves to use as browns all year.
Humid Southeast & Gulf Coast
Heat and humidity make composting fast, often year-round. The risk is a soggy, smelly pile after summer storms, so use a lid, add extra browns, and turn often. Fire ants sometimes move into dry piles; keeping it moist and turned discourages them.
Dry Southwest & desert
Low humidity dries piles out within days. Site the bin in shade, use a closed bin or a shallow pit, water every time you turn it, and cover the top with cardboard or a tarp. Kept moist, a desert pile works very quickly.
Pacific Northwest
Long, wet winters can leave an open pile waterlogged. Cover it, add plenty of browns, and save dry fall leaves in bags for the rainy months. Mild temperatures mean the pile rarely stops completely.
Bear & critter country
In much of the Mountain West, Northeast, Upper Midwest and Appalachians, bears follow their noses into yards. Compost only leaves and yard waste outdoors, keep food scraps in an indoor worm bin or your city’s food-scrap cart, and follow any local wildlife rules. Elsewhere, closed bins stop raccoons, rats and opossums.
City & county programs
Programs vary by city. Many towns collect yard waste curbside or run fall leaf pickup, a growing number collect food scraps, and some states, including California and Vermont, require food scraps to stay out of the trash. Check your city or county website for discounted bins and free finished compost.
Troubleshooting compost problems
Nearly every compost problem traces back to the balance of greens, browns, water and air. Here are the usual symptoms and what to do about them.
!Smells bad & slimy
Rotten-egg or ammonia odor. Too many greens and not enough oxygen. Stir in shredded cardboard or dry leaves and turn the pile thoroughly.
!Dry & nothing happening
Material looks the same weeks later. Too many browns or too little water, common in the West. Add greens, soak it with the hose as you turn, and cover it to hold moisture.
!Won’t heat up
Cool all the way through. Usually too small, too dry or short on nitrogen - or simply winter. Make it at least 3 feet across, add fresh grass clippings or coffee grounds, water and turn.
!Animals or flies
Raccoons, rats or fruit flies. Nearly always food scraps left uncovered, or meat and dairy. Bury scraps under browns, keep the lid latched, line the bin base with hardware cloth, or switch to a tumbler.
!Soggy & heavy
Wet, compacted and sour. Heavy rain or too many wet greens. Add dry browns, put on a lid or tarp, and turn it to open it up and let it drain.
!Big pieces left
Corn cobs, sticks and avocado pits still whole. Woody material is slow. Chop it before adding, or screen the finished compost and toss the leftovers back in the bin.
Using compost in the garden
Compost is ready when it is dark, crumbly and smells like a forest floor, and you can no longer pick out what went into it. Here is how to use it.

Mix into new beds
When making a new bed, work 2-3 inches of compost into the top 6-8 inches of soil to improve drainage and structure.
Spread as mulch
A 1-2 inch layer around shrubs, perennials and vegetables holds moisture, smothers weeds and feeds the soil as worms pull it down.
Blend potting mix
Screened compost makes up to about a third of a homemade container mix. For seed starting, use a fine, sterile seed-starting mix instead.
Top-dress the lawn
Rake a thin layer, about ¼ inch, of screened compost over the lawn after aerating. Cool-season lawns get it in early fall, warm-season lawns in late spring.
Screen it
Shake compost through a frame of ½-inch hardware cloth for pots and lawns. Whatever stays on top goes back in the bin.
Hard to overdo
Unlike synthetic fertilizer, finished compost won’t burn plants. An inch spread over beds each year is plenty for most gardens.
Compost for raised beds
Compost and raised beds go together. Fill new beds with a blend of topsoil and compost, then add an inch or two on top each year and let the worms work it in - no tilling required.

Filling a new bed
A common mix is about 60% topsoil and 40% compost. Avoid filling beds with straight compost or bagged potting mix; they shrink and dry out.
Top up every year
Raised beds settle a few inches each season. An inch or two of compost each spring or fall keeps them full and fertile.
Skip the tiller
Layering compost on top instead of tilling protects soil structure and fungi, and keeps buried weed seeds where they are.
Holds water in summer
Compost-rich beds need less watering - useful in summer heat and wherever watering restrictions apply.
Work out how much
Our raised bed soil calculator and compost calculator give the cubic feet or cubic yards you need to fill or top up a bed.
Buy in bulk if short
Homemade rarely covers every bed. Bulk compost from a landscape supply yard or a city compost program is usually far cheaper per cubic yard than bags.
Compost for vegetables
Vegetable gardens use more compost than any other part of the yard. Put it where the hungriest crops will grow and the whole garden benefits.
Before planting
Work compost into beds before planting heavy feeders like tomatoes, peppers, zucchini, winter squash, sweet corn and cabbage-family crops.
Easy on root crops
Carrots and parsnips can fork in soil loaded with fresh manure. Grow them where compost went in the season before.
Rotate the compost
Each year, give the most compost to the bed growing the hungriest crops, and move it around as you rotate plantings.
Mulch in summer
A compost mulch around vegetables keeps roots cool and moist through July and August heat and cuts down on weeding.
Fall cleanup
Healthy spent vegetable plants and fall leaves are the perfect start for next year’s pile, timed for when your first frost arrives.
Stronger harvests
Compost-fed soil holds water and nutrients better, so crops ride out heat, drought and pest pressure and keep producing longer.
Explore more with Plant Finder & the Grow Your Own guides
Once your soil is in good shape, use our free Plant Finder to match plants to your conditions, and these guides to grow them well.
Helpful garden calculators
Figure out how many cubic feet or cubic yards of compost, mulch and soil your beds need before you order - so you don’t pay for a truckload you can’t use.
Useful for composting
Our picksAs an Amazon Associate, PlantMapper may earn from qualifying purchases. Prices and availability are set by Amazon.
The Grow Your Own Starter Kit
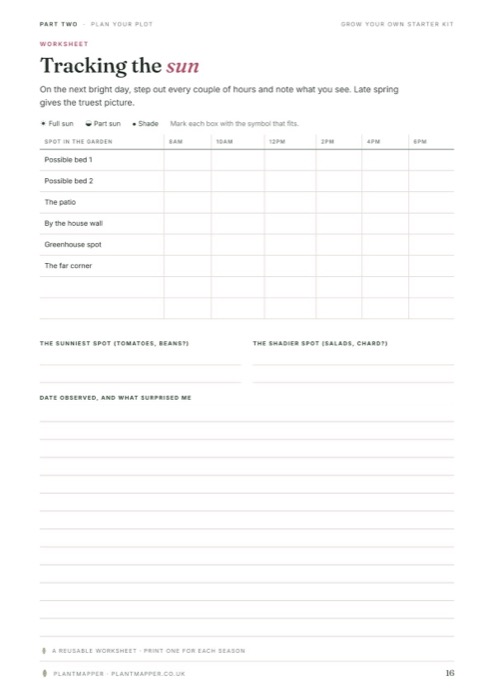
Everything on this page is free: what to compost, which bin to use, hot and cold piles, troubleshooting and how to use the result. If you’d like to plan your vegetable garden on paper, the Grow Your Own Starter Kit is an optional printable workbook that pairs with our free garden calculators and Plant Finder.
Greens & browns checklist
A one-page list of what goes in and what stays out, to stick on the fridge or the bin lid.
Troubleshooting chart
Smelly, soggy, dry or slow? Match the symptom to the cause and the fix.
System chooser
Worksheets to choose between a bin, tumbler, worm bin or bays, and where to put it in your yard.
Soil & compost planner
Plan which beds get compost each year, what to mulch and how to feed your crop rotation.
Grow Your Own plans
Ready-made layouts for beds, containers and a first vegetable garden.
Grower’s journal
Record what went in the pile, how it performed and where the compost went, so each season improves on the last.
Download the Grow Your Own Starter Kit
An instant digital download in US Letter and A4 - print it at home as often as you like and plan a full year of homegrown food. It includes planning and crop systems, bed and rotation planners, a sowing and harvest calendar, a crop directory and seasonal trackers, all in the PlantMapper style. Part of the wider PlantMapper Collection.
Download the Starter Kit on Etsy (UK edition)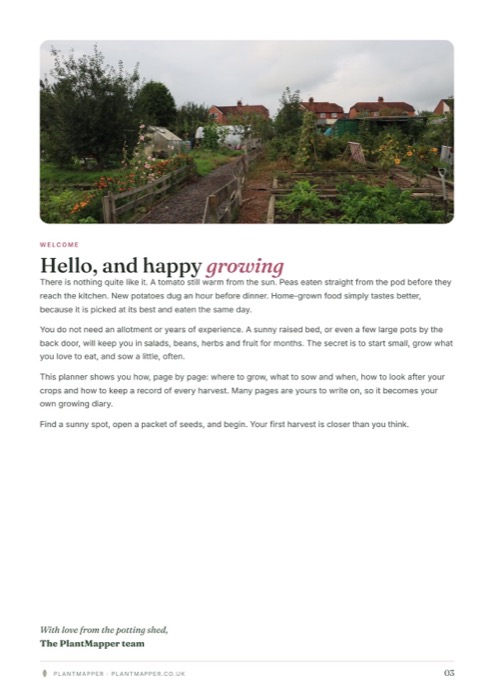
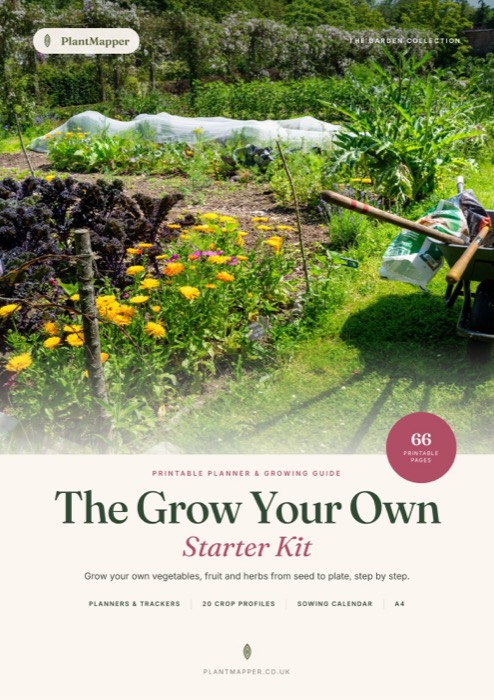 66-page printable workbook · US Letter & A4
Composting questions
How do I start composting in my backyard?
Pick a level, well-drained spot you can reach year-round, set up a bin or a pile about 3 feet across, and add roughly equal amounts of greens (fruit and vegetable scraps, grass clippings, coffee grounds) and browns (fall leaves, cardboard, straw). Keep it as moist as a wrung-out sponge and turn it every week or two. Expect usable compost in two months to a year, depending on how much you manage it.
What should not go in a backyard compost bin?
Leave out meat, fish, bones, dairy, greasy food and cooked leftovers, which draw rats, raccoons and other animals; dog and cat waste; diseased plants; weeds that have gone to seed or spread by runners, such as bindweed and quackgrass; charcoal briquette ash; and anything plastic or glossy. Yard trimmings treated with weed killer are also best kept out.
How long does it take to make compost?
A hot pile that is built all at once, kept moist and turned often can be ready in about 2 to 3 months. A cold pile you add to as you go usually takes 6 months to 2 years. Warm, humid climates speed things up; cold winters pause the process. It is ready when it is dark, crumbly and smells like soil.
Will a compost pile attract bears, raccoons or rats?
Food scraps can. Yard waste alone rarely interests animals, but meat, dairy, fruit and sweet scraps can draw rats, raccoons, opossums, skunks and, in bear country, black bears. Use a closed bin or tumbler, bury fresh scraps under browns, and if bears visit your area, compost only yard waste outdoors and handle food scraps with an indoor worm bin or your city's food-scrap collection.
Does my city collect yard waste or food scraps?
It depends entirely on where you live. Many cities and counties run curbside yard-waste carts or seasonal leaf pickup, a growing number collect food scraps too, and some states, including California and Vermont, now require food scraps to be kept out of the trash. Many local programs also sell discounted compost bins or give away finished compost. Check your city or county public works or solid waste website.
Can you compost in winter?
Yes. In cold northern zones the pile slows or freezes solid, but you can keep adding scraps all winter and it will restart as it thaws in spring. A large pile, a bin insulated with bags of leaves or straw, or a stockpile of fall leaves to mix in helps. In zones 8 and warmer, composting carries on through the winter.
How do you compost in a hot, dry climate like Arizona or Nevada?
Moisture is the challenge. Site the bin in shade, use a closed bin or a shallow pit rather than an open pile, water it whenever you turn it, and add plenty of wet greens. Covering the top with a tarp or a layer of cardboard slows evaporation. A pile kept moist in desert heat breaks down very quickly.
Disclosures & disclaimers
Affiliate disclosure
Some links on this page are affiliate links. If you buy through them, PlantMapper may earn a small commission at no extra cost to you. It never affects which products we suggest.
Gardening disclaimer
This is general guidance for home gardeners across the US. Results depend on your climate, your materials and how you manage the pile. Local rules on backyard composting, wildlife and yard waste vary, so check with your city, county or HOA.
Health & safety note
Wear gloves and wash your hands after handling compost, never use compost containing dog or cat waste on food crops, and wear a dust mask when turning or screening dry compost.