Installing Landscape Lighting Safely: Power, Transformers, Wire and Water
Outdoor wiring gets rained on, buried, stepped on, dug up and frozen, which is why the code is stricter outside than in. The dividing line is simple: anything at 120 volts is a job for a licensed electrician, and a 12V low-voltage system plugged into a properly installed GFCI outlet is generally a reasonable DIY project.
This guide gives general principles, not electrical instructions. Any new outdoor outlet, circuit, hardwired fixture or buried 120V cable should be installed by a licensed electrician, and in most places it needs a permit and inspection under your local electrical code. Every fixture should be listed for the wet or damp location it sits in. Pools, spas, ponds and fountains have extra code requirements. Call 811 before you dig. Part of the PlantMapper Landscape Lighting section.
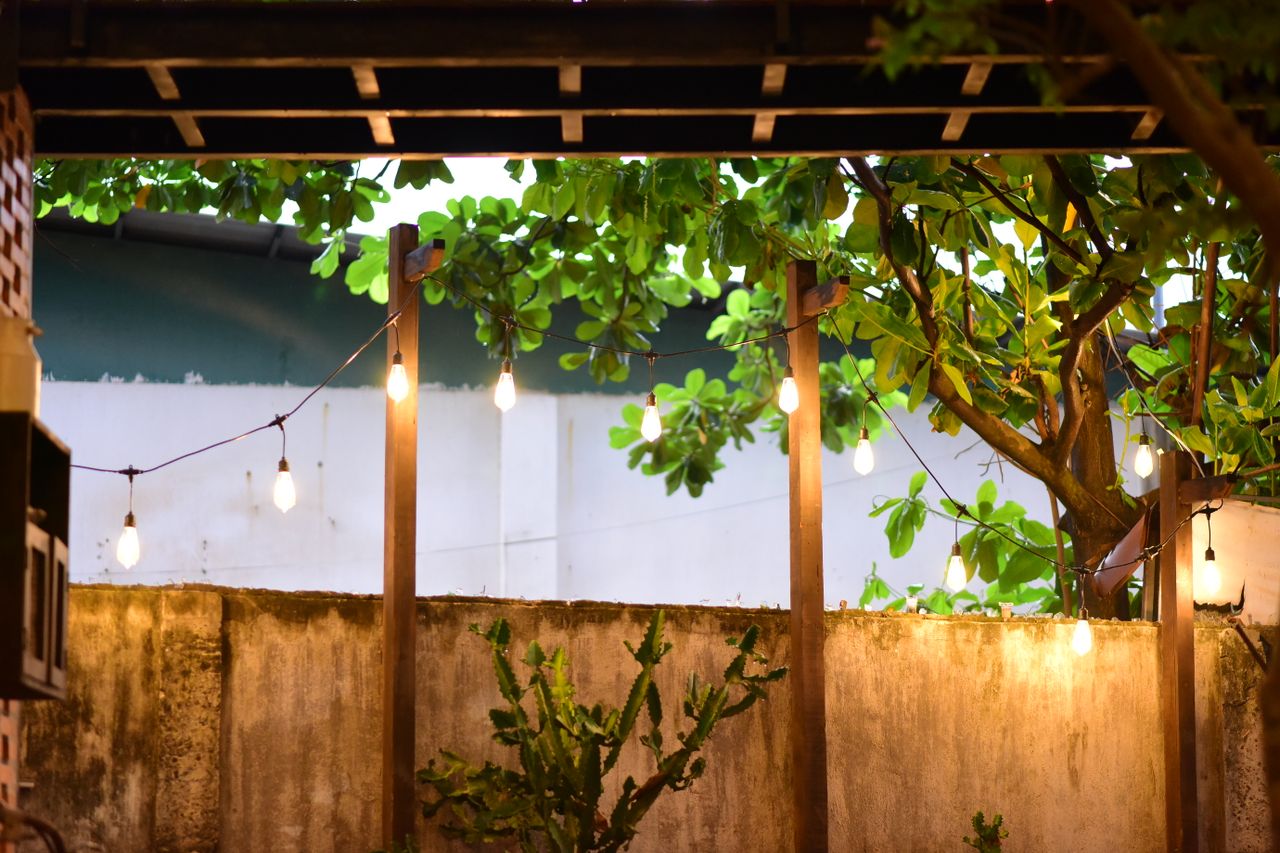
Get the power right and the rest is just placing light · photograph via Pexels
What this guide is, and is not
General principles, not wiring instructions
This guide explains how a landscape lighting system is put together, what a good wire route looks like, how a 12V system is sized, and what makes a fixture right for its spot. It is written so you can plan sensibly, give an electrician a clear brief and install low-voltage lighting properly yourself.
It deliberately gives no instructions for 120V wiring. Line-voltage work outdoors involves circuit sizing, GFCI protection, grounding and bonding, cable type and burial depth, boxes and covers, and in most jurisdictions a permit and inspection. Those belong to a licensed electrician working to your local code, and mistakes outdoors, in wet ground, can be deadly.
What you can do yourself starts at a properly installed GFCI outdoor outlet with a weatherproof in-use cover: plug in a 12V transformer, run low-voltage wire, and install and move low-voltage fixtures. That is what most of this guide is about.
The ground rules
Electrical safety outdoors
Six principles that apply to every landscape lighting job, whoever does the work.
120V work is for a licensed electrician
Permit, install, inspect
Any new outdoor outlet, circuit, hardwired fixture or change to the house wiring should be done by a licensed electrician to your local electrical code, and most jurisdictions require a permit and inspection for it.
That includes new outdoor outlets, line-voltage path or post lights, wall lanterns, in-ground lights on 120V and anything hardwired into the house.
Ask whether the job needs a permit, and keep the paperwork; buyers and home inspectors may ask about it.
Check the electrician's license with your state or local licensing board, and that they carry insurance.
Never run an indoor extension cord or a homemade cord outside as a permanent supply.
Outdoor outlets need GFCI protection
The one that saves lives
A ground-fault circuit interrupter (GFCI) cuts the power in a fraction of a second when current leaks to ground, which is exactly what happens when something goes wrong in the wet. The electrical code requires GFCI protection for outdoor receptacles.
Your electrician will provide GFCI protection at the outlet or the breaker, plus a weatherproof in-use (bubble) cover so it stays protected with a plug in it.
Press the TEST button monthly, then RESET.
If a GFCI keeps tripping, something is wrong. Find out what instead of resetting it over and over.
A portable GFCI cord is fine for a temporary tool, not a substitute for a properly protected outlet.
Fixtures must suit their actual spot
Wet ratings and materials
A fixture rated for a covered porch will fail out in a flower bed. Buy for where it actually goes, not for outdoors in general.
Look for a UL or ETL listing for wet locations in the open, damp-location only under a roof; many fixtures also show IP65, IP67 at ground level, and IP68 with a stated depth if submerged.
The rating covers the whole assembly: connectors, seals and wire entries matter as much as the fixture.
Coastal and windy sites need better materials, such as brass, copper or stainless, not just better ratings.
Pools, spas, hot tubs, ponds and fountains have their own article in the National Electrical Code, with extra rules on equipment, distances, GFCI protection and bonding.
Never improvise anything electrical near water.
Have any wiring for or near a pool, spa, pond or fountain designed and installed by a licensed electrician.
Submersible fixtures must be listed for submersion, at the actual depth.
Every yard has buried lines: power, gas, water, cable and phone, irrigation. Hitting a gas line or a buried power cable is dangerous, not just expensive.
Call 811 (or use your state's 811 website) a few business days before any digging, and wait for the lines to be marked. It is free.
811 only marks utility-owned lines. Private lines, such as a feed to a detached garage, a gas grill line or sprinkler pipes, are yours to locate.
Keep a sketch or photos of where your own wires run, with the permit paperwork.
Assume something is buried until you have checked.
Inspect and maintain it
Outdoor systems age
Weather, sun, freeze-thaw, mowers, string trimmers and roots all work on an outdoor system. It needs checking, not just installing.
Check fixtures, connectors and wire entries every year for water inside and damage.
Have an electrician look at any 120V outdoor wiring that trips, flickers or shows damage.
Replace damaged wire or make a proper splice; never just wrap it in tape.
It is worth being precise here, because a lot of landscape lighting is perfectly reasonable to install yourself, and one specific part of it is not.
✓Reasonable to do yourself
Plugging a 12V transformer into an existing GFCI outdoor outlet with an in-use cover.
Running low-voltage wire and installing, moving and re-aiming 12V fixtures.
Hanging outdoor-rated string lights on a guide wire and plugging them in.
Setting out solar and rechargeable lights, which involve no wiring at all.
Adding plug-in timers, outdoor smart plugs and photocells at an existing outlet.
Cleaning fixtures, swapping replaceable LED bulbs and clearing lenses.
!For a licensed electrician
Any new outdoor outlet, and any new circuit from the breaker panel.
Any 120V fixture wired into the house: wall lanterns, line-voltage path and post lights, in-ground lights, floodlights.
Any buried 120V cable or conduit, including its type, depth and protection.
Anything for or near a pool, spa, pond or fountain.
Changes to the panel, breakers, grounding or bonding.
Permits, inspections and any testing your jurisdiction requires.
Tracking down a GFCI that keeps tripping, a dead circuit or any fault in the house wiring.
The most cost-effective thing to ask an electrician is not "install my landscape lighting" but "put a GFCI outdoor outlet with an in-use cover where my transformer will go". That one job turns landscape lighting into something you can design, install, extend and change yourself with 12V equipment, and the outlet is handy for string lights, a leaf blower and holiday lights as well.
The DIY part
Installing a low-voltage system
A 12V system is straightforward to install well. These are the steps that separate a good job from one that dims at the far end and fills with water.
Lay it out loosely first
Connect the fixtures and set them out on the surface before burying anything. Live with the layout for an evening or two, check it from inside and from every viewpoint, and move things until it looks right.
This is the biggest single advantage of low voltage over 120V, and it is wasted if you bury everything on day one.
Mount the transformer properly
Hang it on a wall or post close to the GFCI outlet, usually at least 12 in off the ground (check the maker's instructions), where you can reach the timer and the terminals.
Do not bury a transformer, box it in with no ventilation, or put it where it will sit in a puddle or a snowdrift. Follow the manufacturer’s instructions for its rating and position.
Size the transformer in watts, with headroom
Add up the wattage of every fixture you will connect and choose a transformer comfortably above that. A common rule is to load it to no more than about 80% of its rating, which leaves room for reliability and for fixtures you add later.
An overloaded transformer runs hot, trips or fails early, and can take fixtures with it.
Keep wire runs within the limits
Low-voltage wire loses voltage along its length, and the symptom is fixtures that are visibly dimmer at the far end of the run. The longer the run and the more fixtures on it, the worse it gets.
Follow the manufacturer’s run-length chart for wire gauge, use heavier wire (12 or 10 gauge rather than 14 or 16) on long runs, and split a big yard into two or more runs instead of one long daisy chain. Feeding a run from the middle (a T or hub layout) also helps, and many transformers have 13, 14 or 15V taps to make up for drop on long runs.
Make every connection properly
Use the connectors made for the system, or gel-filled or grease-filled waterproof connectors rated for direct burial. Electrical tape is not a waterproof connection and will fail within a season.
Keep splices at a fixture or in a spot you can dig up easily, and note where they are.
A wet-rated fixture on a poor splice is not protected.
Bury and protect the wire sensibly
Low-voltage landscape wire is made for direct burial and is usually laid a few inches deep (many makers suggest about 6 in), under mulch or along a bed edge, but it still needs protecting from shovels, aerators, string trimmers and mowers.
Leave a coil of slack at each fixture so it can be moved, and keep it out of places you will dig in three years. See wire routes.
Aim it after dark, then set it
Set the aim at night, from the views that matter, and only then push the stakes in firmly and bury the wire. Nearly every fixture ends up a little way from where it started.
As an Amazon Associate, PlantMapper may earn from qualifying purchases. Prices and availability are set by Amazon. This covers 12V low-voltage work plugged into an existing GFCI outdoor outlet only. New outdoor outlets, circuits and hardwired 120V fixtures should be installed by a licensed electrician, and pools, ponds and fountains have extra code requirements.
The technical bits
Transformers and wire
Three numbers decide whether a 12V system performs: the transformer's wattage rating, the wire gauge and the length of each run.
Planning a 12V low-voltage system. Always follow the manufacturer’s specific guidance.
Consideration
What to do
Why
Transformer rating
Total fixture watts, loaded to no more than about 80% of the rating
Overloaded transformers run hot, trip and dim the fixtures
Multi-tap transformer
Taps at 13, 14 or 15V let long runs start a little higher to make up for drop
Keeps the far fixtures near 12V instead of 9 or 10
Wire gauge
12 or 10 gauge for longer or heavier runs, as the manufacturer's chart says
Thin 14 or 16 gauge on a long run is the usual cause of dim far-end fixtures
Run length
Within the stated maximum for the cable and load
Past it, the far fixtures visibly dim
Circuit layout
Split a big yard into several runs; feed long runs from the middle (T or hub layout)
Shortens the effective run and evens out the brightness
Connections
System connectors, or gel-filled direct-burial connectors
Tape and twist-on wire nuts without sealant fail within a season outdoors
Transformer mounting
On a wall or post near the GFCI outlet, off the ground, easy to reach
You need to reach the timer, and it must never sit in water or snow
Spare capacity
Leave room for two or three more fixtures
Every landscape lighting scheme grows
If some of your 12V fixtures are noticeably dimmer than others, the cause is nearly always voltage drop, not faulty lights. Shorten the run, use heavier wire, feed it from the middle, move it to a higher voltage tap, or split it into two runs from the transformer. A bigger transformer on its own will not fix it.
Where the wire goes
Safe, sensible wire routes
The wire route is what you will curse in five years when your shovel finds it. Plan it as carefully as the lighting.
✓A good wire route
Follows fixed edges, such as a bed edge, a fence line or the side of a walkway, rather than cutting across beds you will dig.
Is recorded: sketch it, photograph it before backfilling, and keep the drawing with your house papers.
Runs in straight lines between known points, so it can be predicted instead of guessed.
Has slack at every fixture, so a light can be moved without new wire.
Stays out of tree root zones, vegetable beds and anywhere you plan to plant.
Is protected in conduit where it crosses a walk or an area you will dig. A length of PVC conduit costs almost nothing.
!A bad wire route
Diagonally across the middle of a flower bed with nothing marking it.
Buried at an unknown depth with no record of where it goes.
Shallow under a lawn where a core aerator or edger will find it.
Through the main roots of an established tree.
Stapled to fence boards that will be replaced.
Spliced mid-run in a buried joint you cannot find.
Buried 120V cable is the electrician’s call
Buried line-voltage cable has code requirements on cable type, burial depth, conduit and protection that your electrician will handle. Do not run 120V cable yourself, and do not ask for it to go shallower to save digging.
Low-voltage wire still needs protecting
It is safe to handle but it is not indestructible. Bury it a few inches deep, tuck it under mulch, or run it along a bed edge, and sleeve it in conduit where it crosses a walk or a spot you will dig.
Keep it well away from where mowers, edgers and aerators run.
Cross hard surfaces while you build
Getting wire under a walkway, a patio or a driveway is easy before it is built and a real job afterward. If you are building anything, lay a spare length of conduit while the ground is open, two if you can, because you will want the second one.
A pull string left in empty conduit turns pulling wire through later into a five-minute job.
Record it before you backfill
Photograph the open trench with something in the shot for scale, and mark the route on a simple sketch of the yard with measurements from the house, fence or other fixed points.
Keep that sketch with your house papers. You, and any future owner, will be glad of it.
Hang string lights on a guide wire, never by their own cordLow voltage lets you move fixtures until the effect is rightConduit under hard surfaces is easy before the surface goes down and awkward afterward
Fixing it in place
Mounting and positioning
A few practical points that decide whether fixtures stay where you put them and keep working.
Stake and in-ground fixtures
Push the stake into firm, undisturbed soil rather than loose mulch, and check the aim twice a year. Frost heave, pets and kids knock them out of line.
Keep them out of the mowing line and back from walkway edges where a wheelbarrow or snow shovel will catch them.
Set them slightly above grade rather than flush, so leaves and mulch do not bury the lens.
Ground-level and in-ground fixtures sit in water: buy wet-listed, IP67 or better, and expect to clean them.
Leave a coil of slack wire at each fixture so it can be moved.
Tuck them behind plants where you can, so the bulb is hidden and the effect is not.
Wall and fence-mounted fixtures
120V wall lanterns are a job for a licensed electrician, including the box, the wire entry and sealing it.
Mount below eye level where people sit, and choose shielded or downward-only designs.
Fix into masonry or siding with exterior-rated stainless or hot-dip galvanized hardware, never plated screws that will streak rust down the wall.
Seal around screw holes and the wire entry so water cannot get behind the fixture.
On a fence, remember boards get replaced. Mount to a post rather than a board where you can.
Keep fixtures and wire entries above the splash zone at ground level.
Mounting lights in trees
Downlighting from high in a tree (moonlighting) gives the most natural look in landscape lighting, but it needs care.
Never fasten anything tightly around a branch or trunk. Trees grow, and a tight strap or wire will girdle and kill the limb.
Use adjustable tree straps or the fixture maker's tree-mount kit, and check and loosen them every year.
Leave generous slack in the wire up the trunk, and recheck it each year as the tree grows.
Think about access. A fixture 20 ft up needs cleaning and eventually replacing, which usually means a tall ladder or a pro.
Use 12V up in trees, and keep connections where you can reach them.
Never wrap wire tightly around a trunk or drive nails into a healthy tree, and ask a certified arborist before working in a valuable or protected tree.
String lights and overhead runs
Hang the run on a stainless steel guide wire with a turnbuckle, and clip the string lights to it. Letting the lights hang from their own cord stretches it and eventually breaks it.
Anchor into masonry, the house framing or a sturdy post set in concrete, not into fence boards or lattice. The pull is considerable.
Allow a gentle sag. A tight run looks wrong and puts far more load on the anchors.
Keep bulbs above head height over a walkway, about 7 to 8 ft where people walk.
Use outdoor-rated string lights and connectors, and plug them into a GFCI outlet through a timer or outdoor smart plug.
On long spans, check the anchors, or take the lights down, before winter storms, heavy snow or hurricane season.
The special case
Lighting near pools, ponds and fountains
Water is the most rewarding thing to light in a yard and the place with the strictest electrical rules. The two go together.
✓The safety position
Pools, spas, hot tubs, ponds and fountains are covered by their own article of the National Electrical Code, with extra rules on equipment, distances, GFCI protection and bonding.
Any wiring for or near water should be installed by a licensed electrician, usually with a permit and inspection under your local code.
Do not improvise, extend an existing circuit, or run an extension cord out to a pond.
Underwater fixtures must be listed for submersion at the actual depth. Check the stated depth, not just "IP68".
Everything must be GFCI protected, and the protection and bonding needed for the location are part of the electrician's job.
Unplug or switch off the power before putting your hands in the water for any reason.
!Getting the effect right
Light water from the side or from below, never from straight above, which just shows you the bottom.
Uplighting moving water from within it, such as a spillway, a bubbler rock or a small waterfall, is the best single accent in most yards.
A still pond is often better left dark and used as a mirror, reflecting a lit tree or wall behind it.
Keep the output low. Water magnifies light, and a bright fixture in a small pond is overwhelming.
Hide the source from the deck or patio: behind a rock, under a ledge, below the waterline.
Warm white, as everywhere else. Colored and color-changing lights in a backyard pond look like a nightclub.
In a wildlife pond, the best lighting is none. Light in and around water at night disturbs frogs, toads, insects and the animals that feed on them, and a lit pond is a poorer habitat than a dark one. Light the plants a little way back from it instead, or leave the whole area dark and let the water reflect something else.
Avoid these
Six installation mistakes
The first two are safety issues. The rest are why systems fail early.
1. Doing 120V work yourself
Outdoor line-voltage work involves circuit sizing, GFCI protection, grounding, cable type and burial depth, and usually a permit and inspection. Getting it wrong outdoors, in the wet, is dangerous, and unpermitted work can cause trouble with insurance or when you sell.
The fixHave any new outdoor outlet, circuit or hardwired fixture installed by a licensed electrician, with a permit where required, and keep the paperwork. Do the 12V side yourself from there.
2. Improvising anything near water
An extension cord run out to a pond, or a light that is not listed for submersion at the depth it sits, is a real hazard. Water has its own code rules for good reason.
The fixHave anything for or near a pool, spa, pond or fountain installed by a licensed electrician, and use underwater fixtures listed for submersion at the actual depth.
3. Taped or unsealed splices
Electrical tape is not a waterproof joint, and an unsealed wire nut in a flower bed is full of water by the second winter. The fixtures then corrode from the inside and the run fails on and off, which is maddening to trace.
The fixUse the system's own connectors, or gel-filled direct-burial connectors, and keep splices where you can find and reach them.
4. Undersizing the transformer or overrunning the wire
Fixtures that are dim at the far end of a run are almost always suffering voltage drop, not faulty. An overloaded transformer runs hot and fails early.
The fixAdd up the total watts and load the transformer to no more than about 80%, follow the run-length chart, use heavier gauge wire on long runs, and split a big yard into several runs.
5. Burying wire with no record of where it is
Every yard gets dug sooner or later, and a forgotten wire route means a shovel through it, or an expensive hunt for a fault years later.
The fixRun wire along fixed edges in straight lines between known points, photograph the trench before backfilling, sketch it with measurements, and keep the sketch with your house papers.
6. Fastening lights tightly to a growing tree
A strap or wire fastened tight around a branch will girdle it as the tree grows, killing the limb and eventually taking the fixture down with it.
The fixUse adjustable tree straps or a proper tree-mount kit, leave plenty of slack in the wire, and check and loosen them every year. Never wrap wire tightly around a trunk.
Print it or check it off as you go
The installation checklist
Fourteen checks from planning to finished system. Your checks are saved in this browser only.
Electrical
Low-voltage system
Routes and mounting
Questions
Installing landscape lighting: your questions answered
Answers to the questions homeowners ask most.
Can I install landscape lighting myself?
Mostly, yes. The 12V low-voltage side is generally a reasonable DIY job: plugging a transformer into an existing GFCI outdoor outlet, running low-voltage wire, and installing, moving and aiming fixtures. So is hanging outdoor-rated string lights and setting out solar lights. What should be left to a licensed electrician is everything at 120 volts: any new outdoor outlet or circuit, any hardwired fixture, any buried line-voltage cable, and anything for or near water, usually with a permit and inspection under your local code.
Do I need an electrician for landscape lighting?
For the 120V part, yes. New outdoor outlets, new circuits, hardwired fixtures such as wall lanterns and line-voltage path lights, buried 120V cable, and any wiring for or near a pool, pond or fountain should be installed by a licensed electrician, and most jurisdictions require a permit and inspection. Keep the paperwork. Once a GFCI outdoor outlet with an in-use cover is in place, a 12V system plugged into it is something you can install and expand yourself.
Why are some of my low-voltage lights dimmer than others?
Almost always voltage drop rather than faulty fixtures. Low-voltage wire loses voltage along its length, so the farther a fixture is from the transformer and the more fixtures share the run, the dimmer it gets. The fixes are to shorten the run, use heavier gauge wire, feed the run from the middle, use a higher voltage tap on a multi-tap transformer, or split the yard into two or more runs. A bigger transformer on its own will not solve it.
How deep should low-voltage landscape wire be buried?
Low-voltage landscape wire is rated for direct burial and is usually laid a few inches deep (many manufacturers suggest about 6 in), under mulch or along a bed edge, but keep it away from shovels, aerators and edgers and sleeve it in conduit where it crosses a walk or a spot you will dig. Buried 120V cable is different: its type, depth and protection are set by the electrical code, so leave it to your electrician. Either way, call 811 first and record the route.
What size transformer do I need for low-voltage lights?
Add up the wattage of every fixture on the system and choose a transformer comfortably above the total. A common rule is to load it to no more than about 80% of its rating, for reliability and because every scheme grows. For example, ten 4-watt LED fixtures (40 W) sit easily on a 100 or 150 W transformer. Check the manufacturer’s run-length chart for the wire gauge, and mount the transformer near the GFCI outlet, off the ground and where you can reach the timer.
Can I put lights in my pond or fountain?
Yes, and lit water is the best accent in most yards, but pools, ponds and fountains have their own rules in the electrical code. Have the wiring installed by a licensed electrician, everything GFCI protected, use fixtures listed for submersion at the actual depth, and never run an extension cord out to the water. For looks, light water from the side or below rather than above, keep the output low, and consider leaving a wildlife pond dark.
How do I splice landscape lighting wire safely?
Use the connectors made for your system, or gel-filled waterproof connectors rated for direct burial. Electrical tape is not a waterproof joint, and an unsealed wire nut in a flower bed fills with water by the second winter, which corrodes fixtures from the inside and causes on-and-off faults that are maddening to trace. Keep splices at a fixture or somewhere you can find again, and remember that a wet-rated fixture on a poor splice is not protected.
Can I mount lights in a tree?
Yes, and moonlighting from high in a tree gives the most natural look in landscape lighting, but never fasten anything tightly around a branch or trunk. Trees grow, and a tight strap or wire will girdle and kill the limb. Use adjustable tree straps or a proper tree-mount kit, leave generous slack in the wire, and check and loosen them every year. Think about how you will reach the fixture to clean it before mounting it high up, and ask a certified arborist about valuable trees.