Building a Patio - What Goes Underneath Decides Everything
A paver patio that stays flat through twenty winters and a thousand cookouts is built mostly out of
sight: the right depth of dig, a compacted crushed-stone base, one even inch of sand, a steady slope
away from the house and an edge that holds it all in. Here is the whole job in order, why each step
matters, and the point at which hiring a crew makes more sense.
General guidance based on common US practice for backyard patios. Soil, climate, frost depth and
local codes vary, so treat the figures as starting points and check locally. Part of the
PlantMapper Patios section.
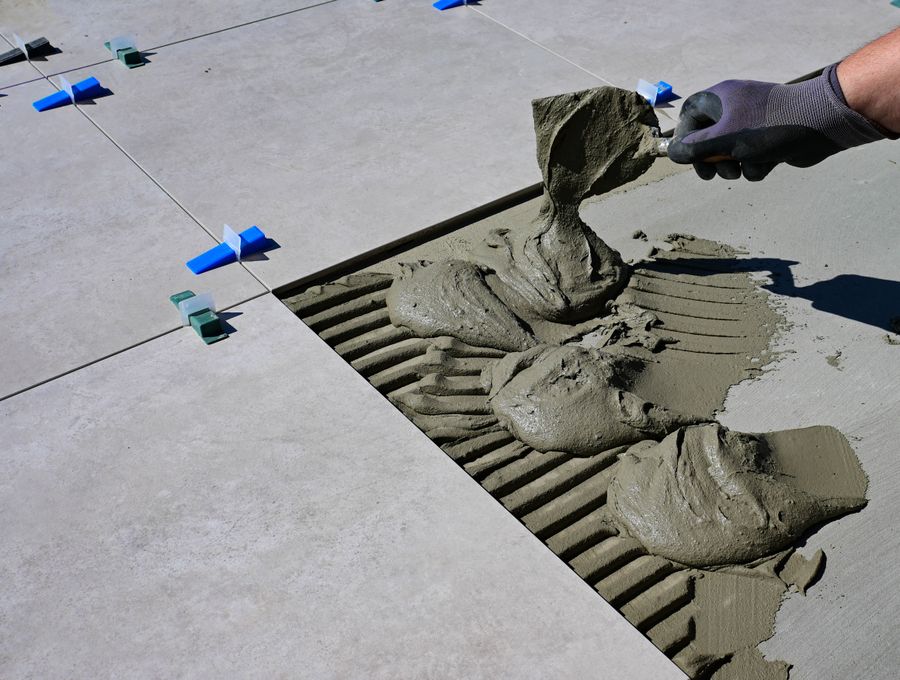
By the time the first paver goes down, most of the work that makes a patio last is already done · photograph via Pexels
Before you dig
Nobody sees the part that matters most
Walk a neighborhood after a hard winter and you can pick out the patios built on a shortcut:
pavers with a dip where the grill sits, a corner that heaved and never came back down, joints full
of weeds and ants. The pavers themselves are rarely the problem. What failed was the base, the
sand, the slope or the edge, all of which were buried and forgotten the day the crew packed up.
This guide follows the build in the order it actually happens and explains what each step is
for. Knowing the reasons lets you compare contractor bids on more than price, keep an eye on a crew,
or do the job yourself without guessing. It focuses on the most common American patio, interlocking
concrete pavers on a sand bed over compacted gravel, and notes where flagstone, porcelain and poured
concrete differ. It is not an engineered design for your lot: expansive clay, fill soil, a high water
table, a deep frost line or a patio that doubles as a parking spot all change the answer.
Two other guides should be settled first. Planning a Patio covers
where it goes, how big and how high it sits against the house, and Patio
Drainage covers where the rainwater ends up. Both shape the construction, so decide them before
the shovel comes out.
What is down there
A patio in cross-section, from the dirt up
Four layers, each doing one job. Skimp on any of them and the whole thing relies on good luck.
1. The subgrade
The undisturbed soil at the bottom of the dig
Its job to hold everything above it still, wet or dry, frozen or thawed
Needs to be firm subsoil, with the sod, topsoil and roots removed
Red flags soil that pumps or squishes underfoot, standing water, loose fill from a recent build
2. The base
Compacted crushed stone, sold as paver base
Its job to spread weight, drain water and resist frost heave
Typically 4-6 in compacted for a walk-on patio, deeper on clay and in cold regions
Only works when compacted in thin layers; loose gravel is just a pile of rocks
3. The bedding layer
One inch of coarse sand, screeded flat
Its job to give each paver a smooth, even seat to settle into
Typically 1 in of coarse concrete sand, never much more
Not a leveling layer; a thick sand bed shifts and ruts under traffic
4. Pavers, joints and edge
The surface you see, and what holds it together
Its job to look good, take wear and shed water
The joints lock pavers together and keep out weeds and ants
The edge restraint stops the whole field from creeping outward
Working out how deep to dig. Start at the finished patio height and subtract the paver
thickness, the sand and the base. With standard 2⅜ in pavers, 1 in of
sand and a 6 in base, you are digging about 9½ inches below the finished surface. Do the
sum for your pavers and climate before you rent the equipment, not halfway down the hole.
An honest look
Build it yourself, or hire a hardscape contractor?
Lots of homeowners lay a great paver patio over a few weekends. Lots of others find out that a
16 x 20 ft patio means moving something like 10 tons of gravel and sand, plus the pavers, by
wheelbarrow. Better to know that before the delivery truck shows up.
✓A sensible DIY project
A simple square or rectangle on ground that is already fairly level and firm
A modest size, perhaps up to 200-250 sq ft for a first patio
Runoff that can drain onto lawn or a planting bed with no drain line to install
Standard concrete pavers in a pattern with few cuts
You can rent a plate compactor and a wet saw and are comfortable running them
!Call a pro
Tight levels at the house, where a door threshold, siding, weep holes or a basement window limit the height
A raised patio or any retaining wall; walls over about 3-4 ft often need a permit and an engineer
Drainage work such as a trench drain, buried drain line or dry well
Problem soil: expansive clay, wet ground, or fill from when the house was built
Large porcelain or mortar-set flagstone, which needs a concrete slab and specialist skills
Anything a car will drive on, which needs a heavier base and different pavers
Comparing bids? Ask five questions. How deep will you dig? How many inches of base, compacted
in how many lifts? What goes on top of the base, and how thick? What edge restraint and joint sand will
you use? Where will the water go? A good contractor answers each in a sentence. As a very rough guide,
professionally installed paver patios often run somewhere around $15-$35 per sq ft depending on
region, pavers and site access; a bid far below that usually saves money underground.
Start to finish
The build, step by step
Twelve steps in order. Each one has its own section further down the page.
Call 811, then lay out the patio
Have buried utilities marked first. Then stake the outline, run mason's line at the finished height, and build in a slope of 1/8 to 1/4 inch per foot away from the house before you dig.
Dig to the calculated depth
Strip sod, topsoil and roots down to firm subsoil, following the slope of the lines, and dig wider than the finished patio so the edges have support.
Prepare the soil
Compact the bottom of the hole, dig out any soft spots and fill them with base, and lay woven geotextile fabric on clay or soft ground.
Build the gravel base
Spread crushed-stone paver base in 2-3 inch lifts, dampen each one and compact it with a plate compactor until you reach the full depth.
Check the base
Pull the lines tight again and confirm the compacted base follows the slope and sits exactly paver-plus-one-inch below the finished height.
Install the edge restraint
Spike plastic, aluminum or concrete edging onto the base along every open side, so the pavers have something solid to push against.
Screed the sand
Set 1 inch pipes on the base, fill with coarse concrete sand and strike it off with a straight 2x4. Leave it loose and smooth, and stay off it.
Lay the pavers
Start at the house or a straight fixed edge and set each paver straight down, working from the pavers already laid, with string lines to keep the pattern square.
Cut the edges
Mark carefully, cut wet with a diamond blade to keep the dust down, and keep cut pieces to the outside edges rather than the middle.
Compact the pavers
Sweep clean, then run the plate compactor with a rubber pad over the surface so every paver beds evenly into the sand.
Sweep in polymeric sand
Fill the joints completely, compact again, top up, blow every grain off the surface and mist with water exactly as the bag says.
Let it cure
Keep feet, rain, pets and furniture off the joints for as long as the polymeric sand maker requires before moving in.
Sharp, angular crushed stone knits together when compacted; smooth pea gravel never willThin layers, each one compacted, turn loose gravel into a real baseMortar-set stone needs full coverage under every piece, never a few blobs
Step 1
Layout, string lines and calling 811
A morning spent on layout saves a weekend of fixing. Layout pins down three things: the shape, the
finished height and the slope.
Call 811 first. It is free, and in every state you are expected to call a few business
days before digging so buried gas, electric, water and cable lines can be marked. Private lines, such
as a sprinkler system or a feed to a shed, will not be marked, so find those yourself.
Check permits and HOA rules. Many towns do not need a permit for a ground-level paver patio,
but some do, and rules on lot coverage, setbacks and drainage vary. If you have an HOA, get approval
in writing. Check locally before you order materials.
Pick a reference point. Something fixed, such as the door threshold or the top of the
foundation, that every height on the job is measured from.
Set the finished height first. Keep the patio surface at least an inch or so below the
door threshold and well below the siding, and work down from there to find the dig depth.
Build the slope into the lines. Run mason's line from stakes at the finished height and
drop it 1/8 to 1/4 inch per foot away from the house. Over a 12 ft patio that is about 1½ to 3
inches. Every layer below follows that slope.
Square the corners with the 3-4-5 method (or 6-8-10 for bigger patios), or measure both
diagonals and adjust until they match.
Dry-lay the pattern for a row or two if it is complicated, and nudge the whole layout a
couple of inches so you are not left with skinny slivers along the house.
Get your quantities before you order
Use the free PlantMapper calculators for square footage and paver count, and for the cubic
yards and tons of base gravel to have delivered.
Dig to an even depth below the string lines, so the bottom of the hole already follows the slope,
and dig wider than the patio so the edges are not hanging over nothing.
How deep
Add it up, do not eyeball it
Paver thickness plus 1 inch of sand plus the compacted base equals how far below the finished
surface you dig.
A typical walk-on patio is about 7-10 inches deep
Cold climates and clay often push that to 10-14 inches
Hit something soft? Keep digging and replace it with base
How wide
Past the finished edge
The base should run out beyond the pavers so the edge restraint and the outer row sit on solid
gravel.
About 6-12 inches wider than the patio on every open side is common
Pavers that overhang the base are the first to sink and spread
Leave room for the edge restraint and its spikes
Stop and think if
The hole tells you things
Digging is when your yard shows you what it is really made of.
You uncover a line, pipe or warning tape: stop and get it identified
Water collects in the hole in normal weather: rethink the drainage
You hit big tree roots: cutting them can harm or destabilize the tree, and some towns protect certain trees
You find old concrete or construction debris: it may be usable or may need hauling out, but look before you build on it
The dirt
There is a lot of it
Soil fluffs up by a quarter or more once it is dug.
A 16 x 20 ft patio dug 9 inches deep is about 9 cubic yards in the ground, more once it is in a pile
Plan ahead: a dumpster, a haul-away, or a spot in the yard to regrade
Save the good topsoil for the beds around the new patio
Step 3
Getting the soil right
The ground at the bottom of the hole has to be firm and, just as important, evenly firm. A patio
that sits half on hard native soil and half on old backfill will crack or dip right along the line
between them.
Take out everything organic. Sod, topsoil and roots rot and settle, and the patio settles
with them.
Compact the bottom of the hole with the plate compactor before any gravel goes in. Soft
spots show up right away.
Dig out and replace soft spots with compacted base rather than hoping the gravel will bridge
them.
Use woven geotextile on soft soil and clay. It keeps the base from being pushed down into
the mud and the fines from working up into the gravel, a common cause of slow sinking. Landscape
fabric for weeds is not the same thing.
Respect expansive clay. Across much of Texas, Oklahoma, Colorado and other parts of the
country, clay swells when wet and shrinks in drought. A deeper base, fabric and good drainage help,
but badly affected lots deserve a local pro's opinion.
Do not build on recent fill. The backfill around a newer house can keep settling for years.
If in doubt, dig through it.
When a pro is money well spent
Some ground problems cannot be solved with a few more inches of gravel:
Water in the hole in ordinary weather, from a high water table or a spring.
Deep fill of unknown origin, common on newer subdivisions and graded lots.
Highly expansive clay, especially near large trees that pull moisture out of it in summer.
A patio that holds back soil or sits on more than a gentle slope.
An hour with an experienced hardscape contractor or, for real problems, a geotechnical engineer costs
far less than tearing out a patio that moved.
Step 4
The gravel base: what to use and how deep
The question everyone asks, and the layer where cutting corners is easiest to hide and most
expensive to fix.
What paver base actually is
Paver base is crushed stone, usually limestone, granite or recycled concrete, graded from about
3/4 inch down to fine dust. Depending on where you live it is sold as paver base, road base, crusher
run, 3/4 inch minus, Class 5 or CA-6. The sharp-edged pieces lock together under the compactor and the
fines fill the gaps, so it packs into a firm, stable layer that still lets water drain. Rounded pea
gravel and river rock have no fines and roll around, so they never make a base. Some contractors use
clean angular 3/4 inch stone (often called #57) in an open-graded base for better drainage, with a
finer bedding layer on top; either system works when it is done properly.
Typical compacted base depths in US residential work. These are starting points, not an engineered spec: soil, frost depth and use change them, sometimes a lot.
The usual case across the South and West. Many installers treat 6 inches as the minimum anyway
Walk-on patio, clay soil or cold-winter regions
6-8 in+
Northern states with deep frost often go deeper; add woven geotextile on clay
Garden walkway, foot traffic only
4 in
Still needs proper compaction and an edge
Driveway or anywhere a car may park
8-12 in+
Heavier pavers and different design; get specific advice
Hot tub, outdoor kitchen, big planters, pergola posts
Designed for the load
Heavy point loads often need footings or a concrete pad, not a standard paver build
Compacted inches, not loose inches. Gravel shrinks by roughly a fifth or more when it is
packed down. A bid that says "6 inches of base" should mean 6 inches after compaction, which
means more went in. It is a fair thing to ask. Order base by the ton: a cubic yard of crushed stone
weighs in the region of 1.3-1.5 tons, and the Gravel Calculator
does the arithmetic.
Step 4, continued
Compacting: the step that gets rushed
Uncompacted gravel settles under the first heavy rain and the first summer of foot traffic.
Compaction is what makes it a base, and it cannot be done in one thick layer.
Compact in lifts. Spread and compact the base in layers of about 2-3 inches (no more
than about 4). A rental plate compactor cannot pack a 6 inch layer from the top, however many passes
you make.
Rent a plate compactor. Home improvement stores and rental yards have them for a modest day
rate. A hand tamper is fine for a tiny landing, not a patio.
Make several passes, in different directions, until the plate stops leaving marks and
starts to bounce on the surface.
Dampen the gravel. Bone-dry base compacts badly. Mist it with a hose so it is damp, not
soaked, and it packs far tighter.
Test it. Walk on it. It should feel like a driveway, not a beach. A heel should not leave a
dent.
Keep the slope as you go. The finished base should follow the same 1/8 to 1/4 inch per foot
as the string lines. The sand on top is not there to create slope.
Frost country note. Frost heave happens when water in fine soils freezes and expands. A
deep, well-drained, well-compacted base is the main defense, which is why patios in Minnesota or Maine
are usually built thicker than patios in Georgia or Arizona.
Step 5
The bedding sand: one even inch
Pavers sit on a thin layer of coarse sand screeded perfectly smooth. Get this layer right and the
pavers go down fast and flat; get it wrong and every paver rocks or dips.
Bedding shortcuts that come back to bite
×Sand too thick
Using 2-3 inches of sand to hide a lumpy base lets pavers sink unevenly and rut wherever people walk.
×The wrong sand
Fine play sand or mason sand holds water and washes out. Coarse concrete sand is the standard.
×Walking on the screed
Every footprint in the sand becomes a low paver. Lay from the finished side and keep off it.
×Stone dust as bedding
Still common, but many paver makers now advise against it under pavers because it holds water and can pump up through joints.
×Mortar dabs under stone
Setting flagstone or porcelain on a few blobs of mortar leaves voids that crack and rock. Full bed or none.
×Hard to undo
The only real fix is lifting the pavers, re-screeding and relaying.
The sand is a seat, not a leveling course. If the base is lumpy, fix the
base.
Screeding the sand
What sand. Coarse, washed concrete sand (often sold as all-purpose or concrete sand). Avoid
play sand, mason sand and anything with clay in it.
How thick. About 1 inch, consistent across the whole patio.
The pipe method. Lay two lengths of 1 inch outside-diameter pipe on the base, shovel sand
between them, and pull a straight 2x4 across the pipes to strike it off. Lift the pipes and fill their
grooves with a trowel.
Leave it loose. Do not compact the sand before laying. The pavers get compacted into it
later.
Screed as you go. Prepare only what you will cover today; rain or a dog through the screed
means doing it again.
Damp, not wet. Slightly damp sand screeds best. Sand that is soaked or bone dry is harder to
get even.
Step 5, other surfaces
Flagstone, porcelain and poured concrete: how they differ
Concrete pavers are the most forgiving DIY patio, but not the only one. Here is how the other common
surfaces change the build.
Porcelain pavers
Thin, dense and precise
Sand-set 3/4 inch thick outdoor porcelain can go on a gravel base with a bedding layer, but only if the maker says so
Mortar-set on a concrete slab with a polymer-modified thinset and full coverage is common for a crisp, tight finish
Pedestals are used on rooftops and over existing slabs
Flagstone
Dry-laid or mortar-set
Dry-laid on a compacted base with a sand or fine bedding layer, joints filled with polymeric sand or planted
Mortar-set on a reinforced concrete slab, with a full mortar bed under every stone
Thickness varies, so each stone is bedded individually to keep the top flat
Poured and stamped concrete
A different trade
Typically 4 inches of concrete over a compacted gravel base, with control joints every few feet
Stamped work needs a skilled crew and fast hands; most homeowners hire it out
Rough cost often around $8-$20 per sq ft installed, depending on finish and region
Mortar-setting tips
For stone or porcelain on a slab
Clean the back of each piece first; mortar bonds to dust, not to the stone
Back-butter dense porcelain with a thin coat as well as combing the bed
No voids: full coverage, never a few dabs at the corners
Step 6
Laying the pavers
Steady and checked often. Racing through this stage is how patios end up with wavy lines.
Start from a straight, fixed edge
Usually the house, a step or a wall, so full pavers sit where people look and cuts end up at the far, least visible edge.
Work off the finished pavers
Kneel on the pavers you have just laid, not on the screeded sand, and move forward from there.
Set, do not slide
Drop each paver straight down onto the sand, snug against its neighbor. Sliding one in pushes a ridge of sand ahead of it.
Leave the mallet for small fixes
Concrete pavers are bedded by the plate compactor later. A rubber mallet is for nudging pieces into line or settling a high one, never a steel hammer.
Keep lines straight
Run a string line every few rows and tap pavers into line as you go. A small drift over 20 feet becomes obvious.
Mind the joints
Most concrete pavers have built-in spacer nubs. For stone and porcelain use spacers. Eyeballed joints wander, and wandering joints catch the eye.
Compact the field
Once a section is laid and the edges cut, sweep it clean and run the plate compactor with a rubber pad over it to bed every paver evenly.
Keep traffic off
Lay boards to spread the weight if you have to wheel a barrow across fresh pavers, and keep everyone else off until the joints are done.
As an Amazon Associate, PlantMapper may earn from qualifying purchases. Prices and availability are set by Amazon. These are the general kinds of tools the job calls for. Check that a product suits your pavers and your project, and follow the label on any cement, thinset or joint sand product.
Step 6, continued
Getting the slope right
Water has to run off. The slope is set at layout, built into the base and carried through every row
of pavers.
How much. Aim for about 1/8 to 1/4 inch of drop per foot, which is roughly a 1 to 2 percent
slope. Most installers settle around 1/4 inch per foot for textured pavers and flagstone.
Always away from the house. Never toward the foundation, a basement window well or a door.
Water against the foundation is how patios cause wet basements.
Toward somewhere useful. A lawn, a planting bed, a gravel strip, a trench drain or a dry
well. Water sent to the property line can become a problem with the neighbors, and some towns restrict
it.
Smooth porcelain sheds water easily and can sit at the gentler end. Tumbled pavers and
cleft flagstone hold water in their texture and like a little more.
One even plane. A single steady slope beats a patchwork of local slopes. Water finds every
flat spot.
No low spot in the middle unless there is a drain there. Two slopes meeting mid-patio is a
puddle you built on purpose.
Test with water. When the pavers are down, dump a bucket or run the hose and watch. Water
is a more honest check than a level.
When there is no room for slope. A patio flush with a sliding door, boxed in by a fence or
tied to an existing walkway may have nowhere to drop. That is the job for a trench drain, and it
needs planning, not improvising. Patio Drainage goes through the
options.
Step 7
Cutting pavers
Cutting is the loudest, dustiest and most dangerous part of the job, and the part where a patio
looks either professional or homemade.
Cutting safety - this is not optional
!Silica dust
Cutting concrete, stone and porcelain throws off respirable crystalline silica, which causes silicosis and other permanent lung disease. OSHA regulates it on job sites for good reason. Cut wet and wear a properly fitted respirator.
!Eyes and ears
Safety glasses or goggles and hearing protection for every cut, not just the long ones.
!Right blade
A diamond blade rated for the material. Porcelain needs a porcelain blade or it chips the face.
!Kickback
Support the paver firmly, keep both hands on the saw and never cut on a wobbly surface.
!Water and power
Electric wet saws should run from a GFCI outlet. Gas cut-off saws make carbon monoxide; never use one in a garage or enclosed space.
!Know your limit
If a cut looks sketchy, it is. A rental yard can show you the saw, or a contractor can make the hard cuts.
Cut outside, cut wet, wear the gear. Silica damage builds up quietly
over years.
Getting clean cuts
Lay the pavers first, then mark. Many pros lay full pavers past the edge, snap a chalk line
and cut them in place or mark each one.
Score, then cut on brittle porcelain and stone; a shallow first pass cuts chipping.
Support the offcut so it does not snap off and take a chunk of the good edge.
Keep cuts at the edges. Cut pieces against a wall or bed look intentional; cuts in the middle
look like a mistake.
No slivers. Pieces smaller than about a third of a paver look wrong and work loose. Shift the
layout or use a border course instead.
Leave generous gaps around obstacles such as downspouts or AC pads, and fill with gravel or
planting rather than fighting for a perfect fit.
Rinse off cutting slurry right away. Once it dries on pavers or stone, it stains.
Step 8
Joint widths
A joint is part of the design, not a leftover gap. The right width depends on the paver and on the
product going into it.
Typical joint widths for residential patios. Always check the joint sand or grout bag, since most polymeric sands list a minimum and maximum joint width.
Surface
Typical joint
Why
Concrete pavers
1/16-3/16 in
Built-in spacer nubs set the gap; tight joints are what make them interlock
Tumbled or antiqued pavers
1/8-3/8 in
Rough edges need a little more room
Clay brick pavers
1/16-1/8 in
Laid tight on sand; check for spacer lugs
Porcelain pavers
1/8-1/4 in
Very accurate; check the minimum for your joint product
Cut (sawn) flagstone
1/4-1/2 in
Crisp edges allow a neat, even line
Irregular flagstone
1/2-2 in
Wide joints take polymeric sand, gravel or creeping plants
Cobbles and setts
3/8-5/8 in
Hand-split stone varies; the joint absorbs it
Consistency matters more than the exact number. The eye goes straight to a joint that swings
from narrow to wide and back.
Do not butt stone or porcelain tight. With no joint there is nothing to fill, water gets in
at every edge and expansion in summer heat chips the corners.
Check the joint product first. Polymeric sands list a joint width range and need the joint
filled close to full depth. Too narrow, too wide or too shallow and the joint fails early.
Keep joints clean as you lay. Sand or mortar pushed up into joints is far easier to clear
while fresh.
Step 9
Filling the joints: polymeric sand and the alternatives
Joints lock the pavers together and keep out weeds, ants and washouts. They are also where most
DIY patios go wrong on the last day.
Polymeric sand
The usual choice for pavers today
Pros hardens when misted, resists washout, weeds and ants, available in several colors
Cons unforgiving: residue left on the surface leaves a hazy film that is hard to remove
Needs dry pavers and dry joints, full-depth filling, compacting in, then a gentle mist
Watch the weather window on the bag; most need no rain for many hours and temperatures above freezing
Plain joint sand
Fine, dry sand swept in
Used for pavers where you may want to lift and relay sections later
Pros cheap, easy, nothing to go wrong on the day
Cons washes out with rain and power washing; weeds and ants move in
Needs topping up every year or two
Mortar or grout
For mortar-set stone and porcelain
Used with flagstone or porcelain set on a concrete slab, not with sand-set pavers
Pros rigid, crisp and permanent looking
Cons slow, easy to smear on the stone, and it cracks if the slab moves
Option premixed exterior paver grouts are easier for porcelain than hand-mixed mortar
Whatever you choose
Three rules
Fill the joint fully: full depth, no gaps, no skim over a void
Clean the surface completely before any water touches it
Read the whole bag first, including the weather limits
As an Amazon Associate, PlantMapper may earn from qualifying purchases. Prices and availability are set by Amazon. Polymeric sands and grouts differ a lot. Check the joint width, joint depth, surface condition and weather limits for the product before you buy.
Step 10
Curing and protecting the new patio
Polymeric sand, mortar and concrete all need time to set up. What happens in those first days shows
for years.
Follow the bag. Most polymeric sands want light foot traffic kept off for about a day and
heavier use for longer. Mortar and concrete need days to gain strength, and poured concrete takes weeks
to reach full strength.
No grill, planters or patio set until the joints have set. Heavy point loads on fresh work
leave marks.
Watch the forecast. A summer thunderstorm on freshly misted polymeric sand can wash it out
or leave haze. Do not start if heavy rain is due.
Mind the cold. Most polymeric sands and all cement products should not be used if freezing
temperatures are expected while they cure.
Mind the heat too. In Arizona or Texas summer sun, mortar and concrete dry before they cure.
Work early in the morning, keep slabs damp and shade fresh work.
Expect efflorescence. A white, chalky haze on new concrete pavers is common, not a defect,
and usually fades with weather. Use an efflorescence cleaner made for pavers if it lingers, not raw
muriatic acid.
Hold off on sealing. If you plan to seal pavers or stone, wait until they are fully dry and
any efflorescence has gone, often a few months. See sealing.
Step 11
Finishing the edges
Edges are where paver patios fail first, and where they look either finished or half done.
Edge restraint
Not optional
Sand-set pavers rely on being held in. Without a restraint the outer rows spread, joints open and
the field slowly creeps apart.
Plastic or aluminum paver edging spiked into the base is the DIY standard
Bury it below the finished edge so soil or sod hides it
Concrete and soldier courses
Stronger and neater
A border row of pavers set on end or lengthwise, backed by a concrete toe below grade, gives a
crisp frame and a tough edge.
Install edging before the field where you can, or right after the last cuts
Keep concrete below grade and off the paver faces
Next to the lawn
Make it mowable
Set the patio flush with or a touch above the soil so the mower wheel can run along the edge.
No lip of sod that traps water on the patio
Firm the sod edge so it does not crumble against the pavers
Next to a bed
Keep mulch and soil low
Soil and mulch should sit below the pavers so a downpour does not wash them across the patio.
An inch or two of drop to soil level is usually enough
A gravel strip along the edge catches runoff and looks deliberate
A common question
Can you lay pavers over an old concrete patio?
Sometimes, and it is tempting: no demolition, no dumpster, no digging. But the old slab has to earn
it.
✓It can work if
The slab is sound: no heaving, no sunken sections, no wide or growing cracks
It has not moved through several winters
It already slopes away from the house and drains well
The extra height works, staying below door thresholds, siding and weep holes
You use an overlay method: thin overlay pavers or porcelain set in mortar, or pavers on a
thin sand layer with drainage holes drilled at the low edge
!Tear it out if
Sections are heaved, sunken or badly cracked
Water ponds on it or runs toward the house
The added height would block a door, cover weep holes or bring the surface too close to the siding
Frost has already moved it; it will keep moving under the new pavers
You do not know how it was built, which is the honest answer for most older slabs
Pavers over concrete also trap water if there is no way out for it, so overlays need drainage at the
low edge and an edge restraint glued or fastened to the slab. Often the better plan is to break up the
old slab and start fresh on a proper gravel base. Broken concrete can go to a recycler, and many
haulers take it for less than mixed debris.
Learn from others
Ten building mistakes that show up later
1. Too little base
Two inches of gravel under pavers looks fine the first summer and heaves or sinks by the second winter.
The fixAt least 4-6 inches compacted, more on clay or where winters are cold.
2. Base never really compacted
Gravel dumped in and raked level looks exactly like compacted base on the day.
The fixDamp gravel, 2-3 inch lifts, plate compactor on every lift.
3. Building on sod or topsoil
Organic material rots and settles, and the patio sinks with it.
The fixDig down to firm subsoil and remove all of it.
4. No slope, or slope toward the house
The top cause of puddles and, worse, water against the foundation.
The fix1/8 to 1/4 inch per foot away from the house, checked with a hose at the end.
5. Leveling with the sand
Thick sand used to fix a lumpy base settles unevenly and leaves dips and ruts.
The fixGet the base right, then screed a steady 1 inch of sand.
6. Polymeric sand in the wrong conditions
Wet pavers, shallow joints, rain on the way or too much water when misting all give crumbly joints or a hazy film.
The fixDry everything, fill to full depth, blow the surface clean and read the bag's weather limits.
7. Leaving residue on the surface
Polymeric sand haze, mortar smears and cutting slurry can stain for good if left to dry.
The fixClean as you go, before any of it sets.
8. No edge restraint
Without one, the outer pavers drift outward and the joints open up across the patio.
The fixRun the base past the edge and spike restraint along every open side.
9. Wandering lines and joints
Joints that open and close or pattern lines that bow are the first thing visitors notice.
The fixString lines every few rows, and spacers for stone and porcelain.
10. Racing the weather
Finishing joints before a storm, or setting mortar with a freeze coming, weakens them for good.
The fixTarp it and come back. A patio should last decades; two days will not matter.
Building questions
Building a patio: frequently asked questions
Sixteen common questions about patio construction. See Patio FAQs for the
full searchable list.
How much gravel do I need under pavers?
For a walk-on patio on firm, well-drained soil, 4 to 6 inches of compacted crushed-stone base is standard, and many installers use 6 inches as their minimum. Clay soil and cold-winter regions usually call for 6 to 8 inches or more, often with woven geotextile underneath. Driveways need 8 to 12 inches or more. What counts is the depth after compaction, not the loose depth you spread.
What kind of gravel is best for a paver base?
Crushed stone graded from about 3/4 inch down to fines, sold as paver base, road base, crusher run or 3/4 inch minus depending on your area. The angular pieces lock together and the fines fill the gaps, so it compacts hard and still drains. Recycled crushed concrete of a similar grading also works. Avoid pea gravel and river rock, which are round, roll under load and never compact.
What sand goes under pavers?
Coarse, washed concrete sand, screeded to an even 1 inch over the compacted base. It gives the pavers a smooth seat to settle into when they are compacted. Do not use play sand or mason sand, which are too fine, and do not use extra sand to level a lumpy base, because a thick sand bed shifts and ruts. Polymeric sand is a different product and goes in the joints, not underneath.
Can you lay pavers directly on dirt?
Not if you want them to stay put. Soil holds water, swells, shrinks and heaves with frost, so pavers set on it rock and sink within a season or two. The only real exception is stepping stones set into a lawn, where a little movement does not matter. For a patio, dig down to firm subsoil and build a compacted gravel base with sand on top.
Do I need to compact the pavers after laying them?
Yes, for sand-set concrete pavers. Once a section is laid and cut, sweep it clean and run a plate compactor fitted with a rubber or urethane pad over the surface. This beds each paver evenly into the sand and pushes sand up into the joints. Compact again after sweeping in the joint sand. Do not compact porcelain or thin stone this way unless the manufacturer says it is safe.
Do I need landscape fabric under pavers?
Weed fabric under pavers is not much help, since most weeds in a patio grow from seeds that land in the joints. A woven geotextile between the soil and the gravel base is a different story: on clay or soft ground it keeps the base from sinking into the mud and the soil from working up into the gravel, which is a real cause of slow settling.
How do you install polymeric sand?
Start with dry pavers and dry joints. Sweep the sand into the joints, run the plate compactor over the pavers to settle it, and top up until the joints are full to just below the paver edge or chamfer. Then blow every grain off the surface with a leaf blower and mist gently with a hose as the bag directs, without flooding it. Keep traffic and rain off it for the time the maker specifies.
How much slope should a patio have?
About 1/8 to 1/4 inch per foot, away from the house, which works out to roughly 1 1/2 to 3 inches over a 12 ft patio. Textured pavers and flagstone like the steeper end; smooth porcelain sheds water at the gentler end. Build the slope into the excavation and the base, not the sand, keep it one even plane, and check it with a hose when you are done.
Do I need edging for a paver patio?
Yes, on every side that is not held by a wall, step or curb. Sand-set pavers depend on interlock, and interlock only works when the edges cannot move. Without restraint the outer rows creep outward, joints open and pavers loosen. Plastic or aluminum paver edging spiked into the base is the usual choice; a concrete toe under a border row is tougher.
How long before I can walk on a new paver patio?
Sand-set pavers can be walked on as soon as they are compacted, but once polymeric sand goes in, most brands ask you to keep foot traffic off for about a day and heavier use, such as furniture and grills, off for longer. Mortar-set stone and porcelain need several days, and poured concrete takes weeks to reach full strength. Check the product and the forecast, and give it longer in cool weather.
Can I build a patio in winter?
In mild southern and western climates, yes. In the North, digging and base work are fine until the ground freezes, but never compact frozen soil or build on it, because it settles when it thaws. Polymeric sand and anything with cement need above-freezing temperatures while they cure, so in cold regions most people lay the pavers in fall and finish the joints in spring, or wait for spring altogether.
How many extra pavers should I order?
About 5 to 10 percent extra for a simple rectangle, and 10 to 15 percent for herringbone, diagonal, curved or circle patterns with lots of cuts. Order everything at once so colors match from the same production run, and keep a few spare pavers for future repairs. The free Patio Area Calculator adds the waste allowance for you.
Do I need a permit to build a patio?
Often not for a ground-level paver patio, but it varies. Some cities and counties require one, especially for raised patios, retaining walls, work near property lines or changes to drainage, and some limit how much of a lot can be covered with hard surfaces. If you have an HOA, you will usually need its approval too. Check with your local building department before you start, and call 811 before you dig.
How do I cut pavers safely?
Cut outdoors with a wet saw or a cut-off saw with a diamond blade, using water to control dust wherever you can, and wear a properly fitted respirator, safety glasses and hearing protection. Cutting concrete, stone and porcelain releases crystalline silica, which causes permanent lung disease. Support the paver and the offcut, plug electric saws into a GFCI outlet, never run a gas saw in an enclosed space, and rinse slurry off right away.
How do you keep pavers from heaving in winter?
Frost heave comes from water freezing in fine soil under the patio. The defenses are a deeper compacted base of free-draining crushed stone, often 6 to 8 inches or more in northern states, good slope so water runs off rather than soaking in, a base extended past the edges, and fabric on clay soils. Sand-set pavers also flex and settle back better than a rigid slab, which is one reason they are popular where winters are hard.
What is the white haze on my new pavers?
Usually efflorescence: a white, chalky bloom left as natural salts in the concrete move to the surface and dry. It is very common on new concrete pavers, it is not a defect, and it usually fades with rain and foot traffic over a season or so. If it lingers, use an efflorescence cleaner made for pavers rather than straight acid. Polymeric sand haze looks similar but comes from residue left on the surface. See Patio Problems for both.
Depths, slopes and methods here describe common US practice for backyard patios. Soil type, frost depth, climate, paver type and how the patio will be used all change what is needed, sometimes a lot.
Follow the manufacturer
Pavers, polymeric sands, thinsets, grouts and sealers all come with instructions on joint size, surface condition and weather. Where they differ from general advice, follow the product.
Silica dust and power tools
Cutting concrete, stone and porcelain releases respirable crystalline silica, which causes permanent lung disease. Cut outdoors, cut wet where possible, and wear a respirator, eye protection and hearing protection.
Levels at the house
Work that changes grading at the foundation, sits near door thresholds, siding, weep holes or window wells, or alters drainage should be checked with a contractor before it starts.
Permits, HOAs and heavy loads
Permit and HOA rules vary, so check locally. Retaining walls, raised patios, driveways and heavy loads such as hot tubs need construction designed for the job, not a standard patio base.
Buried utilities
Call 811 before you dig, every time. Private lines such as irrigation, landscape lighting and outbuilding feeds are not marked, so locate those too, and stop if you hit anything unexpected.
Affiliate links
Some links on this page are Amazon affiliate links. PlantMapper may earn a commission from qualifying purchases at no extra cost to you. It never affects which products we suggest. See our affiliate disclosure.