How to Plan a Patio: Location, Size, Grading and Permits
The decisions that make or break a backyard patio all happen on paper: which side of the
house it sits on, how many square feet the table and grill really need, how it steps down
from the back door, which way the water runs, and what the city, the HOA and the utility
locators need to know first. Settle these before you price a single pallet of pavers.
General guidance for US homeowners. Grading against a house, retaining walls, drainage and
permits depend on your site and your local codes - get professional advice where they apply.
Part of the PlantMapper Patios section.
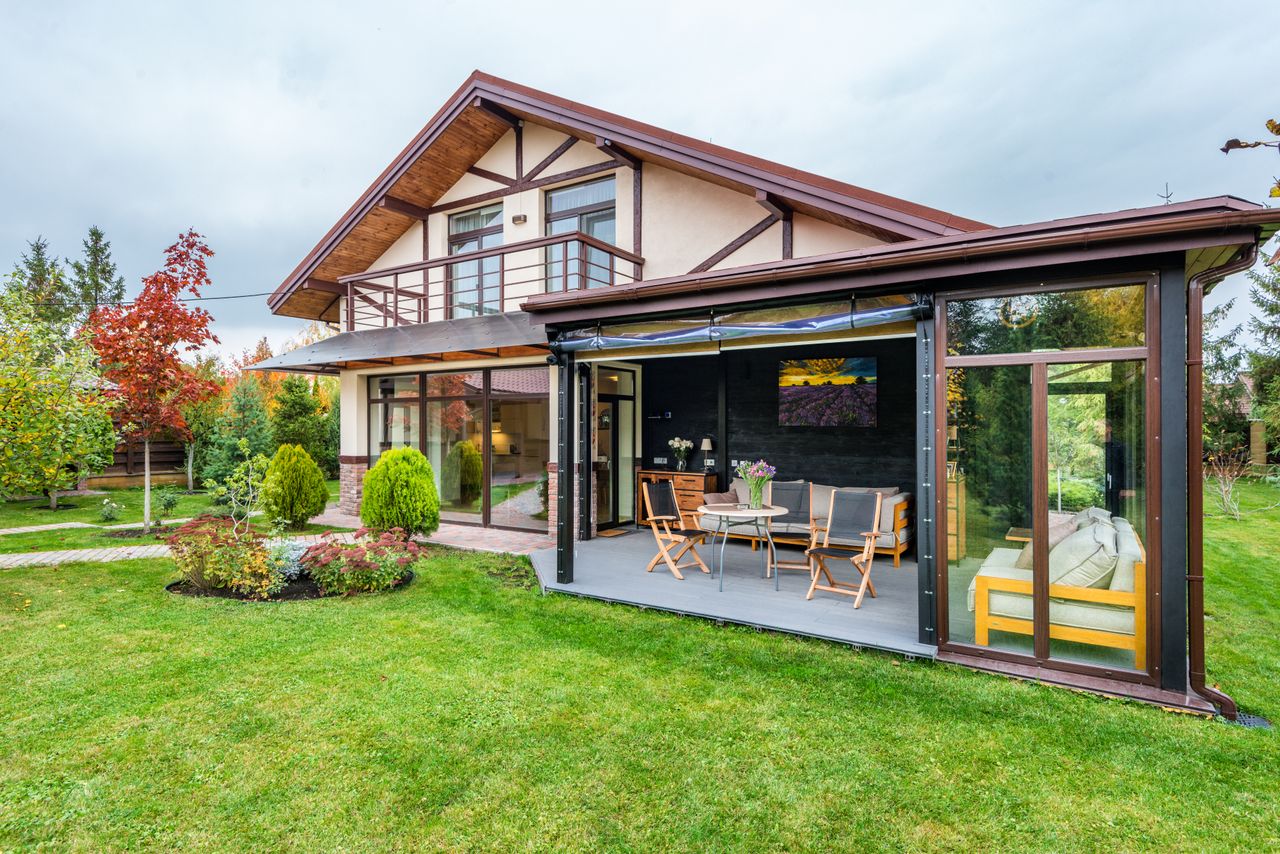
Put the patio in the right place and the rest of the backyard lines up behind it · photograph via Pexels
Where to start
Most patio regrets were decided on the sketch
Ask people what they would change about their patio and they rarely mention the pavers. They
say it is a little too tight for the table, that it is blazing hot until 7 p.m., that the grill
smoke drifts straight into the kitchen, or that the back door opens onto an awkward drop. None of
that is bad workmanship. It was all baked in before the first bag of base gravel showed up.
The upside is that planning is the cheapest stage of the whole project. Sliding a patio 10 ft
across the yard on paper costs an eraser. Moving a finished one means a jackhammer, a dumpster and
several thousand dollars. This is the time to be picky.
This guide takes the questions in the order they come up: where the patio goes, how sun and
shade move across it in your part of the country, how big it must be for the furniture you own,
how it meets the house and the yard, and the checks - permits, HOA rules, buried utilities,
access, grading - that are easy now and painful later. Once those are settled,
Patio Materials helps you pick the surface and
Building a Patio walks through the construction.
Decision one
Choosing where the patio goes
Most patios end up right outside the sliding door simply because that is where the builder
poured a small slab. Sometimes that really is the best spot. Just as often it is not.
✓Reasons to build it against the house
Easy access gets used. A patio you step straight onto gets used for a quick weeknight
dinner. One across the lawn gets used on holiday weekends.
Everything comes from the kitchen. Plates, drinks, the platter for the grill. Every
extra foot between the door and the table is one you will walk dozens of times a summer.
It is usually the easiest ground. Fairly level, close to a hose bib and an outdoor
outlet, and simple to reach with materials.
Shelter. The house blocks wind from one side and can throw welcome afternoon shade in
hot climates.
!Reasons to put it somewhere else
It bakes. A west-facing back wall in Texas or Arizona turns the patio into a griddle
from 3 p.m. until sunset, just when you would want to be out there.
It never sees the sun. In northern states a patio on the north side of the house can
stay cold, damp and mossy for much of the year.
Neighbors look straight down on it. On tight suburban lots the spot by the back door
may be the most exposed part of the yard.
The ground drops away. If the yard falls sharply from the house, a patio there needs
retaining walls and fill, which is a different and much bigger job.
The best free planning tool you have. Push four stakes into the lawn where you think the
corners belong, run string between them, and carry a chair out at breakfast, lunchtime, late
afternoon and dusk on a typical day. Sit there each time. One day of this teaches you more than a
month of sketches, and if the answer turns out to be "over by the oak tree", it cost nothing.
Nothing says a yard gets only one patio. A small landing outside the door for morning coffee,
plus a larger seating area wherever the evening light and shade are best, often beats one big
compromise. Join them with a walkway in the same material and they read as one design.
Backing a patio onto a wall buys shelter, privacy and a backdropDappled shade beats full sun on most American summer afternoonsWhere the patio ends and the lawn starts deserves a line on the plan
The biggest single factor
Sun, shade and the hours you will really be outside
Exposure matters more than any other planning choice, and in the US the right answer changes
with your climate. A west-facing patio that feels perfect on a Minnesota evening can be unbearable
in Phoenix or Houston. Think about where you live, not just which way the house faces.
How each exposure tends to behave in North American yards. Trees, fences and the neighbor's house can override all of it.
Which way the patio faces
Sun through the day
Best in
Watch out for
South facing
Sun most of the day; the warmest, driest spot
Northern states and cool coastal areas, early spring and fall use
Very hot at midday in summer almost everywhere - plan an umbrella, pergola or tree
West facing
Shaded in the morning, full sun from early afternoon until sunset
Cooler regions where evening warmth is welcome
In the South and Southwest, brutal late-day heat and glare; pavers stay hot after dark
East facing
Bright morning sun, shade from around noon
Hot climates - often the most comfortable evening patio in the Sun Belt
Can stay damp and grow algae in humid or northern areas
North facing
Little direct sun, especially in winter
Desert and Deep South yards wanting a cool retreat; shade gardens
Moss, algae and slow drying up north; ice lingers in winter
Morning people
East or southeast
Best for breakfast outside and yard work before the heat builds
Expect shade from about lunchtime on
Plan for slower drying in damp climates - texture and good slope matter more here
Evening people (cooler regions)
West or southwest
Best for after-work dinners in the North, Midwest and Pacific Northwest
Expect the last sun of the day and warm pavers underfoot after dark
Plan for glare through the patio door and some shelter from prevailing wind
Evening people (hot regions)
East side, or shaded west
Best for the Southeast, Gulf Coast, Texas and the desert Southwest
Expect the house itself to shade the patio by late afternoon on the east side
Plan for a shade structure or tree if the only spot faces west, and light-colored pavers that stay cooler
Shade all day
North side, or under big trees
Best for a cool spot in a hot climate, a side-yard utility area or a shade garden
Expect algae, moss and slow drying, plus lingering ice in snowy regions
Plan for textured pavers, a good slope and a yearly clean - see Maintenance
Big trees change the job. A patio under a mature oak or maple gets lovely shade, along
with acorns, sap, bird droppings, honeydew from aphids and a carpet of leaves every fall. That is
no reason to avoid the spot, but choose a surface that cleans easily, keep excavation away from
the main roots, and expect to sweep or blow it often in fall.
Decision two
How big does a patio really need to be?
Work it out from the furniture and the space to move around it, not from a round number like
"10 by 10". A 100 sq ft patio is about the size of a small bedroom, and it fills up fast once a
table, chairs and a grill are on it.
The method is simple. Start with the footprint of the table or seating you plan to use, add room
to slide a chair back and stand up, then add a walking route along at least two sides. That is the
minimum. Then add a bit more, because almost everyone guesses small.
Working sizes for common patio furniture. Measure your own pieces - these are typical, not universal. Comfortable sizes assume you can walk around at least two sides.
What goes on it
Typical furniture footprint
Bare minimum
Comfortable
Notes
Bistro set, two chairs
30 in round table
8 × 8 ft
10 × 10 ft
Fits a small landing or city courtyard
Four-seat round table
36-42 in round
10 × 10 ft
12 × 12 ft
Round tables use a square patio more efficiently than rectangles
Six-seat rectangular dining set
about 6 × 3 ft
12 × 10 ft
14 × 12 ft
The most common family setup
Eight-seat rectangular dining set
about 7½ × 3½ ft
14 × 10 ft
16 × 12 ft
Check that your paver size divides neatly into it
Sectional or conversation set
about 8 × 8 ft
12 × 12 ft
15 × 13 ft
Deep seating needs more space in front than a dining chair
Dining set plus a grill
-
add 4 ft of depth
add 5 ft of depth
Give the cook a clear zone; don't squeeze the grill behind chairs
Fire pit with four chairs
3-4 ft pit
12 ft circle
14-16 ft circle
Allow roughly 7 ft from the fire's center to the back of the chairs; check local burn rules
Two loungers side by side
about 6½ × 5 ft
10 × 8 ft
12 × 10 ft
Loungers chase the sun, so this zone can sit apart from the house
Turn your measurements into pavers
Once you have a length and width, the free PlantMapper calculator gives you the square footage
and the number of pavers or slabs, with extra for cuts and breakage.
Beyond the furniture, the patio has to look right in the yard. Designers often use two rough
guides. A main patio of about a quarter to a third of the open backyard usually feels generous
without looking like a parking pad. And a patio against a two-story house that is much shallower
than about 10 ft tends to feel like a hallway rather than an outdoor room.
If the numbers say the patio wants to be bigger than the yard can spare, split it: a modest
landing by the door and a second seating area elsewhere, linked by a walkway. Two well-sized spaces
beat one that eats the whole lawn.
Dining, lounging, grilling
Planning around the furniture you will actually use
Draw the furniture on the plan at true scale. Not a box labeled "table" - the real table, the
real chairs, and the space a person takes up getting out of one.
Pushing a chair back
Allow 30 in at the very least
About 30 in behind a chair lets someone sit down and get up. It does not let anyone walk past
while they do.
36-42 in is the target on a dining patio
Under 24 in and chair legs drop off the edge into the grass or mulch
Check the ends as well as the sides - end chairs are the ones that get squeezed
The dining zone
Flat, smooth, near the kitchen
A dining table is the one thing on a patio that really hates an uneven surface. Rough
flagstone or tumbled pavers with deep texture leave glasses wobbling.
Put the smoothest surface under the table if you are mixing materials
Keep one steady slope under the table area instead of changing direction beneath it
Think about the route from the kitchen - nobody wants to carry a tray down steps
The lounge zone
Where it is comfortable at 6 p.m.
Lounge seating gets used later in the day and for longer stretches. It works best a little
apart from the main walkway.
Back it against something - a wall, a hedge, a planter. People don't relax out in the open
Allow 18-24 in between the front of a sofa and a coffee table
Consider a second patio if the dining area is already busy
Grills and outdoor kitchens
A real work zone, not an afterthought
A grill or smoker needs somewhere to stand, landing space for platters, and clearance from
anything that can burn, melt or stain.
Follow the manufacturer's clearances from siding, railings and overhangs - often 2 to 3 ft or more, and many apartment and condo rules restrict grills
Expect grease stains - light, porous pavers or concrete under a grill are a gamble; a grill mat helps
Plan gas lines and outlets early; natural gas, built-in kitchens and new wiring usually need permits
Never place the grill where the cook has their back to the main walkway
The part people forget
Walkways: getting around the furniture
A patio is an outdoor room with traffic running through it. If the only route to the shed or the
side gate is between the table and the wall, that gap needs to be a real width, not whatever is
left over.
Route
Bare minimum
Comfortable
Why
Walking behind seated guests
24 in
36 in
Under 2 ft, everyone has to scoot in
Main route across the patio
36 in
48 in
4 ft lets two people pass, or one carry a loaded tray
Wheelbarrow, mower or trash can route
36 in
42-48 in
Measure your mower and the wheeled trash cans
Wheelchair or stroller route
36 in
48 in
A 5 ft turning circle is the usual accessible target - plan it properly
Door swing
the full swing
swing + 12 in
Check French doors and screen doors against furniture and planters
Walk the plan, don't just draw it. Mark the outline on the lawn with marking paint or a
garden hose, set your real patio furniture out on it, and live with it for a weekend. Every tight
spot will make itself known within ten minutes.
Where it meets the house
The patio and the house: doors, steps and grading
This is the part of planning with real consequences for the house itself. Where a patio meets
the foundation, the height and slope of the surface matter as much as how it looks.
Keep water and paving away from the siding and the foundation
A patio is a big hard surface sitting right against your foundation. If it is built too high or
tilted the wrong way, it sends rain toward the house, soaks the bottom of the siding and can end
up as a wet basement or crawl space. Two rules matter most: slope away, and stay low.
Slope the patio away from the house about 1/8 to 1/4 in per foot - roughly 1 1/4 to
2 1/2 in of drop across a 10 ft deep patio.
Keep the finished surface below the door threshold - commonly a step of about 4 to
7 1/2 in, depending on your local code - and several inches below the bottom of wood siding,
trim or stucco weep screeds so they can dry out. Many siding makers and codes ask for around
6 in of clearance to soil and a couple of inches to paving; check your siding and your local
building department.
If the existing ground is already too high, solve it with design rather than ignoring
it: lower the whole patio and add a step, add a trench drain along the house, or leave a strip
of gravel against the foundation.
A flush, no-step threshold is possible and is what accessible design aims for, but it
needs a trench drain right outside the door and a door rated for it. Have a contractor who does
these regularly design and install it.
Don't simply pave over an old slab that already sits close to the threshold - pavers
and sand add another 2 to 3 in or more.
If the levels look tight, have a contractor or a home inspector look before work starts. It is a
short visit that can save a foundation repair.
Doors, steps and what sits where
Outswing doors and storm doors need their full swing clear of furniture, planters and steps.
Sliding and folding glass doors look best when the patio feels like an extension of
the floor inside, which makes the slope and any trench drain more important, not less.
Where a step is needed, make it a full, obvious step with a landing in front of the
door, not a 2 in lip that people catch a toe on. Stairs from a door to a patio may fall under
your local building code, so check rise, landing size and railing rules.
Dryer vents, foundation vents and crawl space vents must stay clear. Never pave over them.
Downspouts, cleanouts, sprinkler valves and meter boxes need to stay reachable. Plan
downspout extensions or underground drain lines before the patio covers the ground.
Which way the slope runs
A patio next to a house always slopes away from it. That is not a style choice: water
pointed at a foundation is the fastest route to a wet basement. Aim for 1/8 to 1/4 in per foot, and
where the yard won't allow that, catch the water with a trench drain and pipe it to daylight or a
dry well. Patio Drainage covers this in full, and it is worth reading
before the design is locked in rather than afterward.
Up and down
Grading, steps and sloping yards
Few backyards are truly flat. How you handle the slope is one of the biggest drivers of cost,
and it is also what separates a patio that looks designed from one that looks squeezed in.
Gentle slope away from the house
The easy case
Usually solved by working with the natural grade and building the drainage slope into it
Watch where the patio meets the lawn - a lip here traps water and scalps the mower
Cost impact minimal
Yard slopes toward the house
Needs a plan, not a guess
The patio must still slope away from the house, so the uphill water has to be caught and sent somewhere
Typically needs a swale or French drain uphill and a trench drain at the low point, piped to daylight
Cost impact moderate - and worth a professional opinion
Side-to-side slope
Common on subdivision lots
Options are to follow the slope, or cut and fill to make one level patio
Cut and fill means retaining something on the low side, even if it is only a low seat wall
Cost impact moderate
Steep or hillside lots
Pro territory
Retaining walls over about 2 to 3 ft hold back serious loads, especially when the soil behind is saturated
Many jurisdictions require a permit and engineering for walls over about 3 to 4 ft (sometimes less, or less when there is a slope or driveway above) - check locally
Cost impact significant - often more than the patio itself
Steps nobody trips on
Outdoor steps work best a little lower and deeper than indoor stairs. Comfortable landscape steps
are typically around 5 to 6 in high with treads of 14 in or more. Two rules matter more than the
exact numbers: every step the same, and every step easy to see.
Every riser in a flight must match. The one odd step is the one people fall on.
A single isolated step is the most dangerous kind - mark it with a change of
material, planting at the edge or a step light.
Give treads a slight slope so water runs off instead of freezing on them in cold regions.
Choose a textured, non-slip surface for treads, especially in shade or where ice forms.
See slip resistance.
Where a drop beside steps or a raised patio is around 30 in or more, building codes
commonly require a guardrail, and stairs with four or more risers often need a handrail. Check
your local code.
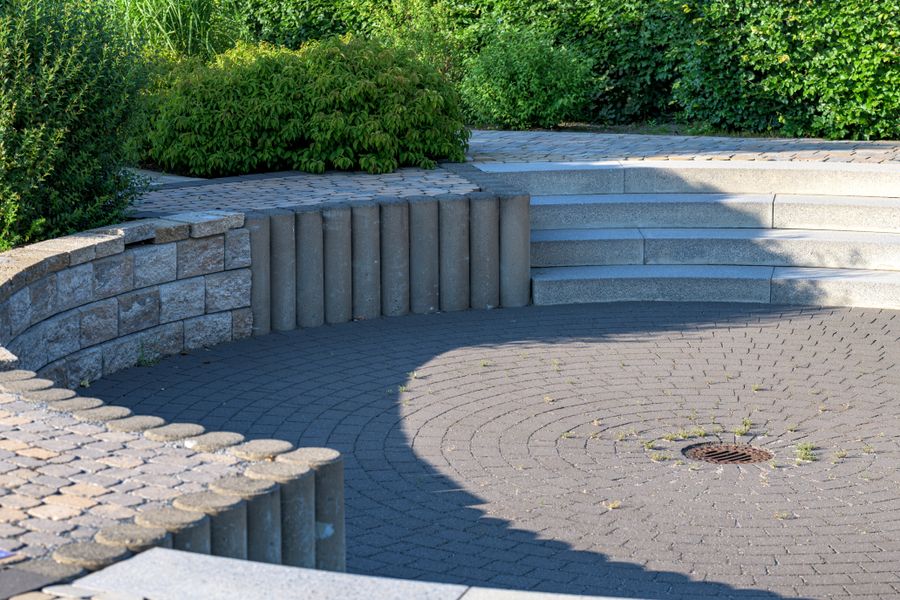
Changing level on purpose turns a slope from a problem into a featureA sunken seating area gives instant shelter and a sense of enclosureFrom an upstairs window, the outline of the patio is the outline of the yard
The edges
Where the patio meets the lawn, beds and walkways
The edges decide whether a patio looks built in or dropped in. They are also where most of the
practical headaches show up.
Meeting a lawn
Aim for a mowing strip
The tidy detail is to finish the patio a fraction below the soil line of the lawn so
a mower wheel can roll straight along it.
Pavers sitting proud of the lawn mean string-trimming every edge forever
Flush with, or about 1/2 in below, the soil line gives a clean cut in one pass
Remember the slope - runoff from the patio lands here, so this edge must not act as a dam
Meeting a flower bed
The most forgiving edge
Planting along the patio hides small flaws, softens the line and makes brand-new pavers look
settled within one growing season.
Keep soil and mulch below the paver surface so they don't wash across in a downpour
Let a few plants spill over the edge - the quickest way to lose the brand-new look
Use Plant Finder to choose plants for your light, soil and zone
Meeting gravel
Needs a solid edge
Gravel wanders. Without an edge it ends up on the patio, in the lawn and thrown by the mower.
Use landscape edging, a paver border or a timber set slightly above the gravel
Keep gravel about 3/4 to 1 in below the top of the edging
A walkway in the patio material reads as part of one space. A walkway in something different
reads as a trip to somewhere else. Both work; something halfway between does not.
Line up the joints where a walkway leaves a patio in the same paver
Match the slope so water isn't steered into a dead end
Be honest about width - 3 ft minimum for a route you use every day, 4 ft for two people side by side
Being able to relax
Privacy, shelter and the view from inside
A patio in full view of three neighbors' decks and windows won't get used, however well it is
built. On tight suburban lots, privacy is a planning decision, not something to fix with a few
potted plants later.
✓What works
Screening close to the seats, not at the property line. A 6 ft trellis or slatted screen
a few feet from where you sit blocks far more than a fence at the back of the lot.
Something overhead. A pergola, shade sail or small tree cuts the view from a
neighbor's second-story window, which is usually the real problem.
Layered planting. A tall shrub, a mid-height grass and something low in front reads
as a garden, not a barricade. Natives such as serviceberry, inkberry holly, eastern red cedar
and switchgrass do this well in many regions.
A solid backdrop behind the seating. People settle in when something has their back.
!What disappoints
Raising the fence. Expensive, often limited to about 6 ft in back yards by local
zoning or HOA rules, and it rarely blocks an upstairs window.
One specimen tree in the middle. It shades the table and hides nothing.
A fast-growing screen of a single plant. Leyland cypress and similar quick screens keep
growing, cast heavy shade and are prone to disease, and a monoculture can fail all at once.
Bamboo spreads to neighbors. Mix species instead.
Solid screens on a windy site. Wind tumbles over them; a screen with gaps is calmer.
Look at it from indoors too. You will see the patio through the kitchen window for far more hours
of the year than you will sit on it. Make the shape look deliberate from inside, and think about the
view in January when the cushions are stored - evergreen shrubs, a well-placed planter or a paver
color you like earn their keep then, especially in snowy regions where the patio may sit under white
for months.
For plants that screen without taking over, see
Plants for Screening; for a patio framed mostly by containers,
Plants for Pots is the place to start.
Drawing it
Shape, angle and paver size
Once the size and location are settled, the shape is mostly about how the patio lines up with
the house and the yard - and how many cuts you are willing to pay for.
Square to the house
Calm and classic
Reads as an extension of the house
Easiest to lay out and the least wasteful to build
Risk it can exaggerate a long, narrow lot
Turned 45°
Makes a narrow yard feel wider
Reads as deliberate and lively
Pulls the eye along the diagonal, the longest line in any rectangular yard
Cost more cuts, more waste, more labor
Round or curved
Softens a boxy lot
Works best with small pavers or a circle kit - great around a fire pit
Large-format pavers and porcelain curve poorly and expensively
Cost high in cuts unless you use a purpose-made kit, or pour concrete
Offset or L-shaped
Fits real yards
Handy for wrapping a corner of the house or skirting a tree or utility box
Separates dining from lounging without building two patios
Cost moderate; keep the corners square to cut down on cutting
Design to the paver size and save real money. If your pavers are 12 × 12 in, a
patio exactly 14 ft wide takes 14 whole pavers across; make it 14 ft 3 in and you add a row of
skinny cuts down the entire length. Those 3 extra inches cost a day of saw work and a pile of
offcuts. Pick the paver first, then nudge the dimensions so whole units land at the edges.
Rules and neighbors
Permits, HOA rules, property lines and what to check
Many simple ground-level patios need no permit at all. But rules vary a lot from one city or
county to the next, and the exceptions are much cheaper to find now than after the pavers are down.
Check these before you commit
Building permits. Many jurisdictions don't require a permit for an at-grade patio,
but often do for raised patios, retaining walls above a set height, attached patio covers and
pergolas, outdoor kitchens, and any new electrical, gas or plumbing. Some also want a permit or
a zoning review for any new hardscape. Call your building department - it is free and quick.
Lot coverage and impervious surface limits. Some cities cap how much of a lot can be
paved, or require stormwater management for new hard surfaces. Permeable pavers or gravel can
help where these limits apply.
Setbacks and easements. Zoning may require hardscape, walls or structures to sit a set
distance from the property line. Utility and drainage easements often can't be built over, or the
utility can tear your patio up without paying to replace it. Check your plat or survey.
HOA rules. Many homeowners associations require approval of patio size, location,
materials and colors, fire pits and pergolas before work starts. Get approval in writing.
Where the water goes. Directing runoff onto a neighbor's property can create legal
trouble, and many places don't allow yard drainage to be connected to the sanitary sewer. Keep
it on your own lot or route it the way your city allows.
Trees. Some cities protect large or heritage trees, including their roots, and digging
close to the trunk can kill a mature tree even where it is legal. Keep excavation outside the
drip line where you can.
Fire pits and grills. Local fire codes, burn bans and HOA rules can limit wood-burning
fire pits and set distances from the house and fences.
Codes and HOA rules differ by state, county and city, and they change. Check with your local
building department and HOA before you build - this page is general guidance, not legal advice.
Practicalities
Practical checks before work begins
What turns a straightforward patio into an expensive one is almost always logistics, and almost
all of it can be found out in advance.
Call 811 and find out what is underground
Call 811 (or use your state's online request) a few business days before any digging. It is
free, and the utilities will mark gas, electric, water, cable and phone lines with paint or flags.
They won't mark private lines you own - the run to a detached garage, a gas line to a grill,
irrigation, a septic system or a buried downspout drain - so check those yourself or hire a
private locator. Never assume a buried line is dead.
Work out access
Pavers and gravel are heavy and arrive by the pallet and the dump-truck load. Can a skid steer
or a pallet jack get to the backyard through a side gate, and how wide is it? Will the delivery
truck block the street, and can it drop on the driveway without cracking it? Tight access is the
biggest hidden cost in residential hardscaping.
Plan where the dirt goes
Digging out a patio produces a surprising pile of soil and sod. A 300 sq ft patio excavated
about 8 in deep is roughly 7 to 8 cubic yards of material. Decide now whether it goes in a
dumpster, gets hauled away, or is reused to build up a bed elsewhere in the yard.
Check the ground you are building on
Dig a test hole, ideally after a good rain. Heavy clay that stays soggy, fill full of
construction debris, a high water table or expansive clay soils (common in Texas, Colorado and
parts of the Southwest) all change the base you need. So does how deep frost goes in your area -
northern patios generally need a thicker gravel base than ones in the frost-free South.
Get a sample, not a photo
Pavers and stone look completely different wet, dry, in sun and in shade, and online photos are
not reliable. Bring home a few samples from the stone yard or home improvement store, set them
outside against the house, and look at them on a dull day and after rain.
Decide who is doing the work
Be honest about the scale. A 250 sq ft paver patio means moving several tons of gravel by
wheelbarrow, running a plate compactor, screeding sand to a steady slope and cutting pavers with a
saw. Plenty of homeowners do it well themselves - but grading against the house, retaining walls,
stamped concrete and anything beyond simple drainage are where a pro earns the fee.
Get at least three quotes and compare like with like
A bid far below the others is usually cheaper somewhere you can't see: a thinner gravel base,
no compaction in layers, no edge restraint, or nowhere for the water to go. Ask every contractor to
state the excavation depth, the base material and compacted depth, the bedding, the joint sand,
the edging and the drainage plan. Check licensing and insurance where your state requires it.
Pick your season
Build when the ground isn't frozen or soaked. Concrete, mortar and polymeric sand all have
temperature and weather limits printed on the bag, so avoid freezing nights and days of rain
while they cure. In northern states that means roughly spring to fall; in the South and
Southwest, fall and early spring are often kinder than the peak of summer.
As an Amazon Associate, PlantMapper may earn from qualifying purchases. Prices and availability are set by Amazon. PlantMapper only lists items that genuinely help with the job on this page. Always check that a product suits your project before buying.
Money
Where the money actually goes
Prices swing widely by region, material and site, so treat any per-square-foot number as a rough
starting point. As a very rough guide for professionally installed patios: plain poured concrete
often runs around $6 to $15 per sq ft, concrete pavers around $15 to $30, stamped concrete around
$12 to $25, and natural flagstone or porcelain around $20 to $40 or more. Doing it yourself saves the
labor, which is often half the bill. What doesn't change is the shape of the budget, and
knowing it makes quotes much easier to read.
What drives the cost of a patio. Real prices depend on your region, the materials, access, quantities and the condition of the site.
Element
Typical share of the job
What pushes it up or down
Surface material
Large
Pavers vs. flagstone vs. porcelain vs. concrete, thickness, color, finish and shipping distance
Depth, soil type, roots and rock, dumpster or haul-away, whether dirt can stay on site
Gravel base and bedding sand
Moderate
Base depth (deeper in frost country), aggregate prices, delivery distance
Drainage
Highly variable
A slope onto the lawn costs almost nothing; a trench drain piped to a dry well is a project of its own
Joint sand and sealing
Small but not trivial
Polymeric sand costs more than plain sand but resists washout, weeds and ants
Edging, steps and retaining walls
Can dominate
Any wall that needs a permit or engineering changes the whole project
Extras
Easy to forget
Conduit for landscape lighting, an outdoor GFCI outlet, a gas line, a hose bib, permits, and topsoil and sod to repair the edges
Spend down, not out. If the budget is tight, the right move is a smaller patio in decent
material on a proper gravel base - not a big one in cheap pavers on 2 in of gravel. The base is the
one part you can never upgrade later without pulling everything up.
Budget the planting around it too
Beds around a new patio are what make it look finished. Use the free PlantMapper flower bed
cost calculator to set money aside for plants before the hardscape eats the budget.
Each one is free to avoid at the planning stage and costly to fix afterward.
1. Building it too small
The most common by far. A patio looks huge spray-painted on the lawn and cramped once the table,
the grill and a few planters move in.
The fixSet your real furniture out on the marked area before you sign anything.
2. Following the back door instead of the sun and shade
A patio placed only for convenience can sit in deep shade all year up north, or roast all
afternoon in the South.
The fixSpend one day tracking sun and shade at the hours you would actually use it.
3. Ignoring where the water goes
A patio replaces lawn that soaked up rain with a hard lid. If nobody decides where the runoff
goes, it decides for itself - usually toward the foundation or into the neighbor's yard.
The fixSettle drainage before the design is final. See Patio Drainage.
4. Building up against the house
Raising the patio to meet the door threshold, or burying the bottom of the siding, is the
classic route to rot and a damp basement.
The fixKeep the patio a step below the door and sloping away, or have a trench drain detail designed.
5. Choosing pavers from a photo
Screen color, the wet-versus-dry look and the real texture all differ from the picture.
The fixGet samples, look at them outdoors, wet them and see them on a cloudy day.
6. Forgetting the walkways
The patio works perfectly until someone needs the shed, the gate or the trash cans, and the
only way past is between the table and the wall.
The fixDraw every route you use, including the mower and trash cans, before finalizing the shape.
7. Picking a size that fights the pavers
A few extra inches of width can add a row of cuts down the whole patio.
The fixChoose the paver first, then tune the dimensions to it.
8. Skimping on the base to afford nicer pavers
Beautiful pavers on a thin, poorly compacted base still heave and sink - they just cost more doing it.
The fixShrink the patio or choose a cheaper surface, never a thinner base.
9. Not thinking about winter or the weather extremes
Smooth, shaded pavers turn treacherous with ice up north, and dark surfaces get too hot for
bare feet in a Southern summer.
The fixChoose textured surfaces where there is shade or a step, and lighter colors in hot sun. See slip resistance.
10. Not running conduit first
Landscape lighting, an outlet, a gas line for the grill and irrigation all cost very little to
sleeve under the patio while the ground is open - and a fortune afterward.
The fixLay empty PVC sleeves under the base even if you aren't installing anything yet.
Before you commit
The patio planning checklist
Run through this before you order materials or sign a contract. It checks itself off as you go
and remembers where you left off.
Location and sun
Size and layout
Grading and water
Practicalities
Planning questions
Patio planning: frequently asked questions
The questions that come up most at the planning stage. The full
Patio FAQs page also covers materials, building, drainage and upkeep.
How big should a patio be for a six-person table?
Most six-seat rectangular tables are around 6 ft long and 3 ft wide. Give each long side about 3 ft for pulled-out chairs and the person standing up, and each end 2 1/2 to 3 ft, and the bare minimum comes out near 12 x 10 ft. A patio of about 14 x 12 ft lets people walk behind seated guests without asking them to scoot in. Measure the table you actually own, because sets vary a lot.
Which direction should a patio face?
It depends on where you live. In cooler northern states a south- or west-facing patio catches the most usable sun and warmth. In hot regions such as Texas, Arizona, Florida and the Deep South, a west-facing slab takes the full force of the late-afternoon sun, so an east-facing spot, the shade of the house or a tree, or a pergola makes the patio far more usable on summer evenings. Watch the spot at the hours you would actually sit there before deciding.
Should a patio go right against the house?
Usually it is the most convenient spot, close to the kitchen and the grill, and the wall gives shelter. But it is not required, and it is a poor choice if that side bakes in full afternoon sun, sits in deep shade, is wide open to the neighbors or drops away steeply. A small landing at the door plus a bigger seating area where conditions are better often works best.
How far below the door should a patio be?
Many builders keep the finished patio surface a step down from the door threshold, often around 4 to 7 1/2 in below it, and keep paving several inches below the bottom of wood siding or trim so it does not stay wet. The patio should also slope away from the house about 1/8 to 1/4 in per foot. If levels are too tight to manage that, use a trench drain at the door or ask a contractor for a proper detail rather than simply building the patio higher. Building codes for exterior stairs and landings vary, so check locally.
Do I need a permit for a patio?
Often not for a simple ground-level paver or concrete patio, but it varies by city and county. Many jurisdictions require permits for raised patios, retaining walls over a set height, patio covers and pergolas attached to the house, new electrical or gas lines, or projects that add a lot of impervious surface, and some limit total lot coverage or setbacks from property lines. HOAs often need to approve materials and placement as well. Check with your local building department and HOA before you build, and call 811 before you dig.
How much of the backyard should the patio take up?
There is no rule. In an average suburban backyard a main patio of roughly a quarter to a third of the open area tends to look generous without swallowing the lawn. In a small city yard the patio can sensibly be most of the space, since a paved courtyard is a perfectly good design. What looks wrong is an in-between size, so either make it the main room or keep it modest and let lawn and planting lead.
Can I have a no-step patio level with the door?
Yes, and it is the goal for accessible design, but only with a trench drain right in front of the door, the paving still sloping away from the house, and a door and sill rated for it. Water driven against a flush threshold will find its way inside otherwise. Have this detail designed and installed by a contractor who builds them regularly.
How much space do you need to walk around a patio table?
About 2 ft is the bare minimum to squeeze past someone who is seated, and 3 ft is comfortable. For a main route through the patio, to a shed, a side gate or the trash cans, aim for 4 ft so two people can pass or someone can carry a loaded tray. A route for a wheelchair or stroller needs at least 3 ft clear and more room to turn, so plan it with care.
Is a raised patio a good idea on a sloped lot?
It can be the only way to get a usable level area on a sloping lot, and it gives you a view. But it turns a paving job into a structural one: retaining walls, drainage behind them, compacted fill and possibly a guardrail. Many jurisdictions require a permit and engineering for retaining walls above about 3 to 4 ft, and some for less, so check locally. A raised patio can also overlook neighbors.
Should a patio be square to the house or angled?
Square to the house is calm, easy to lay out and cheapest to build. Turning it 45 degrees can make a narrow lot feel wider by pulling the eye along the diagonal, but it means more cuts, more waste and more labor. Neither is right or wrong, so decide which look you want and get the cutting priced before committing to the angle.
How do I make a new patio look less bare?
Plant right up to the edges and let some things spill over. Low shrubs, ornamental grasses, creeping thyme and perennials such as catmint, coreopsis or native coneflowers soften hard edges within a season. Use a few large containers rather than lots of small ones and keep the color palette simple. Plant Finder will narrow choices to your light, soil and zone.
Is it cheaper to extend an old patio than replace it?
Sometimes, but it is trickier than it looks. Matching weathered pavers or old concrete is close to impossible, the existing slope dictates the new section, and a poor old base will keep moving along the seam. A new section in a deliberately different but complementary material, with a clear border between the two, usually looks better than a near miss.
Can I put pavers over an existing concrete patio?
Only if the slab is sound, not heaving or badly cracked, already slopes away from the house, and is low enough that another 1 1/2 to 3 in of pavers will not crowd the door threshold, the siding or a vent. Thin overlay pavers exist for this job. In practice those conditions are often not all met, and covering a failing slab just hides the problem for a season or two. The building guide covers when it makes sense.
When is the best time of year to build a patio?
Spring through fall in most regions, when the ground is not frozen or saturated and temperatures suit concrete and polymeric sand (most products want it above about 40 to 50 degrees F and dry for a day or more). In the hot South and Southwest, fall and early spring are often more pleasant and kinder to fresh concrete than midsummer. Good contractors book up for spring early, so get quotes over the winter.
Dimensions, slopes and depths on this page reflect common practice for ordinary residential patios in the US. Soil, frost depth, the surface you choose, loads, drainage and grading all vary, and no single specification suits every yard.
Grading against the house
Anything that affects your foundation, siding, a door threshold, vents or the drainage around the house should be checked by a contractor or home inspector before work starts.
Retaining walls
Retaining walls, raised patios and terracing hold back loads that rise sharply when the soil behind them is saturated. Taller walls often need a permit and an engineered design; check your local requirements.
Permits and HOA rules
Building codes, zoning and HOA rules vary by state, county and city and change over time. Always confirm the current requirements locally. Nothing here is legal advice.
Buried utilities
Never assume the location or condition of buried electric, gas, water, cable or drain lines. Call 811 before digging, and have private lines located where there is any doubt.
Affiliate links
Some links on this page are Amazon affiliate links. PlantMapper may earn a commission from qualifying purchases at no extra cost to you. It never affects which products we suggest. See our affiliate disclosure.