

A clean coop is the cheapest veterinary care you will ever buy
Almost every common backyard poultry problem - respiratory rattles, red mite, scaly leg, coccidiosis, worms, flies, rats, dirty eggs, sour smells - either starts in a dirty coop or gets dramatically worse in one. Cleaning is not housekeeping. It is the single most effective disease-prevention measure available to a backyard keeper, and it costs almost nothing but time.
It’s also far less work than most new keepers fear. A quick scrape every morning and a short weekly session keep a typical backyard coop properly clean, and turn the twice-yearly deep clean from a lost Saturday into about an hour. What actually wears people out is skipping the small jobs until the big one can’t wait - usually in a heat wave or a January freeze.
This guide sets out the whole system: the daily, weekly, monthly and seasonal routines; a step-by-step deep clean with realiztic timings; how to clean nest boxes, perches, feeders and drinkers properly; which disinfectants are genuinely safe around poultry and which are not; what vinegar and other natural methods can and cannot do; how cleanliness prevents mites, mold and ammonia; how to compost the waste; and the biosecurity habits that keep disease out. Because a coop in humid Florida and one in snowy Wisconsin fight different battles, there are region-by-region notes too.
Nine cleaning warnings worth acting on today
Cleaning is one of the few jobs in chicken keeping where doing it wrong can be worse than not doing it at all. These are the mistakes that actually harm birds - or keepers.
The nine that matter most
Every one of these is common, and several are still recommended in places that should know better.
!Never mix bleach and ammonia
Household bleach plus anything containing ammonia - including chicken droppings and many descalers - produces chloramine gas, which is genuinely dangerous to breathe. Never bleach a coop that has not first been cleared of droppings, and never mix cleaning products.
!Phenols and pine oil are not poultry-safe
Traditional phenolic and coal-tar disinfectants and pine-oil cleaners are toxic to birds and persist on surfaces. Only ever use a disinfectant explicitly approved for poultry housing, at the stated dilution, and rinse if the label says so.
!Dry-sweeping fills the air with dust
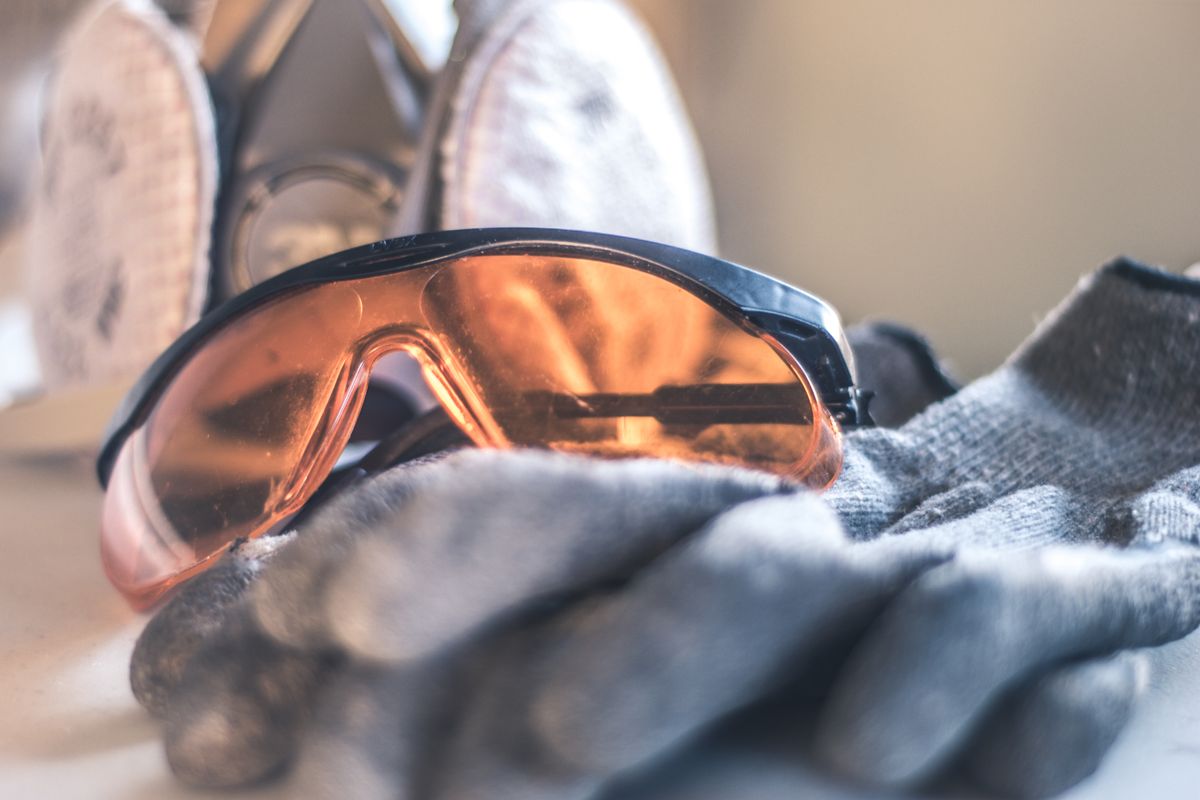
Sweeping or scraping a dry coop aerosolises dried droppings, feather dander and mold spores - the classic route to a keeper's chest infection and to Aspergillus exposure. Mist the surfaces lightly first, and wear an N95 mask.
!Never put birds back into a wet coop
Damp is the enemy the rest of the year and it is no different on cleaning day. The coop must be completely dry before bedding and birds go back in - that is usually several hours, not twenty minutes. Clean on a dry, breezy morning.
!Ammonia damage happens before you smell it
If the coop smells sharp when you open the door, the birds have been breathing far higher concentrations all night at floor level. A smell is a same-day job, not a weekend one.
!Bedding changes do not clear red mite
Red mite live in the structure - perch ends, joints, cracks, under felt - and only feed on birds at night. Removing bedding leaves the population intact. Clearing an infestation means stripping, cleaning, treating the woodwork and repeating on a cycle.
!Pressure washers do more harm than good on wood
High pressure drives water deep into lumber, blows contamination into the air, and forces mite eggs into cracks rather than removing them. On a wooden coop use hot water, a stiff brush and patience. Save the washer for plastic coops and concrete or gravel pad.
!Do not compost manure onto growing food
Fresh chicken manure is far too strong for plants and carries pathogens. It must be composted for months before it goes anywhere near edible crops, and never applied to a crop close to harvest.
!Protect yourself, every time
Poultry and their bedding can carry salmonella, campylobacter and other organisms. Gloves, an N95 mask, dedicated coop footwear and a proper hand-wash afterwards are the minimum - particularly for children, older people and anyone pregnant or immunocompromised.
Everything on this page is general guidance for keepers. It is not veterinary advice. Persistent respiratory signs, sudden losses or a flock that is unwell need a qualified poultry or avian vet - and suspected bird flu or Newcastle disease must be reported to your State Veterinarian or USDA APHIS (1-866-536-7593). Always read and follow the manufacturer’s label on any disinfectant or parasite product, and check that it is approved for use around poultry.
Cleaning a coop is four small habits, not one big day
Muck out, scrub, disinfect, re-bed. Everything on this page is a version of those four things done at different intervals - daily in seconds, weekly in minutes, and properly two to four times a year.

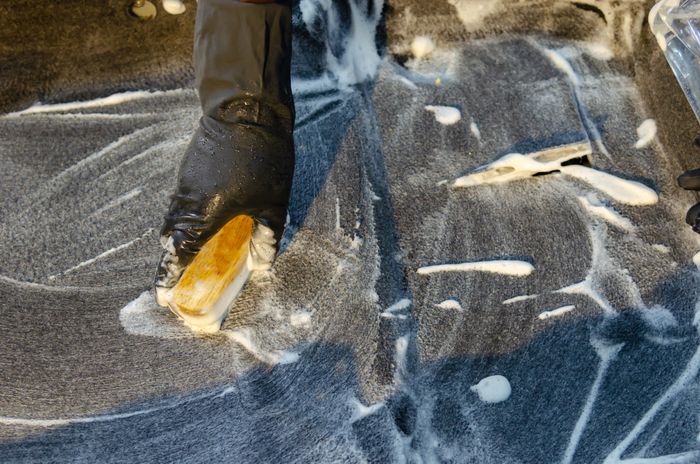


Why cleaning your chicken coop is essential
A coop concentrates everything a pathogen needs into one small, warm, enclosed space: droppings, moisture, feed, dust, feathers and a group of birds sleeping in close contact for eight to fourteen hours a night. Left alone, that environment does not stay neutral - it actively deteriorates.
Six things go wrong when cleaning slips, and they compound. Damp raises ammonia; ammonia damages the airway; a damaged airway lets minor infections take hold; sick birds produce more mess; and so it goes on. Almost every keeper who describes a “run of bad luck” with their flock is describing this cycle.
Ammonia damages the airway
The core riskBacteria break down uric acid in droppings and release ammonia, which burns the lining of the respiratory tract.
WhyThe reaction needs moisture. Wet, soiled litter left down produces ammonia continuously, and it concentrates near the floor where roosting birds breathe it all night.
SoRemoving droppings and keeping litter dry is a respiratory intervention. See Chicken Health.
Parasites live in the fabric
Very commonRed mite, northern fowl mite and lice thrive in undisturbed cracks, perch ends and seams, feeding on birds at night.
WhyA heavy red mite burden causes anemia, stops laying and can kill young or weak birds. They can survive months without a meal, so a neglected coop stays infested.
SoRegular stripping and inspection is the only thing that finds them early, while they are still easy to clear.
Coccidiosis builds up in litter
Young birdsCoccidial oocysts are shed in droppings and become infective in warm, damp litter.
WhyThey are ubiquitous and largely harmless at low levels; the disease is a dose problem. Damp, soiled litter multiplies the dose enormously.
SoDry litter and prompt removal of droppings is the main non-medical control, especially for chicks and growers.
Worm eggs are recycled underfoot
OngoingRoundworm and other parasite eggs pass out in droppings and are picked up again from the ground and litter.
WhyA bird in a dirty coop repeatedly re-infects itself and its flockmates, so worm burdens climb even after treatment.
SoCleaning breaks the cycle. Worming without cleaning is a treadmill.
Mess attracts rodents and flies
Escalates fastSpilled feed, damp litter and droppings bring rats, mice and flies within days.
WhyRats take eggs and chicks, foul feed and carry disease; flies lay in damp organic matter and can cause fly strike in warm weather.
SoCleaning is pest control. See Predator Protection for the rodent side.
Dirty nests mean dirty eggs
EverydayNest bedding is the last surface an egg touches before you collect it.
WhyWashing eggs strips the natural cuticle, which is what keeps bacteria out and moisture in, so a washed egg keeps less well than a clean one.
SoTwo minutes on the nest boxes each week saves washing eggs at all. See Bedding.
Quick tip - the doorway test. Open the coop first thing in the morning, before you let the birds out, and take one breath at head height. It should smell of dry hay and warm feathers. Anything sharp, sour or musty is the coop telling you exactly what to do that day.
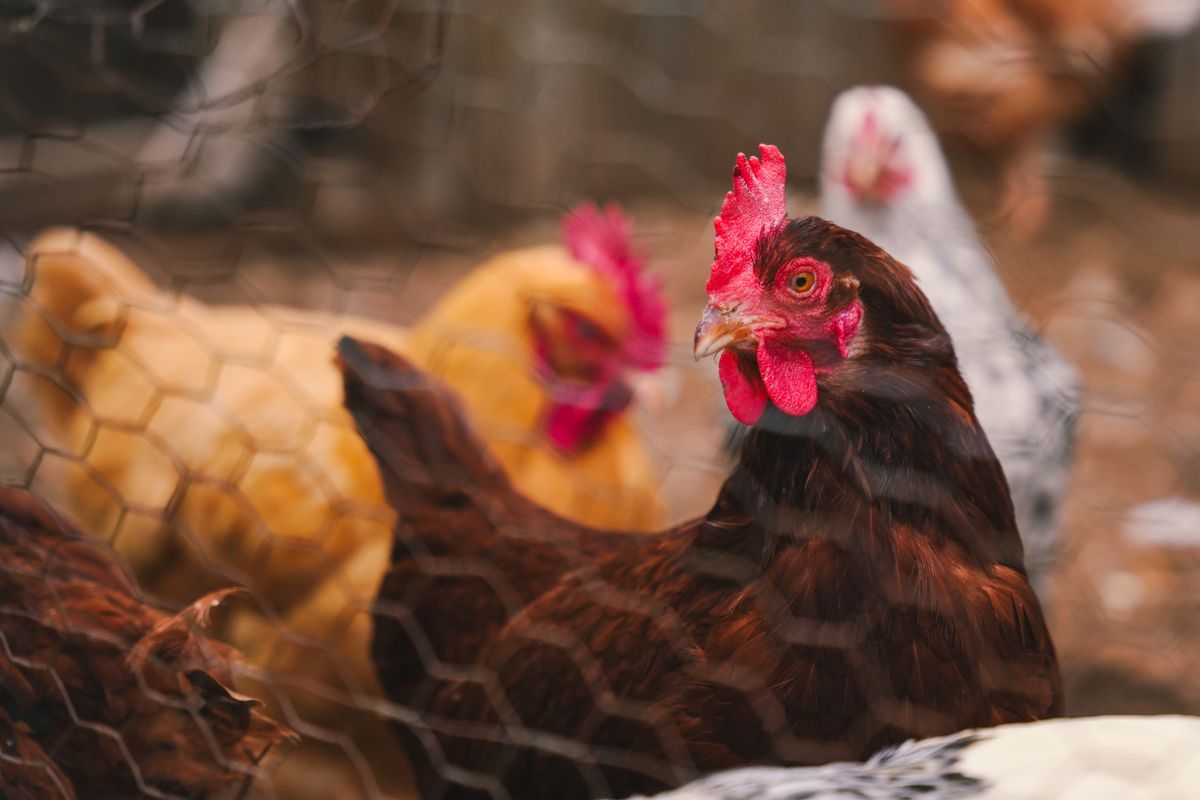
The benefits of good coop hygiene
It is worth being concrete about the payoff, because “keep it clean” is easy to nod at and easy to postpone. Here is what a properly maintained coop gives you, in the order keepers usually notice it.
Healthier birds
The main one
Fewer respiratory problems, fewer parasites, fewer digestive upsets and less vet-worthy illness overall.
- Because you remove the moisture, ammonia, dust and parasite habitat at source.
- Noticeable within two or three weeks of tightening up a slack routine.
- Do not assume medication substitutes for husbandry - it does not.
Cleaner eggs, better keeping
Immediate
Clean nests mean clean eggs, and unwashed eggs keep far longer than washed ones.
- Because washing removes the cuticle, the shell’s natural barrier.
- Fix refresh nest bedding weekly and collect eggs at least once a day.
- Avoid letting birds sleep in the nest boxes - that is what fouls them.
Far less total work
Counter-intuitive
Small, frequent jobs are dramatically less effort than occasional big ones.
- Daily two minutes with a scraper beats an hour with a shovel.
- Deep clean takes an hour on a maintained coop and half a day on a neglected one.
- Never let a job wait for “a proper session” that never comes.
No smell
Quality of life
A well-run coop does not smell, which matters for you and matters for neighbors.
- Because smell is moisture plus droppings plus poor airflow, all controllable.
- Bonus no smell means far fewer flies in summer.
- Watch complaints about smell are one of the most common reasons keepers are asked to stop.
Cheaper keeping
Adds up
Less feed wasted to rodents, less bedding used, fewer vet visits, longer-lasting coop.
- Because dry, clean lumber does not rot and clean feed is not fouled.
- Bedding lasts noticeably longer when droppings are removed daily.
- Structure a coop cleaned twice a year lasts years longer.
Real biosecurity
Underrated
A clean setup with a cleaning routine is a setup that keeps disease out.
- Because most disease arrives on boots, hands, equipment and new birds.
- Also you spot problems early, because you are looking closely every week.
- Legal keepers have duties to report reportable disease - see below.

The chicken coop cleaning kit
None of this is expensive, and having it all in one bucket by the coop door is the difference between a five-minute job and a job you keep putting off. Keep coop tools separate from garden and household tools - that is a biosecurity point, not fussiness.
A bedding fork and a stable fork
A fine-tined bedding or shavings fork lifts soiled shavings and hemp cleanly; a heavier muck fork handles straw, deep litter and run clearance.
A paint scraper and a stiff brush
A wide paint scraper takes droppings off boards and perches in seconds. A stiff-bristled brush does the scrubbing. A narrow wire brush gets into perch joints.
Two buckets
One for hot soapy water, one for rinse or disinfectant. Color-code them and never use them for anything else.
A trigger sprayer and a watering can
The sprayer is for misting surfaces before scraping and for applying disinfectant evenly; the can is for rinsing down without soaking.
Gloves, mask and dedicated footwear
Waterproof gloves, an N95 dust mask, and boots or clogs that live by the coop and never come indoors.
A wheelbarrow and a lidded can
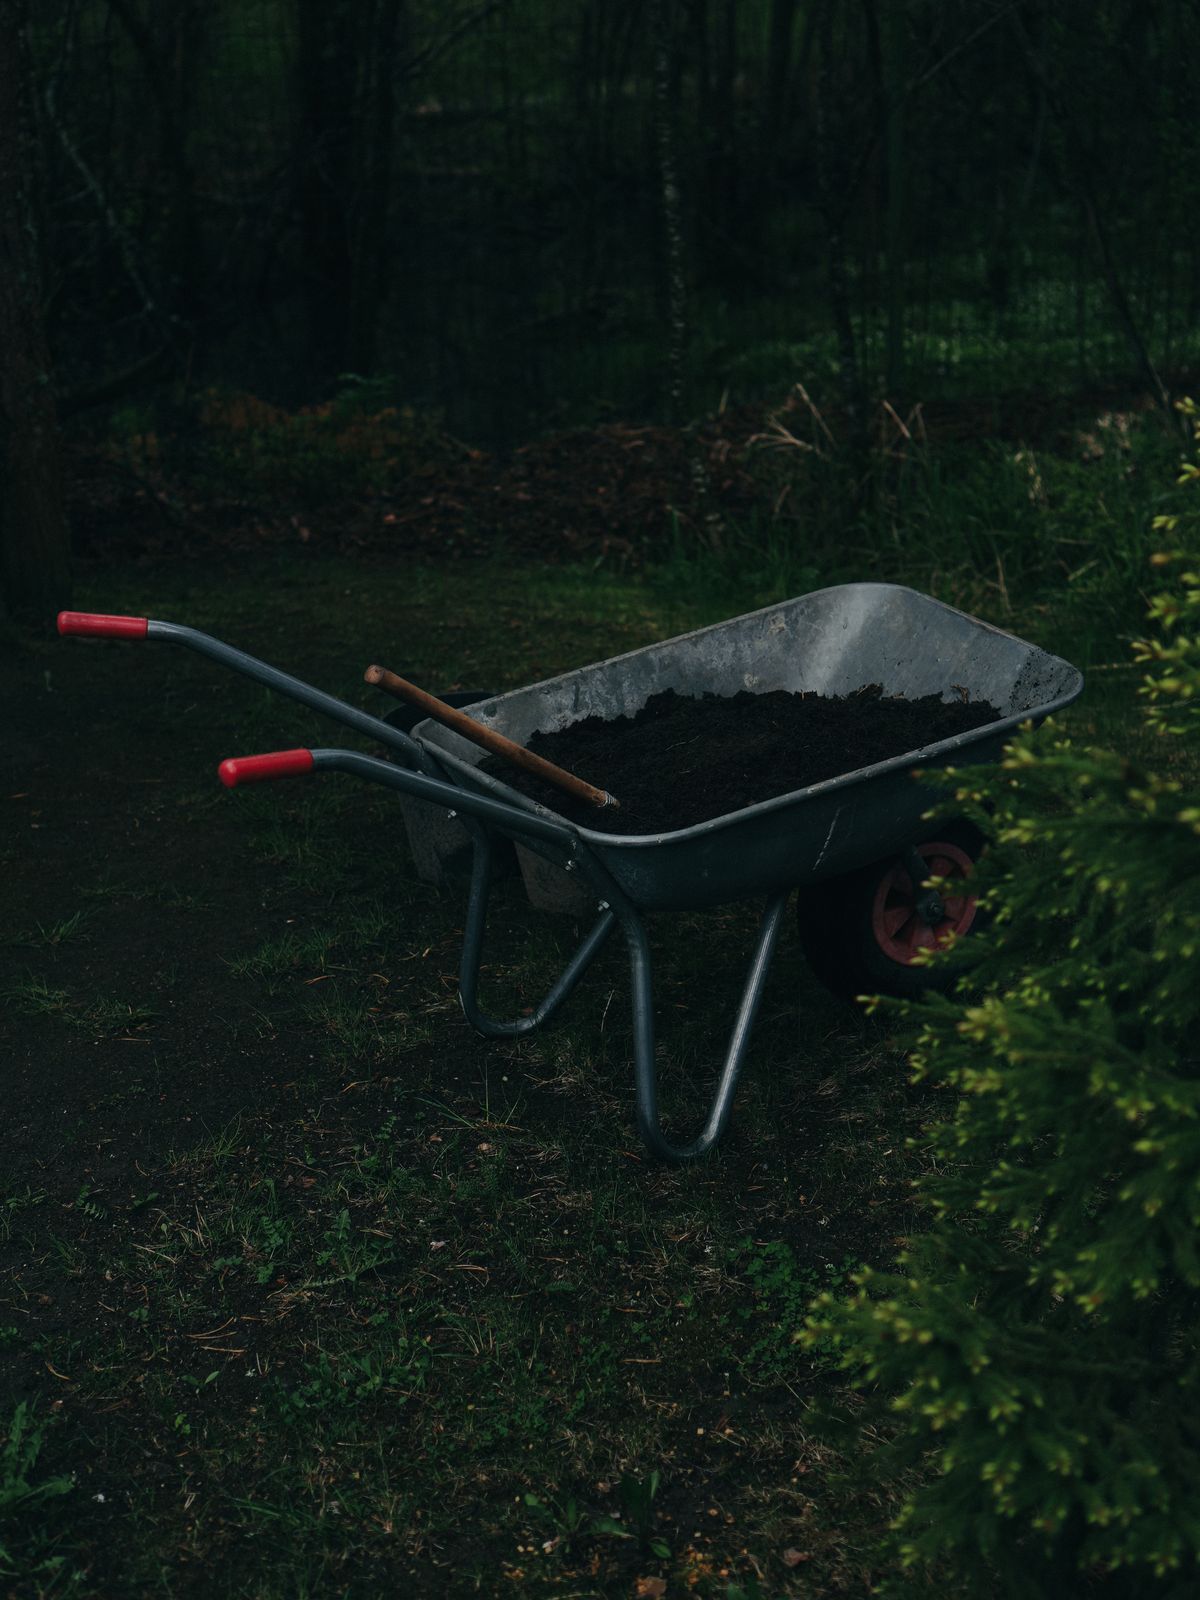
One trip to the compost pile instead of six, and a lidded metal trash can so stored bedding stays dry and rodent-free.
Cleaning kit essentials
Amazon picksAs an Amazon Associate, PlantMapper may earn from qualifying purchases. Prices and availability are set by Amazon. Always follow the manufacturer’s instructions, and introduce any new bedding or product to your flock gradually.

The daily cleaning routine
This is the routine that makes everything else easy. It is short enough to do while the coffee brews, and skipping it is what turns the weekly job into a chore and the deep clean into a half-day.
Morning, on opening up
About 90 seconds
- Scrape the droppings board - the single highest-value job in the coop.
- Lift out any wet patch of litter, especially under the perch and by the door.
- Take one breath at head height - it should smell of dry hay, nothing sharper.
- Check the drinker is clean, full and has not leaked into the bedding.
- Top up feed and clear any spillage from the floor.
- Look at every bird as they come out - posture, comb, eyes, droppings.
During the day
As you pass
- Collect eggs at least once, twice in hot or freezing weather.
- Remove any broken egg immediately, and clean the nest it was in.
- Rinse the drinker if it has gone green or has bedding floating in it.
- Rake the run briefly if it is muddy or droppings are concentrating.
- Pick up spilled feed - it is what brings rats.
- Note anything odd on the coop door list so it gets done at the weekend.
Evening, at lock-up
About 30 seconds
- Count the birds in and glance at the litter one more time.
- Lift feeders if rodents are active in your area.
- Shut and latch the pop-hole and the run gate.
- Check the nest boxes are empty of birds - sleeping in them fouls them.
- Look for fresh droppings in odd places, which can signal a sick bird.
- Leave the vents open - every night, all year.
Quick tip - fit a droppings board. A removable board, tray or sheet of vinyl flooring under the perches catches roughly 60-70% of everything the flock produces, because most droppings are made overnight in one small area. Scraping it each morning takes seconds, roughly doubles how long your bedding lasts and does more for coop air quality than any other single change.

The weekly cleaning routine
The weekly round is where you actually get ahead of problems. Pick a fixed day - most keepers use a weekend morning - and treat it as non-negotiable.
Fork the litter through
Run a fork through the whole floor to break up compaction and let air in, paying particular attention to the strip under the perches and the corners. Lift out anything dark, damp or matted rather than turning it under. Scatter a handful of scratch grain afterwards and the flock will keep it loose for you all week.Top up the bedding
Add fresh dry material wherever it has thinned, to bring the depth back to about 2-4 in - more in winter. Never add fresh bedding on top of wet: take the wet out first. Bedding covers materials and depths in full.Strip and refresh the nest boxes
Nest bedding goes out completely, not topped up. Scrape the box, check the corners for mite, and refill with 3-5 in of soft chopped straw, hemp or fine shavings, banked slightly at the edges so a hen can shape a hollow.Scrape the perches
Run the scraper along the top and both sides of every perch and check the ends and sockets with a flashlight. Perch ends are where red mite live, and a weekly look is what catches an infestation while it is still trivial to deal with.Wash feeders and drinkers properly
Not a rinse - a wash. Hot water, detergent and a bottle brush, then rinse thoroughly and let them dry. Biofilm in a drinker is invisible, slimy to the touch and a genuine bacterial reservoir.Walk the run
Rake the surface, break up any capped or muddy patches, remove droppings from around feeders and check for standing water. Top up wood chip where it has thinned. See Chicken Runs.Do the flashlight inspection
After dark, with a flashlight: perch ends, joints, under the roof felt, behind nest boxes. You are looking for red mite, which are gray when hungry and red after feeding, and for any dampness or leak that has appeared.Wipe down and restock
Wipe the windows and vents clear of dust and cobwebs, check the bedding store, and note anything that needs repairing before it becomes a job.
Quick tip - keep a wipe-clean list on the coop door. A laminated card or a chalk marker on the door, with the weekly jobs on it, is worth more than any app. It also means anyone covering for you while you are away knows exactly what “looking after the chickens” involves.

The monthly cleaning routine
The monthly job is a full bedding change plus an inspection of everything you do not normally look at. In a small flock kept on hemp or shavings with a droppings board, this is often the point at which the floor litter comes out completely.
Full bedding change
Everything out
Strip the floor completely rather than topping up, and sweep before re-bedding.
- Frequency every 2-3 weeks in summer, 4-6 in winter.
- Method mist lightly, fork out, sweep, then re-bed once dry.
- Never put fresh bedding onto a floor that is still damp.
Scrape the whole interior
Boards and joints
Perches, roosting bars, nest box lips, window ledges and the tops of framing.
- Tool a wide paint scraper, then a narrow one for joints.
- Look for mite clusters, gray ash-like deposits and egg trails.
- Do not sand or wire-brush dry - mist first.
Check the floor and the base
Underneath
Soft boards, damp corners, rot at the base of walls and anything nesting underneath.
- Probe any board that feels spongy - rot spreads fast in a wet coop.
- Raise the coop or improve drainage if the base stays damp.
- Watch for rat runs and tunnels under a coop on bare ground.
Clear the ventilation
Easily forgotten
Vents block with dust, cobwebs and feathers, and a blocked vent is a damp coop.
- Brush every vent, mesh panel and window clear.
- Check mesh is intact - a hole is a predator route.
- Never close vents to keep the coop warm.
Service the fittings
Ten minutes
Hinges, latches, pop-hole runners, automatic door and nest box lids.
- Oil anything stiff - a seized bolt is a bolt that gets left undone.
- Tighten screws that have worked loose in the framing.
- Test the automatic door by hand, especially in frost.
Deep-clean the equipment
Not just a rinse
Feeders, drinkers, grit hoppers, dust bath and any treat dispensers.
- Soak drinkers in a poultry-safe cleaner and brush the reservoir.
- Scrub feeder corners where damp meal cakes and molds.
- Replace anything cracked - cracks are impossible to disinfect.

How to deep clean a chicken coop, step by step
The full deep clean is the reset: everything out, everything scrubbed, everything treated, everything dry, everything back. On a coop that has been maintained weekly this takes about an hour for a typical backyard coop. On a neglected one, allow half a day.
Do it on a dry, breezy morning so the coop has all day to dry out. Never start a deep clean in the afternoon - birds must not go back into a damp coop at dusk.
- 0:00
Get set up and protected
Gloves on, N95 mask on, coop boots on. Buckets filled - one hot soapy, one clean rinse. Wheelbarrow and compost destination ready. Let the birds out into the run first; never deep clean around them. - 0:05
Remove everything that lifts out
Feeders, drinkers, grit hoppers, nest boxes if removable, and the perches if they lift off their brackets. Stand them outside in the open air. A coop you can empty completely is a coop you can actually clean. - 0:10
Mist, then muck out
Lightly mist the litter and surfaces with plain water first - this is the single most important step for your own lungs, because it stops dried droppings and mold spores becoming airborne. Then fork everything out into the wheelbarrow. - 0:20
Scrape every surface
Wide scraper on the floor, boards and perch tops; narrow scraper or an old chisel into joints, corners, perch sockets and under the nest box lips. Get the hard deposits off dry-ish rather than trying to dissolve them later. Sweep or vacuum the debris out. - 0:30
Wash with hot water and detergent
This is where the cleaning actually happens. Hot water, a poultry-safe detergent or coop cleaner, and a stiff brush over every surface - walls, floor, ceiling, perches, nest boxes, inside the pop-hole. Disinfectant does not work on a dirty surface, so do not skip or rush this. - 0:45
Rinse and let the water run out
Rinse down with clean water and let it drain. Tip the coop or open both doors so water is not sitting in the corners. Avoid a pressure washer on lumber - it drives water into the wood and blows contamination around. - 0:50
Apply an approved disinfectant
Only a product explicitly approved for poultry housing, mixed at the stated dilution, applied with a sprayer or watering can so it wets the surface evenly. Observe the stated contact time - usually 10-30 minutes - and rinse afterwards if the label requires it. - 1:05
Treat the structure for mite
While the coop is empty and clean is the only time this is easy. Work an approved poultry mite product into perch ends and sockets, joints, cracks, seams and under any felt or lining, following the label exactly. Repeat on the label’s cycle to catch newly hatched mites. - 1:15
Dry it completely
Doors and vents open, in a breeze if you have one. This usually takes several hours. Do not guess - put your hand flat on the floor and into a corner. If it feels cool and damp, it is not ready. - Later
Clean the equipment while the coop dries
Scrub feeders and drinkers with hot soapy water and a bottle brush, disinfect, rinse and leave them to dry in the sun. Do the same with removable perches and nest boxes. Sunlight is a genuinely useful disinfectant. - Later
Re-bed and rebuild
Once everything is dry: fresh floor bedding at the right depth for the season, fresh nest bedding banked at the edges, perches refitted, clean feeders and drinkers back in place with fresh feed and water. - Done
Compost the waste and clean yourself up
Waste to the compost pile or yard-waste cart, tools rinsed and left to dry, boots left at the coop, gloves off, hands washed thoroughly with soap. Write the date on the coop-door card so you know when the next one is due.
Deep clean safety box
Mask up, every time. The dust from a dry coop contains dried droppings, feather dander and fungal spores including Aspergillus. An N95 mask and a light misting before you start remove almost all of that risk. This matters more than any other safety point on the page.
Never mix cleaning products. Bleach plus ammonia - which includes droppings and many descalers - produces chloramine gas. Use one product at a time, rinse between, and work with the doors open.
Read the label, then follow it. Dilution, contact time and whether a rinse is needed are not suggestions. An under-diluted disinfectant is not safer, and an over-diluted one does nothing.
Birds out, and stay out until dry. No bird goes back into a coop that is damp or still smells of disinfectant. If in doubt, leave it another hour.
Wash your hands properly afterwards, keep coop footwear at the coop, and keep children away from the waste and the compost pile. Salmonella and campylobacter are the practical risks.

Cleaning nest boxes
Nest boxes are the highest-value cleaning in the coop and the most often skimped. Everything a hen sits on transfers to the egg, and a clean nest is the difference between eggs you can store for weeks and eggs you have to wash.
Strip it completely, weekly
All the old bedding out, not a top-up. Nest bedding compacts and holds moisture in a way floor litter does not, because a hen sits in the same spot for an hour at a time.Scrape and brush the box out
Corners, the lip at the front and the underside of the lid. If a hen has been sleeping in there, expect a solid deposit - scrape it rather than trying to wash it off.Check the seams for red mite
Nest boxes are a favorite harborage because they are dark, undisturbed and close to sitting birds. Look along every joint and under any lip with a flashlight.Wash and disinfect monthly
Hot soapy water and a brush, then an approved poultry disinfectant, then dry completely before re-bedding. Removable boxes can be taken outside and left in the sun.Re-bed 3-5 in deep, banked at the edges
Soft chopped straw, hemp or fine dust-extracted shavings. Bank it slightly at the sides so the hen can shape a hollow - a flat nest lets eggs roll together and crack.Deal with a broken egg immediately
Strip and clean the whole box the moment an egg breaks. Hens that taste egg learn to eat them, and egg-eating is one of the hardest habits to stop once it starts.
Quick tip - stop hens sleeping in the nest boxes. Birds that roost in a nest box foul it all night and ruin both the bedding and the eggs. The usual causes are perches set lower than the boxes, overcrowding, or red mite driving birds off the perch. Fix the cause, then block the boxes at dusk for a week to break the habit.

Cleaning perches and roosting bars
If you only inspect one thing in the coop, inspect the perches. Birds are in contact with them for the entire night, droppings concentrate underneath them, and the ends and sockets are the number one red mite harborage in backyard coops.
✓Do this
A weekly scrape and a flashlight check is ten times more useful than an occasional big effort.
- Scrape weekly the top and both sides, plus the wall bracket and socket.
- Shine a flashlight on the ends after dark - mite are gray when hungry, red after feeding.
- Use removable perches so they can be lifted out, scrubbed and dried in the sun.
- Wash and treat monthly with hot soapy water, then an approved poultry mite product.
- Keep them smooth - splinters and rough edges damage footpads and hide mite.
- Site them 12 in from any wall or mesh so nothing can reach a roosting bird.
×Avoid this
Several popular ideas make the mite problem worse rather than better.
- Do not use round metal or plastic - cold, slippery, and hard on feet in frost.
- Do not seal perches with varnish - it traps moisture and chips into hiding places.
- Do not paint over mite - painting a dirty perch simply seals eggs in.
- Do not use old pallet wood with deep cracks; you will never get it clean.
- Do not fix perches permanently if you can avoid it - removable is far easier to clean.
- Do not ignore powder or gray ash at the ends - that is mite debris, not dust.
Quick tip - the sticky-tape test. Press a strip of clear tape along the underside of a perch and its end socket after dark, then hold it up to the light. Anything that looks like moving grit is red mite. It is the quickest confirmation there is, and far more reliable than looking at the birds.

Cleaning feeders and drinkers
A drinker is warm, wet, in daylight and full of organic matter - a near-perfect bacterial culture vessel. The slippery film you can feel on the inside is biofilm, and rinsing does not remove it. This is one of the few places where cleaning has an immediate, measurable effect on bird health.
Drinkers - weekly, properly
- Empty and dismantle - take the reservoir apart if it comes apart.
- Scrub with a bottle brush in hot soapy water; you must physically break the biofilm.
- Disinfect with a poultry-approved product, then rinse thoroughly.
- Dry in the sun if you can - UV finishes the job for free.
If the inside feels slippery, it is not clean, however clear the water looks.
Feeders - weekly
- Empty completely rather than topping up over old feed.
- Brush out the corners where damp meal cakes and molds.
- Wash and dry fully before refilling - wet feed molds within a day.
- Check for cracks - a cracked feeder cannot be disinfected.
Moldy feed causes mycotoxin problems that look like a dozen other illnesses.
Siting them well
- Keep drinkers out of the coop where possible - spills wreck bedding.
- Raise both to roughly back height so litter is not scratched in.
- Shade the water in summer to slow algae growth.
- Lift feeders at night if rodents are active.
Good siting halves the cleaning and removes most of the moisture problem at source.
Nipple and cup systems
- Flush the line weekly and check every nipple actually delivers.
- Descale if you are in a hard-water area - scale harbors bacteria.
- Check cups for bedding and droppings daily.
- Insulate or drain before a hard frost. See Winter Care.
Closed systems stay far cleaner than open drinkers and are worth the switch.
Quick tip - two drinkers, alternating. Keep a spare drinker. Swap the clean one in, bring the dirty one indoors to soak, and clean it when you have a spare minute rather than standing in the rain doing it now. It sounds trivial; it is the reason some keepers manage weekly cleaning and others do not.
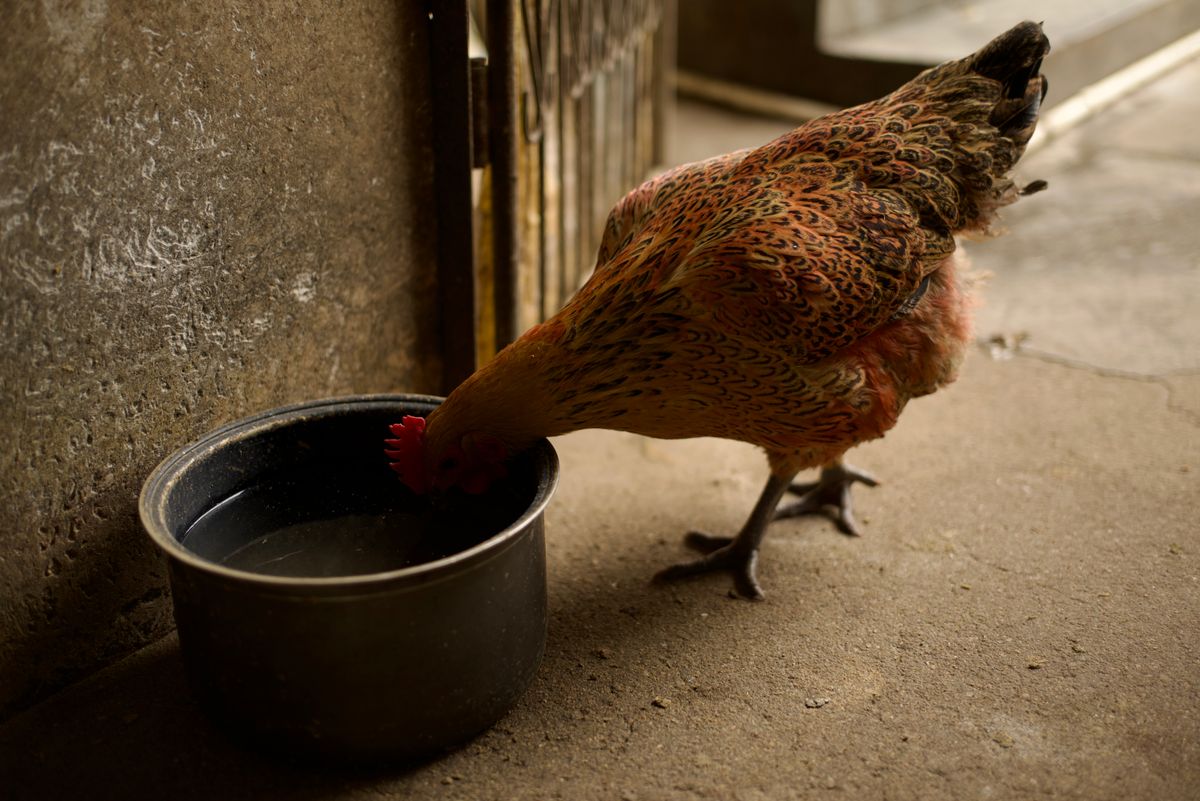

Removing old bedding correctly
Taking bedding out is the part of the job that most often makes keepers ill, and it is entirely avoidable. The hazard is not the bedding - it is what becomes airborne when you disturb it dry.
Let the birds out first
Never muck out around the flock. Dust is worse for them than it is for you, and they will scratch through exactly what you are trying to remove.Put the mask on before you open the door
An N95, fitted properly over the bridge of the nose. A surgical mask does very little against fine dust and spores.Mist the litter lightly
A trigger sprayer or a watering can rose, just enough to damp the surface. This one step removes most of the airborne dust and takes fifteen seconds.Fork rather than shovel
A fork lifts litter cleanly and drops far less. Work from the back of the coop towards the door, straight into a wheelbarrow rather than onto the floor outside.Take out the corners and under the perches properly
These are the wettest, most compacted areas and the ones people leave. If it is stuck down, scrape it - do not bury it under fresh bedding.Sweep damp, never dry
Mist again before sweeping out the fines. A dry broom on a dry floor is the single dustiest thing you can do in a coop.Wheelbarrow it straight to the pile
Do not leave a pile of soiled bedding beside the coop - it attracts flies and rodents within hours and undoes the whole job.Clean the tools and yourself
Rinse fork, scraper and wheelbarrow, leave them to dry in the open, take the boots off at the coop and wash your hands thoroughly with soap and water.
Safe poultry disinfectants
The single most important thing to understand about disinfectants is that they only work on a surface that is already clean. Organic matter - droppings, feathers, bedding dust - inactivates almost every disinfectant on the market. Scrubbing with hot water and detergent does 90% of the work; disinfectant finishes it.
The second most important thing is that “strong” is not the same as “suitable”. Birds have exceptionally sensitive airways, and several traditional farm disinfectants are actively toxic to them. Only use a product whose label states it is approved for poultry housing.
| Product type | What it is good at | Poultry-safe? | Contact time | Rinse? | Notes |
|---|---|---|---|---|---|
| EPA-registered disinfectant labeled for poultry houses | Broad-spectrum bacteria, viruses and fungi on cleaned surfaces | Yes - as labeled | 10-30 min | Per label | The default choice. Check the label states poultry housing and use the stated dilution |
| Detergent / dedicated coop cleaner | Lifting grease, droppings and biofilm - the actual cleaning | Yes | While scrubbing | Yes | Not a disinfectant. Use it first, always |
| Oxidizing products (peroxygen powders, accelerated hydrogen peroxide) | Virus and bacteria control on hard surfaces; widely used in poultry | Yes - as labeled | Per label | Per label | Mix fresh; store powder dry; wear gloves and eye protection when mixing |
| Quaternary ammonium (“quats”) | Bacteria on hard, non-porous surfaces | Only if labeled | Per label | Yes | Poorly effective on porous lumber; inactivated fast by organic matter |
| Household bleach (sodium hypochlorite) | Hard surfaces, plastic coops, footbath top-up | With great care | 10 min | Yes, thoroughly | Never mix with anything. Bleach + droppings/ammonia = chloramine gas. Ventilate fully |
| Steam / very hot water | Mite eggs in cracks, general sanitizing, no chemical residue | Yes | Direct contact | No | Excellent on perch ends and joints. Beware forcing moisture into lumber |
| Phenolic / coal-tar disinfectants | Outdoor concrete or gravel pad only | No - toxic to birds | - | - | Persists on surfaces and vapour harms birds. Keep out of the coop entirely |
| Pine oil and scented household cleaners | Nothing useful here | No | - | - | Volatile aromatics irritate avian airways in an enclosed coop |
| Creosote and old wood preservatives | Nothing - creosote is not sold for home use in the US | No | - | - | Use only preservatives sold as safe for animal housing, fully dried before birds return |
Scroll sideways on a phone. If a product does not say on the label that it is suitable for poultry housing, assume it is not.
Using disinfectant properly - the five rules
1. Clean first. Scrape, wash with detergent, rinse. Disinfectant applied to a dirty surface is wasted money and false confidence.
2. Dilute exactly as the label says. Stronger is not better - it leaves residues and can damage surfaces and birds. Weaker simply does not work.
3. Wet the surface and leave it. Contact time is what kills organisms. A quick wipe that dries in thirty seconds achieves very little.
4. Rinse if the label says rinse, and always let the coop dry completely before bedding and birds go back in.
5. One product at a time. Never mix, never layer a second product over a wet first one, and always work with the doors and vents open.
Disinfecting & scrubbing
Amazon picksAs an Amazon Associate, PlantMapper may earn from qualifying purchases. Prices and availability are set by Amazon. Always follow the manufacturer’s instructions, and introduce any new bedding or product to your flock gradually.

Natural cleaning methods - vinegar and the rest
Natural methods have a real place in a coop, particularly for routine between-clean work where you do not want chemical residues near feed and water. They also have real limits, and the internet is not always honest about where those limits are.
✓What natural methods do well
Use these confidently for routine cleaning between deep cleans.
- White vinegar (5%) excellent everyday cleaner - cuts hard-water scale, water stains and light grime.
- Vinegar in drinkers a 50:50 solution left to soak lifts scale and helps break down biofilm before scrubbing.
- Baking soda mild abrasive for scrubbing, and genuinely good at absorbing odors.
- Boiling or very hot water kills mite and eggs on contact in perch ends and joints.
- Sunlight UV is a real and free disinfectant - dry equipment outdoors whenever you can.
- Elbow grease physically removing organic matter is most of what any disinfection achieves.
×What they do not do
Be clear-eyed here - this is where flocks get let down.
- Vinegar is not a disinfectant - it will not reliably kill the viruses and bacteria that matter.
- It does not clear red mite - it may deter, it does not eradicate.
- Essential oils are not treatments - and strong aromatics irritate avian airways.
- Never mix vinegar with bleach - that combination releases chlorine gas.
- Diatomaceous earth is dusty - use sparingly if at all; it is a respiratory irritant to birds and to you.
- Natural does not mean harmless - check anything you use is safe around poultry.
Quick tip - the sensible hybrid. Most experienced keepers use both: vinegar and hot soapy water for the weekly round, where there is no residue risk near feed and water, and an approved poultry disinfectant for the two-to-four deep cleans a year and any time there has been illness in the flock. That gives you the low-residue routine and the real protection when it counts.

Preventing mites, lice and worms through cleanliness
Red mite is the parasite that defeats most backyard keepers, and it defeats them because it does not live on the birds. It lives in the coop, feeds at night and hides by day - which means every effective control measure is a cleaning measure.
| Parasite | Where it actually lives | What cleaning does |
|---|---|---|
| Red mite (Dermanyssus gallinae) | Cracks, perch ends and sockets, joints, under felt - not on the bird | Strip-out, hot water, scraping and treating the structure is the entire control program |
| Northern fowl mite | Lives on the bird, around the vent | Coop hygiene reduces reinfestation pressure; the bird itself needs treating |
| Lice | On the bird, eggs cemented to feather shafts at the vent | A dry dust bath and clean housing reduce numbers; treat birds directly for an infestation |
| Scaly leg mite | Burrows under leg scales; spreads bird to bird and via perches | Clean, smooth, treated perches cut transmission between birds |
| Roundworm & cecal worm | Eggs in droppings, picked up from litter and ground | Removing droppings breaks the re-infection cycle; rotating or resting run ground helps |
| Coccidia | Oocysts in droppings, sporulate in warm damp litter | Dry litter and prompt droppings removal is the main non-medical control |
| Flies & maggots | Lay in damp organic matter; fly strike risk on soiled birds | Removing damp bedding and droppings removes the breeding site entirely |
Scroll sideways on a phone. Every row has the same answer: remove the droppings, keep it dry, and clean the structure - not just the bedding.
Red mite - the six things that actually work
If you take one section away from this page, make it this one. Red mite ends flocks.
!Look weekly, after dark
Flashlight along perch ends, sockets, joints and under any felt. Gray when hungry, red after feeding. Weekly looking catches it while it is a ten-minute job.
!Strip and treat the structure
Bedding changes alone do nothing. Everything out, scrape, hot wash, then an approved poultry mite product worked into every crack, exactly as the label instructs.
!Repeat on the label’s cycle
Eggs hatch after treatment. A single application never clears an infestation - you must repeat at the stated interval, usually within a week or two, and then again.
!Use heat where you can
Very hot water or steam into perch ends and joints kills mites and eggs on contact and leaves no residue. It is the most under-used tool available to backyard keepers.
!Remove hiding places
Smooth lumber, sealed cracks, removable perches and no old pallet wood. Plastic coops are far easier to clear than wooden ones for exactly this reason.
!Watch the birds for the signs
Reluctance to go in at night, pale combs, drop in laying, restlessness on the perch, tiny gray specks on eggs. Any of these means look at the coop, not just the bird.
Anemia from a heavy red mite burden can kill, particularly in young, old or already unwell birds - and it can build up very quickly in warm weather. Pale combs and wattles, weakness or collapse need a vet, not just a clean. Use only parasite products labeled for poultry, follow the label exactly, and observe any egg-withdrawal period stated on it. See Chicken Health.
Mite control, bedding & refills
Amazon picksAs an Amazon Associate, PlantMapper may earn from qualifying purchases. Prices and availability are set by Amazon. Always follow the manufacturer’s instructions, and introduce any new bedding or product to your flock gradually.

Preventing mold and damp
Mold in a coop is not a cleaning failure so much as a ventilation and drainage failure that cleaning has to keep mopping up. Aspergillus spores cause aspergillosis, which is difficult to treat and frequently fatal, so this is one of the few areas where prevention genuinely is the only strategy.
Ventilate, permanently
Non-negotiable
Open vents above bird height, all year, in every season including deep winter.
- Rule draft-free at perch level, freely ventilated above it.
- Test condensation inside the coop means far too little airflow.
- Never close vents to keep birds warm - damp causes frostbite, not cold.
Find and fix every leak
Same day
Roof felt, seams, window surrounds and rain blowing in through the pop-hole.
- Check after the first real rain of fall and after every storm.
- Look for staining, soft lumber and darker patches of bedding.
- Do not try to out-bed a leak - it simply rewets.
Get the coop off the ground
Structural
A coop on wet earth wicks moisture up through the floor continuously.
- Raise on legs or blocks with clear air underneath.
- Drain the ground around it; add a gravel apron if it puddles.
- Bonus raising it also removes rodent harborage.
Keep litter genuinely dry
Daily
Damp litter is where mold gets going before it reaches the structure.
- Lift out wet patches daily rather than turning them under.
- Check under the perch and around the drinker first.
- Reject any bale that smells musty or feels warm.
Store bedding and feed dry
Often the source
Moldy material introduced into a clean coop is a common and avoidable route in.
- Store in lidded bins, off the floor, under cover.
- Smell every bale before it goes in - sweet and dry, never musty.
- Never use bedding with a white, gray or blue-green bloom.
Let the sun in
Free
Light and airflow together are what keep lumber dry and mold-free.
- Open the coop up on dry days whenever you can.
- Cut back vegetation shading and dripping onto the coop.
- Dry equipment outdoors after washing rather than indoors.
Reducing smells and ammonia build-up
A well-run coop does not smell. If yours does, the smell is information: ammonia is being produced by bacteria breaking down uric acid in droppings, and that reaction needs water. Every fix below is really a way of removing moisture, removing droppings, or moving air.
Take it seriously rather than masking it. Ammonia damages the respiratory lining at concentrations below the level at which people can smell it - so by the time you notice, the birds have been living in far worse at floor level all night.
Scrape the droppings board daily
Biggest single winRoughly 60-70% of droppings are produced overnight in the small area under the perches.
WhyRemoving them each morning removes most of the nitrogen and most of the moisture before it ever reaches the litter.
SoTwo minutes a day, and it roughly doubles how long bedding lasts.
Ventilate above bird height
AlwaysAir movement is the only thing that actually removes ammonia and water vapour.
WhyA sealed coop concentrates everything the birds breathe out and everything the litter produces, in the space where they sleep.
SoVents open all year. Draft-free at perch level, freely ventilated above.
Get water out of the coop
Easy fixDrinkers indoors spill, splash and evaporate into a small enclosed space.
WhyOne knocked-over drinker soaks the floor and produces ammonia within a day.
SoSite drinkers in the run; where they must be indoors, raise them and use cups or nipples.
Change bedding on time
ScheduledLitter has a finite capacity, and past it every extra day makes things worse quickly.
WhyDark, flattened litter that no longer rustles has stopped absorbing and started producing.
SoEvery 2-3 weeks in summer, 4-6 in winter - sooner if it smells.
Do not overstock
Often the real causeToo many birds in too small a coop produces more moisture than any bedding can absorb.
WhyEvery bird breathes out moisture all night; double the birds and you double the load on the same floor and the same vents.
SoAllow at least 4 sq ft of coop floor per standard-size hen (about 2 sq ft for bantams). See Chicken Coops.
Use absorbent bedding
Material mattersHemp, wood pellets and dust-extracted shavings hold far more moisture than straw or paper.
WhyThe more water the litter locks away from the air, the slower the bacterial reaction that produces ammonia.
SoSee Bedding for the full comparison.
Quick tip - do not use air fresheners or scented sprays. They mask the signal you actually need, and volatile aromatics are irritants to birds in an enclosed space. A coop that needs perfume needs mucking out and ventilating instead.
Safe disposal and composting of chicken manure
Chicken manure is one of the richest garden fertilizers there is - and one of the easiest to cause damage with. Fresh, it is far too high in nitrogen and will scorch roots and burn foliage, and it carries pathogens. Composted, it is superb.
The one absolute rule: never put fresh manure or bedding onto growing plants, and never onto anything edible without full composting first.
Compost bedding and droppings together
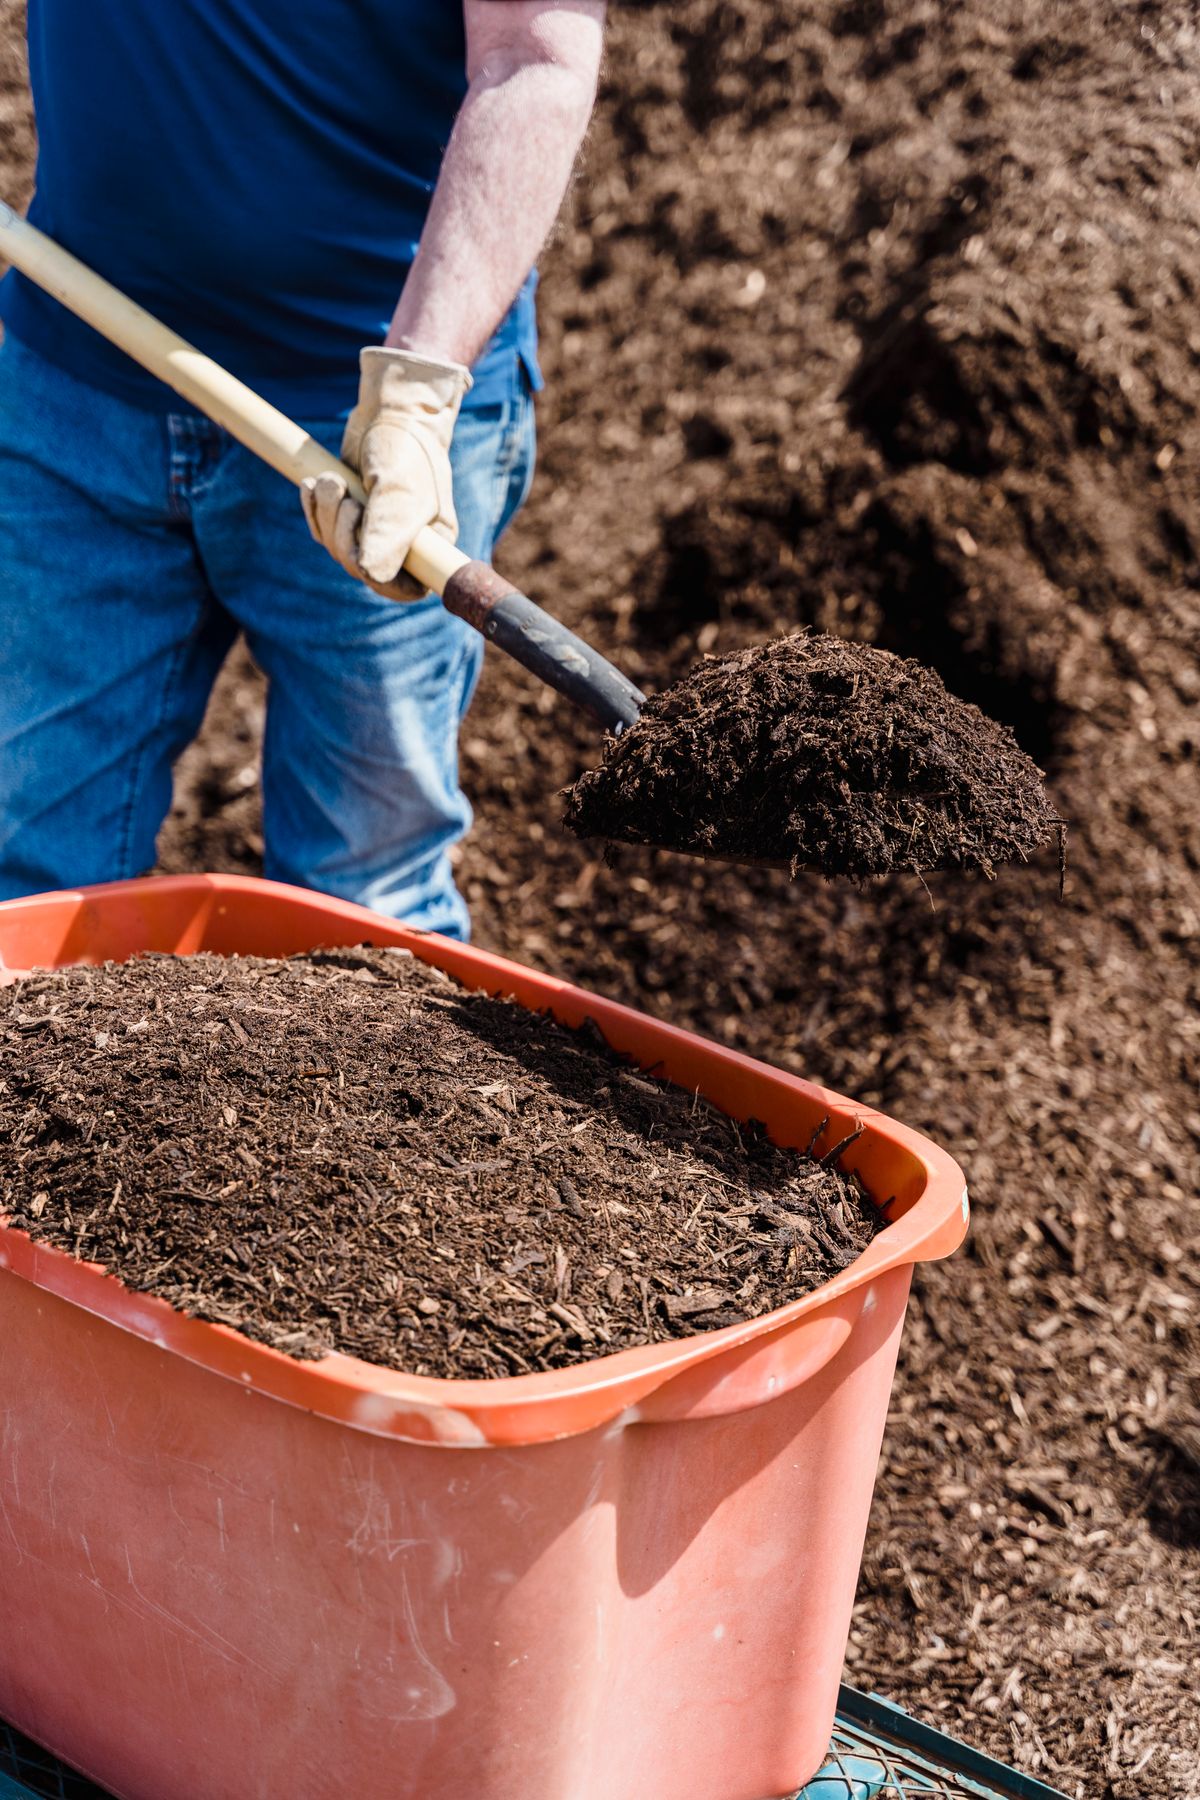
They arrive already close to the right mix - the bedding supplies carbon, the droppings supply nitrogen. A dedicated coop pile or bay is ideal because it lets you give the material the long maturing time it needs without holding up your kitchen compost.Balance it if it smells or stalls
An ammonia smell means too much nitrogen: add dry carbon - cardboard, dry leaves, more bedding. Nothing happening at all usually means too dry or too little nitrogen; water it and turn it.Keep it moist and turn it
It should feel like a wrung-out sponge. Turn every few weeks to keep air in it. A pile that heats strongly in the first two weeks is working exactly as it should, and heat is what reduces pathogens and weed seed.Give it six to twelve months
Longer than yard waste, both to break down woody bedding and to reduce pathogens. Six months is the practical minimum; nine to twelve is better. Hot composting that sustains high temperatures is faster and safer.Use it on the right things
Finished compost is excellent dug into beds and borders in fall or winter, around fruit trees and bushes, and on hungry crops such as brassicas, pumpkins and sweetcorn. Go lighter on roots, and keep it away from ericaceous plants such as blueberries.Observe the food-crop interval
For anything eaten raw, allow a clear interval of at least 90-120 days between application and harvest - the standard guidance for manure on food crops - and use only fully composted material.Handle sand and non-compostables separately
Sand does not compost: sifted droppings go on the pile, the sand itself is topped up and eventually spread as a conditioner on heavy ground. Rubber and plastic nest liners are washed and reused, never composted.If you cannot compost, dispose of it responsibly
Yard-waste programs differ from city to city, and many exclude animal bedding and manure from curbside collection. Check your city or county website rather than assuming, and never dump bedding in the woods, on public land or where it can wash into a creek or storm drain.

Seasonal cleaning advice
The core routine does not change, but what you are fighting does - and the seasons arrive at very different times across the US. Spring cleaning might be a February job in zone 9 Texas and a May job in zone 4 Minnesota, and Gulf Coast keepers fight flies and mites for half the year. Match these to your own frost dates (find your growing zone).
Spring - the big one
- Full deep clean before red mite become active as temperatures rise.
- Treat the structure for mite while the coop is empty and clean.
- Reduce bedding depth as the coop dries out from winter.
- Repair and re-treat lumber with a stain or sealer sold as safe for animal housing, fully dried.
Spring is the single most valuable clean of the year. Do it before the mite population starts, not after.
Summer - speed everything up
- Change bedding more often - every 2-3 weeks rather than 4-6.
- Check for red mite weekly - populations can explode in two weeks.
- Watch for flies and fly strike - check every bird’s vent weekly.
- Keep drinkers shaded and scrubbed - algae and biofilm grow fast in heat.
Heat plus moisture equals flies and mite. Summer is about frequency, not effort.
Fall - get ahead of the wet
- Second deep clean before the birds start spending long nights indoors.
- Fix leaks and drainage now - not mid-winter, in sleet.
- Top up the run surface with fresh coarse wood chip before it turns to mud.
- Start deep litter if you use it - on a clean, dry floor.
Everything you fix before the first frost is something you are not fixing in the dark in mid-winter.
Winter - damp is the enemy
- Scrape the board daily - birds are indoors far longer.
- Top up bedding weekly and lift out wet patches immediately.
- Keep every vent open - no exceptions, however cold.
- Clean on dry, breezy days only so the coop can dry before dusk.
Never do a wet deep clean in midwinter. Scrape, refresh and ventilate instead. See Winter Care.
Coop cleaning across the US
The routine above works everywhere, but the problem it is fighting changes with the climate. Use these notes to decide where to put the extra effort.
Northeast & Midwest
Freeze & thawBirds spend long winter days indoors, so droppings and moisture pile up just when washing is impossible.
FocusDaily droppings-board scrapes, dry bedding top-ups and open vents all winter; a full wet clean in spring.
SoPlan the big clean for the first dry, mild week after your last frost.
Southeast & Gulf Coast
HumidityLitter never fully dries, and flies, mites, mold and coccidiosis are active for most of the year.
FocusShorter bedding-change intervals, weekly mite checks, waterers scrubbed twice a week.
SoClean in the morning so the coop dries by evening, and never leave soiled bedding piled by the coop.
Texas & the Southwest
Heat & dustLow humidity helps, but dust, heat and algae in sun-warmed waterers are the daily battle.
FocusMist litter before mucking out, shade and scrub waterers often, sift sand floors daily.
SoWear an N95 mask - dry, dusty coops are the worst for your lungs.
Pacific Northwest
Long wet seasonMonths of rain mean muddy boots, wet runs and damp coops from fall to spring.
FocusFix leaks fast, roof part of the run, keep a boot tray at the coop door.
SoTime deep cleans for dry spells and let the coop dry fully before re-bedding.
Mountain West & Plains
Wind & coldDry air and bitter cold, with dust storms and big temperature swings.
FocusDry cleaning methods in winter, windbreaks that don’t block high vents, rodent checks around stored feed.
SoSave washing for warm, still days so surfaces dry before dusk.

Biosecurity and preventing disease spread
Cleaning stops problems developing inside your flock. Biosecurity stops them arriving. Most disease reaches a backyard flock on boots, hands, equipment, wild birds, rodents or - most often of all - new birds brought home without quarantine.
Quarantine every new bird
Two to four weeks, housed separately with separate equipment, and attended to last. This one habit prevents more disease than everything else on this page combined.
Keep coop footwear at the coop
Dedicated boots or clogs that never go indoors and never go to another keeper's premises. A simple disinfectant footbath, kept clean and refreshed, is worth having.
Wash hands before and after
Before, so you do not bring anything in; after, for your own sake. Keep a hand sanitizer or a soap bottle by the coop door.
Do not share equipment
Feeders, drinkers, crates and tools moving between flocks move disease with them. If you must borrow, clean and disinfect before and after.
Keep wild birds off feed and water
Wild birds are a major route for avian influenza and other disease. Feed under cover, never scatter feed in the open, and net or roof the run where you can.
Know your reporting duties
Suspected avian influenza or virulent Newcastle disease must be reported promptly to your State Veterinarian or USDA APHIS (toll-free 1-866-536-7593). Rules on poultry permits, premises registration and bird movement vary by state and city and change from time to time; check your state department of agriculture and local ordinances.
Cleaning after illness or a loss
Treat it as a full reset. Everything out, deep clean as set out above, approved disinfectant at the labeled contact time, all bedding disposed of separately from your normal compost, and equipment disinfected rather than rinsed.
Do not reuse bedding or leftover feed from a coop where birds have been unwell. It is a false economy and a straightforward route to reinfection.
Leave it empty and dry if you can. Time, dryness and sunlight are genuinely effective. Where an infection is known, follow your vet’s advice on how long to rest the housing.
Work clean to dirty. Attend to healthy birds first and any isolated or unwell birds last, with separate equipment, and change footwear and wash hands in between.
Talk to a vet before restocking after any significant illness, and quarantine incoming birds without exception.
Your chicken coop cleaning schedule
Tap through the four intervals. Everything above, compressed into the jobs that actually get done - and, more usefully, a realiztic sense of how little time each one takes.
- Scrape the droppings board - the highest-value two minutes in the coop.
- Lift out wet litter under the perch and around the drinker.
- Smell the air at head height - sharp or sour means act today.
- Check and top up feed and water and clear spilled feed.
- Collect the eggs at least once, twice in extreme weather.
- Look over every bird as they come out in the morning.
- Shut and latch up at dusk, with the vents left open.
- Fork the litter through and lift out anything dark or matted.
- Top up the bedding to the right depth for the season.
- Strip and refresh the nest boxes completely, not a top-up.
- Scrape the perches and shine a flashlight on the ends for red mite after dark.
- Wash feeders and drinkers with hot soapy water and a brush - not a rinse.
- Rake the run and clear droppings from around feeders.
- Clear vents and windows of dust and cobwebs.
- Full bedding change - strip, sweep, re-bed once dry.
- Scrape the whole interior including joints, ledges and nest box lips.
- Inspect the floor and base for damp, soft boards and rodent activity.
- Deep-clean the equipment - soak, brush and disinfect drinkers and feeders.
- Service hinges, latches and the pop-hole and oil anything stiff.
- Check the roof and felt for leaks and lifted seams.
- Refresh the dust bath with dry material.
- Full deep clean - the twelve-step routine above.
- Treat the structure for red mite while the coop is empty, then repeat on the label cycle.
- Re-treat lumber with a stain or sealer sold as safe for animal housing, fully dried.
- Reset bedding depth for the coming season.
- Overhaul the run surface - clear, top up or replace the chip.
- Review ventilation and drainage before winter.
- Record the date on the coop-door card.
The printable coop cleaning checklist
Check the boxes as you go - the page remembers your checkmarks on this device until you clear them. The print button gives you a clean one-page version for the coop door.
Every day
About two minutes
Every week
About ten minutes
Every month
About half an hour
Deep clean
Two to four times a year
Chicken coop cleaning: frequently asked questions
Tap any question to open it. These are the ones keepers ask most often about routines, disinfectants, mite, smells and what to do with the waste.
How often should I clean my chicken coop?
Daily, weekly, monthly and seasonally - but the daily job is only about two minutes. Scrape the droppings board and lift out any wet litter every day; fork the litter through, refresh the nest boxes and wash the feeders and drinkers once a week; change the bedding completely and inspect the structure every two to six weeks depending on season and flock size; and deep clean the whole coop two to four times a year. Keepers who do the small jobs almost never face the big one.
How do I deep clean a chicken coop?
Birds out first, mask and gloves on. Remove everything that lifts out, mist the litter and surfaces lightly with water, then muck out completely. Scrape every surface and joint, wash with hot water and a poultry-safe detergent using a stiff brush, and rinse. Apply an approved poultry disinfectant at the labeled dilution and leave it for the stated contact time, then treat perch ends, joints and cracks for red mite. Let the coop dry completely - usually several hours - before fresh bedding and the birds go back in. On a maintained coop the whole job takes about an hour.
What is the best disinfectant for a chicken coop?
One whose label says it is for use in poultry houses. In the US that means an EPA-registered disinfectant with poultry premises on the label - peroxygen powders (potassium peroxymonosulfate), accelerated hydrogen peroxide and some quaternary ammonium products are the common types sold through farm stores and online. Clean first, use the stated dilution and contact time, rinse if the label says so and let the coop dry completely. The label is the law; your county Cooperative Extension office can help if you are unsure which product fits.
Can I use bleach to clean a chicken coop?
With considerable care, and never as your first choice. Bleach is inactivated quickly by organic matter, so it is useless on a dirty surface, and - critically - it must never come into contact with ammonia, which includes chicken droppings, or with acids such as vinegar. Those combinations release chloramine and chlorine gases. If you do use it, clear all droppings first, dilute properly, ventilate fully, rinse thoroughly and let everything dry. A purpose-made poultry disinfectant is safer and works better.
Are pine-oil or phenolic cleaners safe for chicken coops?
No. Pine-oil cleaners and phenolic or coal-tar disinfectants are toxic to birds, and their vapor and residues persist on treated surfaces. Keep them out of the coop, off perches and away from anything birds touch, even after rinsing. Use plain dish soap and hot water for cleaning and a disinfectant labeled for poultry houses for disinfecting.
Can I clean a chicken coop with vinegar?
Vinegar is an excellent everyday cleaner and a poor disinfectant. White vinegar cuts hard-water scale, water marks and light grime, and a 50:50 solution left to soak in a drinker helps lift scale and biofilm before you scrub. What it will not do is reliably kill the viruses and bacteria that matter, or clear red mite. Use vinegar for the weekly round where residues near feed and water would be a concern, and an approved poultry disinfectant for deep cleans and after any illness. Never mix vinegar with bleach.
Should I use a pressure washer on my chicken coop?
Not on a wooden one. High pressure drives water deep into lumber, which takes days to dry and encourages rot, and it blasts contaminated material into the air rather than removing it - including mite eggs, which get forced further into cracks. Hot water, detergent and a stiff brush clean wood far better. A pressure washer is genuinely useful on plastic coops, concrete standing and hard run surfaces.
How do I get rid of red mite by cleaning?
Red mite live in the coop, not on the birds, so cleaning is the whole battle. Strip everything out, scrape and hot-wash all surfaces paying particular attention to perch ends, sockets, joints, seams and under any felt, then treat the structure with a product labeled for poultry, exactly as the label instructs. Repeat on the label's cycle, because eggs hatch after the first treatment. Very hot water or steam into perch ends kills mites and eggs on contact and leaves no residue. Changing bedding alone achieves almost nothing.
How do I know if I have red mite?
Look after dark with a flashlight along the underside and ends of the perches, in joints and under any lining. Mite are gray when hungry and red after feeding, and you may see gray ash-like debris and egg trails rather than the mites themselves. A strip of clear tape pressed along a perch end and held up to the light is the quickest confirmation. In the birds, look for reluctance to go in at night, pale combs, restlessness on the perch, a drop in laying and tiny dark specks on eggs.
Why does my chicken coop smell so bad?
Almost always moisture. Ammonia is produced when bacteria break down uric acid in droppings, and the reaction needs water - so a dry coop does not smell and a damp one does. Work through the causes in order: a leaking roof or rain blowing in; a drinker inside the coop; too many birds for the floor area; blocked or inadequate ventilation; bedding left down too long; or a coop sitting on wet ground. Strip out the damp litter the same day, open every vent, fix the water source and re-bed with dry material.
Is ammonia in the coop dangerous?
Yes. Ammonia irritates and damages the lining of the respiratory tract, reduces the birds' ability to clear pathogens and makes infections such as mycoplasma far more likely to take hold. It also irritates the eyes and depresses growth and laying. Because it concentrates in still air near the floor, roosting birds are exposed to much higher levels than you are while standing. Damage begins below the level at which people can smell it, so any noticeable smell means act today.
How do I clean chicken feeders and drinkers?
Properly, not with a rinse. Empty and dismantle them, scrub with hot soapy water and a bottle brush - you have to physically break the slippery biofilm on the inside - then disinfect with a poultry-approved product, rinse thoroughly and let them dry, ideally in the sun. Do this weekly. If the inside feels slippery, it is not clean, however clear the water looks. Keeping a spare drinker so you can swap and soak makes the job far more likely to actually happen.
How often should nest boxes be cleaned?
Strip and re-bed them completely once a week, and immediately after any egg breaks. Nest bedding compacts and holds moisture far more than floor litter because a hen sits in the same spot for an hour at a time, and everything in the nest transfers to the egg. Scrape the box, check the seams for red mite, then refill with 3-5 in of soft chopped straw, hemp or fine shavings banked slightly at the edges. Wash and disinfect the boxes monthly.
How do I stop chickens sleeping in the nest boxes?
Fix the cause first. Usually the perches are set lower than the nest boxes - chickens roost at the highest point available, so perches must be higher. Other causes are overcrowding on the perch, insufficient perch length (allow about 8-10 in per standard hen), or red mite driving birds off the perch at night. Once the cause is fixed, block the nest boxes at dusk for a week and lift any bird found sleeping in one onto the perch.
What should I do with used chicken bedding?
Compost it. Bedding provides carbon and droppings provide nitrogen, so what comes out of a coop is usually already close to a good mix. Keep the pile moist but not wet, turn it every few weeks, and give it six to twelve months. The result is one of the best free soil improvers a garden can have. Never put fresh manure on growing plants, and for anything eaten raw allow at least 90 to 120 days between application and harvest. Sand does not compost and is handled separately.
Can I put chicken manure straight on the garden?
No. Fresh chicken manure is far too high in nitrogen and will scorch roots and burn foliage, and it carries pathogens. It must be composted first - six months minimum, nine to twelve months better. Once fully composted it is excellent dug into beds and borders in fall or winter, around fruit trees and bushes, and on hungry crops such as brassicas, pumpkins and sweetcorn. Go lighter on root crops and avoid it around ericaceous plants such as blueberries.
Can used chicken bedding go in my yard waste cart?
It depends on your city. Some municipal yard-waste and composting programs accept poultry bedding and manure in the curbside cart; many do not, and the rules change. Check your city or county solid-waste website rather than assuming. Composting it yourself is almost always the better answer, and never dump bedding in the woods, a ditch or anywhere it can wash into a creek or storm drain.
How do I keep a coop clean in a hot, humid Southern summer?
Do the same jobs more often. In the Southeast and along the Gulf Coast, damp litter, flies, mites and mold build up fast, so scrape the droppings board daily, change shallow bedding every two to three weeks, scrub waterers twice a week, and check perch ends for mites weekly. Clean in the morning so the coop dries in the afternoon heat, and keep every vent open.
How do I clean a coop when it is below freezing?
Don’t wash it. In a zone 3-6 winter, water freezes on surfaces and leaves the coop damp for days. Scrape the droppings board, lift out wet litter, add dry bedding and keep the vents open, and save the wet deep clean for a dry spell above freezing or for spring. Heated waterers still need a weekly scrub - bring them indoors to do it.
What cleaning products can I buy at a US hardware store for the coop?
For everyday cleaning: dish soap, hot water, white vinegar, baking soda and a stiff brush. For disinfecting after cleaning: a disinfectant whose EPA label lists poultry houses, or household bleach used with great care on clean, rinsed, non-porous surfaces - never mixed with anything. Avoid pine-oil, phenolic and scented cleaners. Follow every label exactly.
Do I need to wear a mask when cleaning a chicken coop?
Yes, and this is the safety point most often ignored. Disturbing dry litter aerosolises dried droppings, feather dander and fungal spores including Aspergillus. Wear a well-fitting N95 mask and gloves, and mist the surfaces lightly with water before you start - that one step removes most of the airborne dust. People who are pregnant, elderly, very young or immunocompromised should avoid the job altogether.
How long should a coop dry before the chickens go back in?
Until it is genuinely dry, which usually means several hours rather than minutes. Put your hand flat on the floor and into a corner - if it feels cool and damp, it is not ready. Clean on a dry, breezy morning so the coop has all day, with the doors and vents open. Never put birds back into a damp coop at dusk: damp is what causes frostbite and respiratory problems, and it undoes the entire point of the clean.
Can I clean the coop while the chickens are inside?
No. Let the birds out into the run first. Dust is worse for them than it is for you, they will scratch through exactly what you are trying to remove, and disinfectants should never be applied around birds. The daily two-minute scrape can reasonably be done with birds coming and going, but anything involving mucking out, washing or chemicals means an empty coop.
How do I clean perches properly?
Scrape the top and both sides weekly with a wide paint scraper, then use a narrow scraper or an old chisel in the joints, ends and wall sockets. Wash monthly with hot soapy water and treat the ends and sockets for red mite. Removable perches are far easier - lift them out, scrub them and dry them in the sun. Keep perches smooth: splinters damage footpads and rough lumber gives mite somewhere to hide. Never varnish or paint over a dirty perch.
What is the fastest way to clean a chicken coop?
Design the job out rather than speeding it up. A droppings board under the perches removes most of the mess in one scrape; removable perches, nest boxes and a lift-out floor tray turn a fiddly job into a two-minute one; siting the drinker outside the coop removes the most common source of wet bedding; and keeping a dedicated kit in a bucket by the door removes the friction that makes people postpone. Those four changes cut most keepers' cleaning time by more than half.
How do I prevent mold in a chicken coop?
Ventilation, drainage and dry bedding, in that order. Keep vents open above bird height all year, fix leaks the same day you find them, raise the coop off wet ground, lift out damp litter daily, and store bedding and feed in sealed containers so nothing moldy is brought in. Never use bedding with a white, gray or blue-green bloom, or a bale that smells musty or feels warm - Aspergillus causes aspergillosis, which is difficult to treat and frequently fatal.
Is diatomaceous earth good for cleaning a coop?
It is widely recommended and worth being cautious about. Food-grade diatomaceous earth can help with parasites in dry conditions, but it is a fine dust and a recognized respiratory irritant - to birds, whose airways are exceptionally sensitive, and to you. If you use it at all, use it sparingly, in a dust bath rather than scattered through the coop, never where it will become airborne around roosting birds, and wear a mask when applying it. It is not a substitute for cleaning and treating the structure.
What cleaning routine prevents disease best?
The daily scrape and the weekly wash do most of the work, but biosecurity is what keeps disease from arriving in the first place. Quarantine every new bird for two to four weeks with separate equipment; keep coop footwear at the coop; wash your hands before and after; do not share feeders, drinkers or crates between flocks; and keep wild birds away from feed and water. That last point matters particularly for avian influenza.
Should I clean differently in winter?
Yes - scrape more, wash less. Birds spend far longer indoors, so the droppings board needs daily attention and bedding needs topping up weekly, but a full wet deep clean in midwinter is a bad idea because the coop cannot dry before dusk. Do the big cleans in spring and fall, keep every vent open however cold it gets, and if you must wash something in winter, do it on a dry, breezy morning. See Winter Care.
How do I clean a coop after a bird has been ill or died?
Treat it as a full reset. Everything out, deep clean as described above, an approved disinfectant at the labeled contact time, and all bedding disposed of separately rather than into your normal compost. Do not reuse bedding or leftover feed. Disinfect all equipment rather than rinsing it, leave the coop empty and dry as long as you reasonably can, and attend to healthy birds before any isolated ones. Speak to a vet before restocking, and quarantine any incoming birds.
Do I have to register my chickens or report disease in the US?
Reporting is not optional. Suspected avian influenza or virulent Newcastle disease must be reported promptly to your State Veterinarian or to USDA APHIS on its toll-free line, 1-866-536-7593. Registration is a patchwork: some states require or encourage premises registration for poultry, many cities require a permit for backyard hens or limit flock size, and some HOAs ban chickens altogether. Check your state department of agriculture, your city or county ordinances and any HOA rules.

Key takeaways
If you remember only a handful of things from this guide, make them these.
Small and often beats big and rare
Two minutes a day and ten a week keeps a coop genuinely clean and turns the deep clean from a half-day into an hour.
Fit a droppings board
It catches 60-70% of everything the flock produces, in one small area, and doubles how long your bedding lasts.
Clean first, disinfect second
Disinfectant does almost nothing on a dirty surface. Hot water, detergent and a stiff brush do the real work.
Only poultry-approved products
No phenols, no pine oil, no scented cleaners, and never mix bleach with anything. Read the label and follow the dilution and contact time.
Mask up and mist first
Dried droppings and mold spores are the real hazard on cleaning day - to you far more than to the birds.
Mite live in the coop, not the birds
Weekly flashlight checks on perch ends, and treat the structure - repeating on the label cycle to catch newly hatched mites.
Dry is the whole game
Ventilate above bird height all year, fix leaks the same day, and never put birds back into a damp coop.
Compost the waste properly
Six to twelve months turns it into one of the best free soil improvers a garden can have - never fresh onto food crops.
More from the Chickens guides
Cleaning ties the whole silo together - housing, bedding, health and the seasons. The full set of ten is now live.
When something still goes wrong, work through it methodically
A clean coop prevents most problems, but not all of them. Common Problems is the flagship troubleshooting guide in this silo - a symptom checker, a traffic-light urgency system and real first aid. Alongside it, the material that goes on the floor is covered in Bedding, the structure in Chicken Coops and Chicken Runs, the cold season in Winter Care, and anything unwell belongs on Chicken Health. New to all of this? Take it from the top with Chicken Keeping Basics, or browse the whole Chickens hub.
Scrape daily, ten minutes weekly, deep clean twice a year - three habits that prevent most of this page.

Disclosures & disclaimers
Not veterinary advice
Everything on this page is general educational guidance for chicken keepers. It is not a diagnosis, not a treatment plan and not a replacement for examination by a qualified poultry or avian veterinary professional. Respiratory signs, pale combs, sudden losses or any flock that is unwell need veterinary attention. Cleaning is often part of the answer, never the whole of it.
Disinfectants, parasite products and label instructions
Only use products whose labels state they are suitable for poultry housing, and follow the dilution, contact time, rinsing and repeat instructions exactly. Never mix cleaning products - bleach combined with ammonia (including droppings) or with acids such as vinegar releases toxic gases. Phenolic and coal-tar disinfectants, pine oil and scented household cleaners are not suitable for use around birds. Observe any egg-withdrawal period stated on a parasite product.
Dust, mold and your own health
Cleaning a coop generates dust that may contain dried droppings, bacteria and fungal spores including Aspergillus. Wear a well-fitting N95 mask and gloves, mist surfaces before disturbing them, and work with the doors open. People who are pregnant, elderly, very young or immunocompromised should avoid handling used bedding and manure altogether.
Zoonoses and hand hygiene
Poultry, their housing and their bedding can carry salmonella, campylobacter and other organisms transmissible to people. Wash your hands thoroughly after handling birds, bedding, eggs, equipment or the compost pile; keep coop footwear separate from indoor shoes; do not eat or drink while working in the coop; and supervise children closely around poultry and used bedding.
Manure, composting and food crops
Fresh chicken manure and bedding must never be applied to growing plants, and must never be used on food crops without full composting. Compost for at least six months - nine to twelve is better - and allow a clear interval of at least 90-120 days between application and harvest for any crop eaten raw. Site piles away from wells, drains and creeks. Local rules on storing and spreading manure, and on what may go into yard-waste collections, vary by state, county and city.
Disease reporting and keeper duties
Suspected avian influenza or virulent Newcastle disease must be reported promptly to your State Veterinarian or USDA APHIS (toll-free 1-866-536-7593). Rules on poultry permits, premises registration and bird movement vary by state and city and change from time to time; check your state department of agriculture and local ordinances. For pesticide and disinfectant questions, follow the label and check with your county Cooperative Extension office.
Affiliate disclosure
Some links on this page are Amazon affiliate links. If you buy through them, PlantMapper may earn a small commission at no extra cost to you. It never affects what we suggest, no product here is presented as a substitute for good husbandry or veterinary care, and we only list categories of product that are genuinely useful to a backyard keeper.